Use the EVA Grading dialog to specify the grading for an EVA sole, taking account of the expansion properties of EVA foam.
To open the EVA Grading dialog:
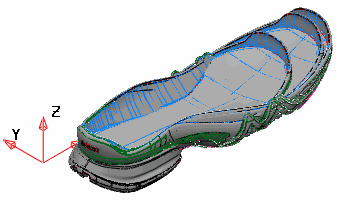
- Select the model to be graded.
- Select Wizard tab > Grading panel > EVA.
The EVA Grading dialog is displayed.
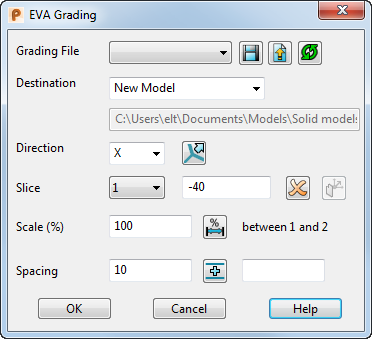
- Use the following options on the dialog to define the EVA grading:
Select a Grading File from the list.
 Save — Click this button to save the modified grading file as a
.csv file. Save the grading table to the
shareddbfolder that is typically stored in
C:\Users\Public\Documents\Autodesk.
Save — Click this button to save the modified grading file as a
.csv file. Save the grading table to the
shareddbfolder that is typically stored in
C:\Users\Public\Documents\Autodesk.
If you subsequently display this dialog, the saved grading file is included in Grading file list. The grading table is saved as PSEVAGRADE_HEEL_xxxx.csv, where xxxx is your filename.
 Load Slices — Click this button to load the slice data that you used most recently.
 Reset Slices — Click this button to reset the slice data to the default settings.
Destination — Select a destination from the list.
- New level to save each size to a new level on the existing model.
- Mirror levels then group saves each grade to a group; existing levels are preserved.
-
Current model and levels to save sizes to existing model and levels. Although this option enables you to see all the results of using different values, the output can look rather cluttered if you are generating several versions:
- New Model to save the graded model as a new model with the name EVA graded items.psmodel.
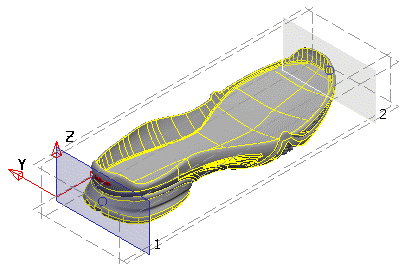
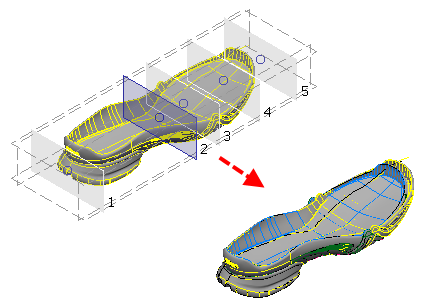
Direction — Select X, Y or Z from the list to define the direction for the current slice. In this example, the Direction is X:
 Alternate Direction — Specifies slices in an alternative direction. To select the slice direction:
- Click the button. The Use slices defined dialog is displayed.
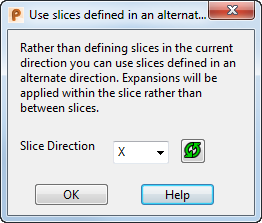
- Select a Slice Direction from the list. Expansion is applied within the slices in this direction, rather than between the slices.
- Click OK to return to the EVA Grading dialog.
Slice — Select the slice number from the list. If additional slices are created, they are added to this list.
Enter the position of the current slice. If you create additional slices, the positions are specified by the Spacing value.
If you are using a curve selection, this option is not available.
 Delete — Click this button to delete the current slice.
 Curve Direction — Click this button to toggle the direction of curve extrusion. When using a curve to produce the slice, the curve is extruded orthogonal to the axis. In most cases the most appropriate direction is selected automatically, but if required, toggle the extrusion to see the only alternative.
Scale (%) — Enter the scale factor for the current slice as a percentage. If you want the expansion factor to be unchanged, leave this option set at 100. When you create a new slice, it is automatically given the expansion factor of the current slice.
 Between — Click this button to apply the Scale factor between the slices. This button changes to
 .
.
In this example, the Scale is 70, which produces a shrinkage of 30% between slices 2 and 3.
Spacing — Enter the spacing of additional slices.
 Add — Click this button to add a slice, relative to the selected Slice, using the Spacing value. To add more than one slice, enter the number of slices to add after the button.
You can also graphically add and select slices as follows:
- To copy a slice, press and hold the Ctrl key and drag an existing slice.
- To reposition a slice, drag the slice to the new position.
- To select a slice in the current direction, click the appropriate slice to make it current.
The correct numbering of slices is always maintained, so adding and repositioning slices may cause existing slices to be renumbered to maintain integrity.
- Click OK to create the grading, or click Cancel to close the dialog without saving changes.