The clipboard is the memory area used to hold copied data. It enables you to easily re-use objects in the current model or in other models. Use the options in the Clipboard panel to cut or copy items to the clipboard, and paste the clipboard contents into models.
Paste
Use this option to add the clipboard contents into the current model.
- Cut or Copy the required objects to the clipboard.
- Click Home tab > Clipboard panel > Paste to paste the objects.
You can paste as many times as you like, but the old clipboard data is lost each time you make a new Cut or Copy.
The pasted objects are inserted at the exact X, Y, Z coordinates of the originals, and automatically selected. This is convenient when pasting between models. However, when pasting copies into the same model, it can appear that nothing has happened because the copies fall at the same coordinates as the originals.
Paste Style
Use this option to assign the style of an object to a selected group of objects.
- Select an object with the required style.
- Cut or Copy the selected object to the clipboard.
- Select a group of objects.
- Click Home tab > Clipboard panel > Paste Style.
The selected group of objects are assigned the style of first object.
Paste Level
- Select an object on the required level.
- Cut or Copy the selected object to the clipboard.
- Select a group of objects.
- Click Home tab > Clipboard panel > Paste Level.
The group of objects are put on the same level as the first object.
Use this option to put a group of objects on the same level as the object on the clipboard.
Paste Special
This option is similar toPaste, except that the pasted objects are attached to the cursor and pasted when you click. This is useful on complex models where you can easily lose sight of the pasted objects.
- Cut or Copy the required objects to the clipboard.
An anchor point is used to position the pasted objects. PowerShape chooses an anchor point when you select the objects.
- To change the anchor point, hold down Ctrl+Alt and click a position.
- Click Home tab > Clipboard panel > Paste Special.
When you move the cursor over the current graphics window, the objects appear attached to the cursor at their anchor point.
- Position the cursor where you want the objects to fall and left-click.
When you left-click, the objects are pasted with their anchor point at the click position.
Objects remain selected after pasting.
Cut
Use this option to remove the selected objects from the model and place them on the clipboard.
- Select the objects.
- Click Home tab > Clipboard panel > Cut.
A copy of the selected objects is put onto the clipboard, overwriting anything already there. The original objects are deleted from the model.
- Paste the clipboard contents into another model, or back into the same model.
The objects remain on the clipboard until you make another Cut or Copy.
Copy
Use this option to copy the selected objects to the clipboard.
- Select the objects.
- Click Home tab > Clipboard panel > Copy.
The selected objects are copied to the clipboard, overwriting anything that is already there. The original objects remain in the model.
- Pastethe clipboard contents into another model, or the same model.
The objects remain on the clipboard until you make another Cut or Copy.
You can also copy objects by dragging them:
- Select the objects.
- Hold down the
Ctrl key and drag to move the selection to another position.
The original objects remain in place, and copies appear when you release the mouse button.
- Confirm the action in the
Confirm Copy dialog.
The dialog displays the distance (in terms of coordinates) of the copied objects from the original objects:
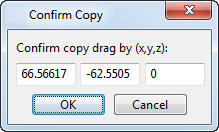
- Click OK to confirm the copy drag.
Paste Attributes
Use this option to paste the attributes of a selected object to another object. You can paste Style, Level, Transparency and Material attributes.
- Select the source object.
- Click Home tab > Clipboard panel > Paste Attributes to display the
Attribute Selection
dialog:
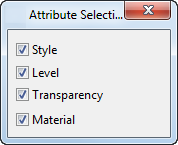
- Use the dialog to select the attributes you want to paste.
- Select the objects you want to paste the selected attributes to.
The attributes are pasted automatically.