The Heel Grading wizard enables you to produce a series of graded heels from a single heel.
To use the Heel Grading wizard:
- Select the model to be graded.
- Select Wizard tab > Grading panel > Heel > Heel.
The Select Faces dialog is displayed:
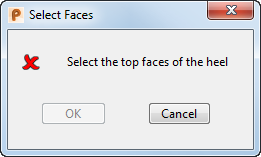
- Select the top faces of the heel in your model.
- Click
OK.
The Heel Grading dialog is displayed.
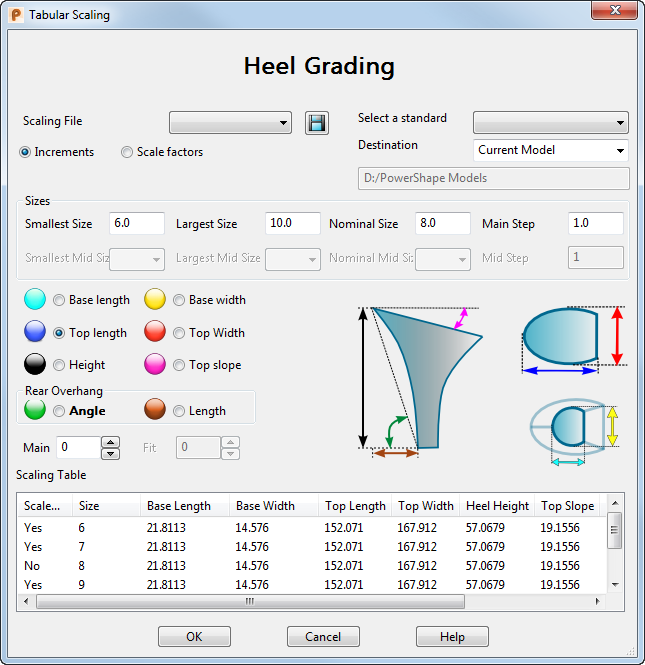
- Use the following options on the dialog to define the heel grading:
In the Scaling File list, select a grading file.
- Click
Save
 to save the modified grading file as a
.csv file. Save the grading table to the
shareddbfolder that is typically stored in
C:\Users\Public\Documents\Autodesk.
to save the modified grading file as a
.csv file. Save the grading table to the
shareddbfolder that is typically stored in
C:\Users\Public\Documents\Autodesk.
If you subsequently display this dialog, the saved grading file is included in Grading file list. The grading table is saved as PSGRADE_HEEL_xxxx.csv, where xxxx is your filename.
- Choose a
Grading definition option to specify how scaling factors are expressed in the
Scaling Table. Select:
- Increments to specify the grading increments by measurement.
- Scale factors to specify grading incrementby scaling factors relative to the Nominal Size of the shoe.
-
Select a standard — Select a standard from the list. The standards files contain the definition of width fittings and are stored as
.csv files, typically in:
C:\Program Files\Autodesk\PowerShapexxxxx\file\grading
where xxxxx is the version number of PowerShape and C is the disk on which PowerShape is installed.
The names of the standards files have a prefix of PSGRADESTND_. You can create your own standard or customise an existing one. Save customised standards files in the shareddb folder with a filename that takes the form PSGRADESTND_name.csv.
- In the
Destination list, select:
- Current model to save sizes to existing model and levels.
- New Model to save each size as a new model. The model name takes the form Graded_size_XX.shoe where XX is the shoe size.
- Current Model Same Location to save graded heels to the current model and the same location.
Note: Although this option enables you to see all sizes together, the output can look cluttered when you generate lots of sizes. - In the
Sizes area, enter the details of the size range you want to produce:
- Smallest Size — Enter the size of the smallest last to create.
- Largest Size — Enter the size of the largest last to create.
- Nominal Size — Enter the shoe size that you want to base the grading on.
- Main Step — Enter the step size for the shoe sizes. For example, to create shoe sizes 10, 10.5, and 11, enter 0.5.
- The following options are available only if the Increments option is selected:
- Smallest Mid Size — Select the narrowest fitting. The values that are available to select are defined by the file that you selected from the Select a Standard list. US options display sizing of AAAA - EEEE. UK options display widths A - H.
- Largest Mid Size — Select the widest fitting.
- Nominal Mid Size — Select the standard width fitting that this model represents.
- Mid Step — Select the step size for the shoe widths. For example, to create shoe widths AA, B, D, and EE, enter 2.
- Use the
Parameters for Grading area to define the increments or scale factors for grading. Select a dimension from:
- Base length
- Top length
- Height
- Rear Overhang: Angle
- Base width
- Top width
- Top slope
- Rear Overhang: Length
- In the Main box, set the grading increment or scale factor for the main sizes of the selected Dimension.
- In the Fit box, enter the grading increment or scale factor for the width fittings of the selected Dimension.
- Use the
Scaling Table to view all the grading and sizing information for the range of sizes. Double-click on a table cell to edit its value. The grading table has the following columns.
Scale — This column indicates whether the size is defined by grading. Any shoe size that is defined by grading is denoted by Yes by default, except the Nominal Size. To omit a particular size, double-click on the grade cell for the size row and select No.
Size — This column displays every size that falls in the range defined in the Sizes section.
Dimensions — Each of the heel dimensions has a column.
- Click OK to create the grading and close the dialog, or Cancel to close the dialog without saving changes.