Note: Although you can modify the existing report template, we suggest creating a new one and keeping the default templates intact.
- On the ribbon, click Home tab
 Project panel Project Manager Project Setup.
 - In the Project Setup tree view, expand General Settings. Click Project Reports.
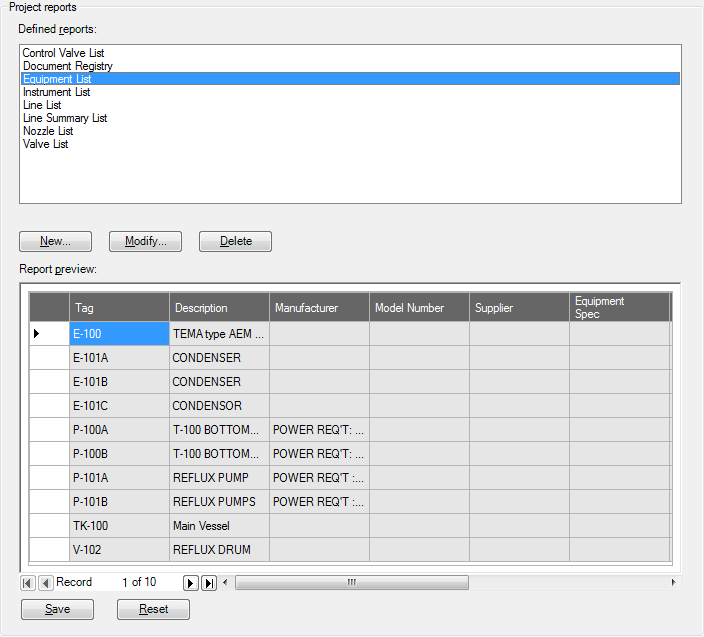
- On the Project Reports pane, click a report on which to base the new report (for example: Equipment List). Click New.
- In the New Report dialog box, enter a name for the new report (for example: New Equipment List).
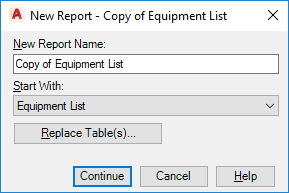
- (Optional) To replace the family tables, do the following:
- Click Replace Table(s).
- In the Replace dialog box, select the check box next to the tables you want to replace (for example: select the Equipment check box).
- In the drop-down list, click a replacement class table. Click Continue.
- On the Create Report Template dialog box, click Continue.
Note:The name you entered in the New Report Name box on the New Report dialog box is displayed as the title of the subsequent dialog box.
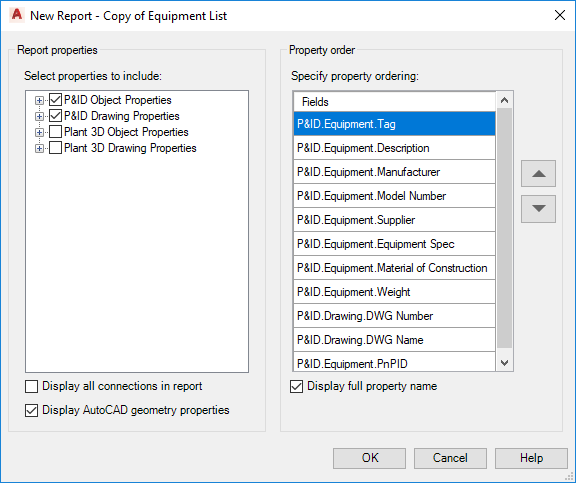
- In the [New Report Name] dialog box, in the Report Properties pane, in the Select Properties To Include tree view, expand the class definition whose fields you want to configure (for example: Equipment). Note:
If you are creating a Plant 3D report template, you can specify Plant 3D object or drawing properties and order them appropriately. The Plant 3D data is included in the report only if a corresponding P&ID object with an identical tag exists in the project.
- Click the properties you want queried in the new report.
- On the Property Order pane, in the Fields list, click a field whose location you want to change. Use the Up or Down arrows to rearrange the order in which the fields are displayed in the Data Manager. The top-to-bottom order in the Fields list is displayed left-to-right in the Data Manager.
- Repeat steps 7-8 for each of the available properties that you want reported.