- In the Project Setup tree view, expand Isometric DWG Settings. Click Title Block and Display.
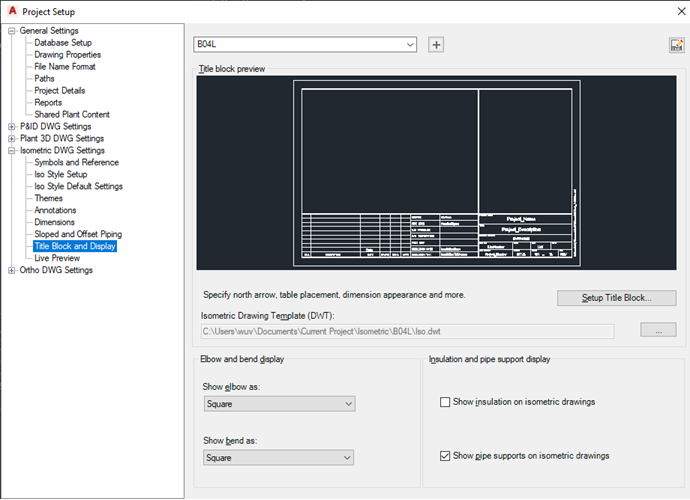
- On the Title Block & Display pane, next to Iso Style, select a style from the drop-down list.
- Under Title Block Preview, click Set Up Title Block.
- On the ribbon, Attributes panel, click Title Block Attributes
 .
.
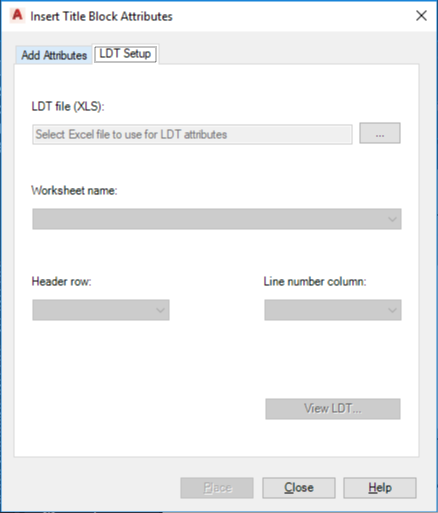
- In the Insert Title Block Attributes dialog box, click the LDT Setup tab and do the following:
- Under LDT File (XLS), click the [...] button and browse to the location where the LDT file you want to use is located. Click the LDT file and click Open. Information from the spreadsheet you have selected appears under Worksheet Name, Header Row, and Line Number Column.
- Click View LDT to display a preview of the line designation table.
- In the Insert Title Block Attributes dialog box, click the Add Attributes tab and do the following:
- Under Attribute Category, select LDT Attributes from the drop-down list.
- Under Attribute Names, click the attribute you want to add to the title block.
- Under format, change the Style, Justify, and Text Height boxes as desired.
- Click Place.
- Click in the drawing area to place the attribute.
- Continue selecting attributes, adjusting the formatting, and placing attributes into the title block.
- When finished, click Close.
- When finished, on the ribbon, Close panel
 click Return to Project Setup.