If you create isometric drawings with split points that are automatically specified (Drawing Congestion Splitting) you can import the split points and save them into the model.
-
 In the status bar, click the isometrics icon to display the Isometric Creation Results dialog box.
- Click Convert Split Points. the Convert Split Points dialog box displays.
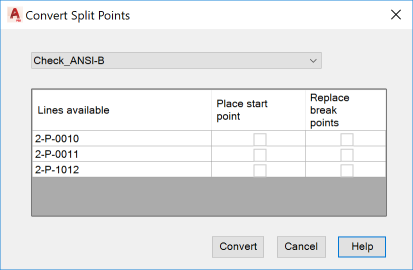
- In the Iso Style dialog box, specify the Iso Style that you want to import split points from.
Note: If the Iso Style that you want to import split points from is not displayed, you can use the plantisosplitpoints command instead.
- In the lines available column, click a line. The line highlights blue.
- If you want to import additional line numbers, press and hold CTRL and click to specify additional lines.
- If you want to import the Start Point, select Place Start Point for the line.
- If you want to replace existing break points, select Replace Break Points.
Note: If you selected Ignore Break Points from Model when you created the isometric drawings and have existing split points saved in the 3D model, it is recommended that you replace break points.
You must create isometric drawings with Create Split Points Automatically enabled in the current drawing session to follow this procedure. If you have not, the Isometrics Creation Results dialog box is not available.