By default, Revit creates a join where 2 walls intersect. However, you can prevent joins for a selected wall whenever necessary.
For example, if you want to keep small expansion spaces between walls, you can do so by disallowing joins for either of the adjacent wall ends.

2 horizontal walls with 3/8-inch expansion space between them
Disallowing joins is also useful for resolving complex joins. For example, if you add a wall to a complex join and it produces undesired results, you can disallow joins on the added wall and then use the Join Geometry tool to clean the join between this wall and other walls.
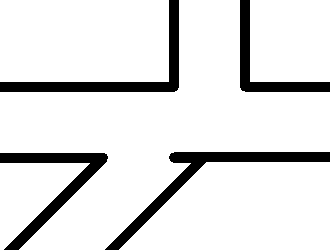
Automatic Wall Join cleanup
Selected wall with disallowed join

Wall cleaned up after Join Geometry used
The procedure for disallowing joins varies slightly for the ends of a wall as opposed to any of its mid-end faces.
To disallow joins for a wall end
- Select the wall.
- Right-click the wall end control where you want to disallow the join, and click Disallow Join.
The end of the wall now cannot join to another wall.
If you want to allow joins again, right-click the wall end control, and click Allow Join, or click
 (Allow Join) above the end of the wall.
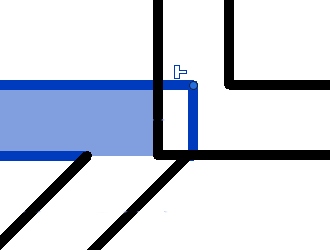
To disallow a join on a mid-end face
- Open a plan view in which the mid-end face is visible, and select the wall.
Tip: If only the ends of the wall with the mid-end face are visible, you may need to adjust the cut plane height. For more information, see About the view range.
- Click
 (Disallow Join) above the mid-end face, or right-click, and click Disallow Join. Notice that
changes to
.
(Disallow Join) above the mid-end face, or right-click, and click Disallow Join. Notice that
changes to
.
The mid-end face now cannot join to another wall.

Disallow mid end face join