After creating a roof, you can change its shape or overhang, cut openings, or align ridges.
Edit the roof sketch
- Select the roof, and click Modify | Roofs tab
 Mode panel
 (Edit Footprint) or
  (Edit Profile).
 - Make necessary changes.
If you want to change the position of the roof, use the Properties palette to edit the Base Level and Offset properties to change the position of the reference plane. If you’re warned that the roof geometry cannot move, edit the roof sketch, and check for constraints on the sketch, such as between a level line and a sketch line of the roof.
- Click
 (Finish Edit Mode).
Resize the roof using shape handles
Use this method to resize roofs that were created by footprint or by face.
- In an elevation or 3D view, select the roof.
- Drag the shape handle, as desired.
Change the roof overhang
When editing the footprint of a roof, modify properties of its boundary lines to change the roof overhang.
- In sketch mode, select a boundary line for the roof.
- On the Properties palette, enter a value for Overhang.
- Click (Finish Edit Mode).
Cut openings in an extruded roof
- Select the extruded roof, and click Modify | Roofs tabOpening panel
 (Vertical).
 - If the Go to View dialog displays, select the appropriate plan view in which to edit the profile.
A plan view representation of the roof displays. Reference planes define the boundary of the roof.
- Sketch closed-loop openings.
Closed-loop sketches in sketch mode
- Click (Finish Edit Mode).
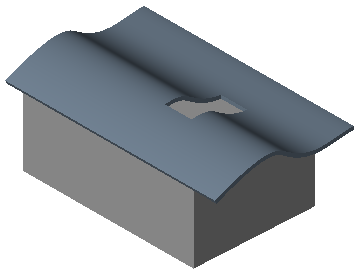
Closed-loop sketches become vertical cuts in the roof
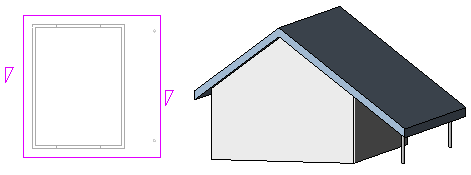
Align roof ridges
You can align roof ridges in 3D and elevation views. To align roof ridges in an elevation view, use the Align tool.
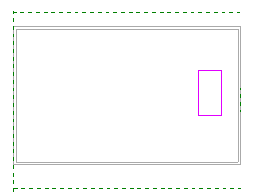
- In a plan view, add a reference plane:
- Click
 (Ref Plane).
 - Architecture tabWork Plane panel (Ref Plane)
- Structure tabWork Plane panel (Ref Plane)
- Systems tabWork Plane panel (Ref Plane)
- Architecture tab
- In the drawing area, sketch a reference plane that is not perpendicular to the roof ridges.
Reference plane in plan view
- Select the reference plane, and on the Properties palette, enter a name for the plane.
- Click
- Open the 3D view, and click
 (Set).
 - Architecture tabWork Plane panel (Set)
- Structure tabWork Plane panel (Set)
- Systems tabWork Plane panel (Set)
- Architecture tab
- In the Work Plane dialog, select the reference plane name you just created, and click OK.
- To align roof ridges, use the Align tool.
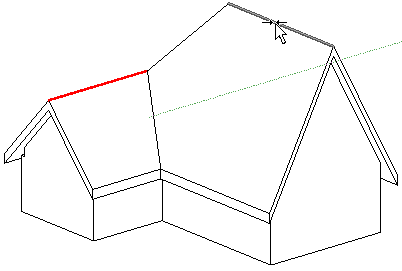
Unaligned roof ridges
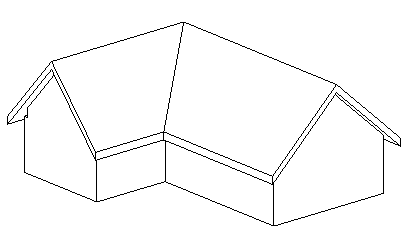
Aligned roof ridges
Create a Conical Roof
If a roof includes a slope-defining arc line or circle, it creates a conical roof. If desired, you can divide the arc or circle into segments as follows.
- In the drawing area, select the arc line.
- On the Properties palette, specify a value for Number of Full Segments.
If you specify zero segments (the default), a conical roof is created.