Document your model by annotating and detailing views to create construction details.
Detailing in Revit is a process to add detail elements to model geometry and create construction details. The basic process to create detail views is outlined as follows:
- Create views of the model to detail.
- Add detail elements to the view to illustrate items typically too small or too numerous to model.
- Annotate the detail view with dimension, notes, and/or keynotes as required.
- Consider keeping a library of typical detail for use in multiple projects.
Create Views
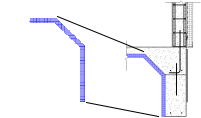
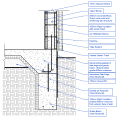
Create section, callout, and drafting views to detail your models and produce construction documents. When detailing, you can use model elements in the view as part of the detail, as a reference for detail elements, or do not use model geometry at all in the detail view.

|

|

|

|
|
Learn about detailing views of your model. |
Create views of your model for detailing. |
Learn about when to use a drafting view. |
Create a Drafting View when a detail does not need to reference model geometry. |

|
|
||
|
Create a view reference for a drafting view in your project. |
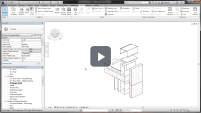
Use parts and exploded 3D views as an alternative to method of detailing. |
Add Detail Components
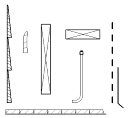
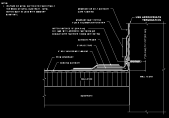
Detail components are view specific 2D elements added to a view or used to compose a detail view. Detail elements are typically elements that are too small or numerous to model and are instead represented one time in a detail view. Having a library of typical detail component families can save you time when detailing. Revit provides a sample library of over 500 detail component families. Lines and filled regions are also used when creating detail views of your models.

|
|

|

|
|
Learn about the different tools you use when creating detail views. |
Learn about Detail Component families, 2D families used to create detail views. |
Place a detail component family in your view. |
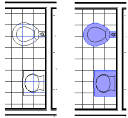
Use a repeating detail to quickly place multiple detail components in a repeating pattern. |

|
|||
|
Use a line based detail component as an alternative to a repeating detail when you need more control over the layout or need to annotate the component. |

|
|
|

|
|
Draw lines to represent elements in your detail views. |
Use a filled region to apply a pattern across an area of your detail. |
Masking regions hide model geometry in the view. |
Use the insulation tool to add batt insulation. |

|
|||
|
Change the draw order of detail elements in a view to display them as required. |
Annotate Details
Use the annotation tools to annotate your details with dimensions and notes. The keynoting system provides a way to pre-populate detail component families with annotation information. Keynotes make annotating detail views fast and consistent.
|

|

|

|
|
Add leaders and notes to your detail. |
Use Keynotes to quickly add annotation to your details. |
See how keynotes are placed into a detail view for consistent documentation. |
Customize a keynote file to meet your standards and provide a consistent source of annotation text. |
Reuse Details
Save typical details out to files used as a library. Views from typical detail libraries are transferred into your project to save time. Use Legacy CAD details in drafting views so this previous work can be leveraged in Revit workflows.
|

|

|

|
|
Save a detail view for use in other projects. |
When a detail view uses model elements save both the model elements and detail elements to an external project. |
Place detail elements from a detail library into your current project. |
Drafting views can be transferred from one project to another. |

|
|
||
|
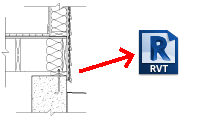
Set up an RVT file(s) as a library for typical detail views. |
Use legacy CAD details in your projects. |