In this exercise, you create a mezzanine in the store room area of the building.
|
Before you begin, download the GSG_04_add_floor.rvt file. Download this zip file (if you have not already downloaded the exercise files for the tutorials.)
Objectives
- Add a floor by drawing an outline to create the boundary.
- Edit the floor boundary and use the Align and Trim tools to create a closed loop sketch.
 Watch the video
Create a Floor on the Lower Level
- Open project GSG_04_add_floor.rvt.
Note: An additional level was added to this file for the mezzanine level. Additional Pad elements were added to the file to create the sidewalk and the parking area.
- In the Project Browser, under Floor Plans, double-click Mezzanine.
- Click Architecture tab
 Build panel
 (Floor).
- Click Modify | Create Floor Boundary tabDraw panel
 (Pick Walls).
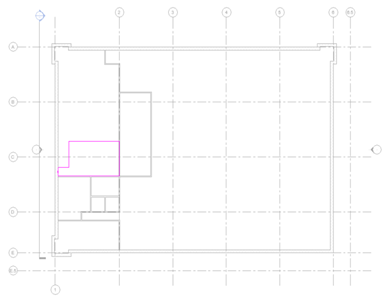
- Position the cursor over each of the 3 walls as shown in the image, and click on each to place boundary lines.

- On the Modify|Create Floor Boundary tabDraw Panel, change to place line segments.
- Place additional boundary lines approximately as shown.
- On the Modify | Create Floor Boundary tab, select Trim to corner.
- Trim the corners of the boundary by selecting the lines on the sides that will be kept.

- After the boundary forms a closed loop, check
 (Finish Edit Mode) on the Mode panel. In the dialog click Yes.