Learn about how to add a railing extension to a continuous rail.
What are they?
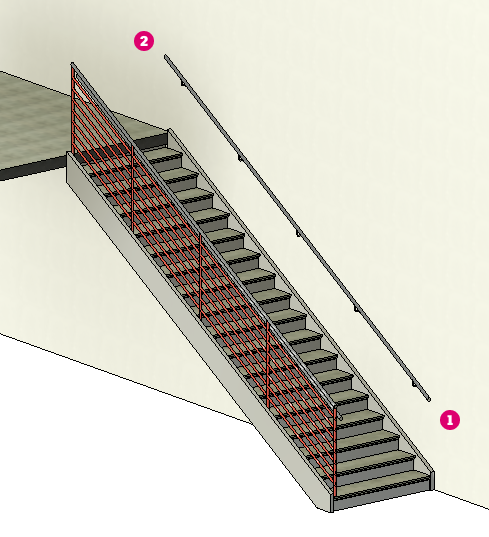
Railing extensions are used when you need to modify and customize the beginning and end conditions of a railing in your model. By default, a railing is defined by the start and end points of the sketch line used to define it. For example, you place a stair and the railings automatically added to the stair begin a the nose of the first tread
 and end at the edge of the last riser
 . Railing extensions give you a way to modify this default condition and extend the railing beyond the endpoints of a railing with a railing extension. Select from common extension configurations or use sketching tools to create a custom extension.
Why should you use them?
by 12" and extend at least one tread width at the bottom of the stair
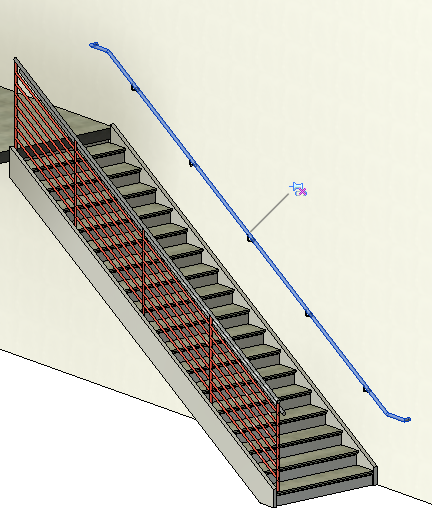
. In addition to the extension length, the railing needs to return against the wall, to itself, or to the walking surface. Meeting code requirements is the most likely reason to use a railing extension. Once railing extensions are applied to the stair pictured above, the railing mounted to the wall is extended at the top and bottom and returned to the wall.
Where do you find the tool?
Railing extensions are a type property setting of continuous rails assigned to the railing type. This can make them a bit difficult to find unless you know specifically how to access them.
- In a 3D view or a plan view, press Tab to highlight the continuous rail, and click to select it.
A pin icon (
 ) displays. The pin indicates that there are no rail instance or railing system type changes made to it. The rail is as specified in the Railing System type properties.
When you click the pin icon, the unpin (
 ) icon displays.
- On the Properties palette, click
 (Edit Type).
- In the Type Properties dialog, use the pulldown to set the Extension Style for the Beginning/Bottom and/or the End/Top.
- None - Use this option with a set length if you wan tto manually sketch the extension shape.
- - Wall
- - Floor
 - Post
- Specify the Length of the extension.
- (Optional) If adding an extension to the Beginning/Bottom of a railing, select "Plus Tread Depth" to automatically add a tread depth to the length of the extension when the railing is hosted by a stair.
- Click Ok.
Review the video below to see how to add a railing extension.
- In a 3D view or a plan view, press Tab to highlight the continuous rail, and click to select it.
- On the Continuous Rail panel, click
 (Edit Rail).
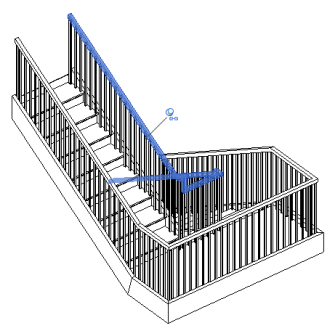
- On the Tools panel, click
 (Edit Path).
- Use sketch tools to create a path for the railing extension.
- Click
 (Finish Edit Mode).
Examples
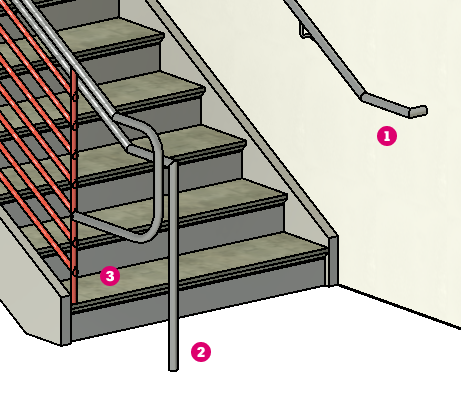
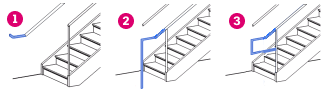
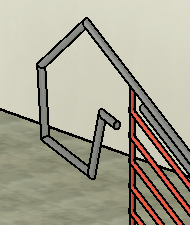
- - Handrail with a wall extension returning against the wall.
- - Handrail with a floor extension. The extension uses a 90 degree join as the railing returns to the floor.
- - Top rail extension returning to the post of the railing. Rail extension was edited to have rounded joins in the return to the post.