In Revit 2022 you can use shared parameters in a key schedule. This lets you quickly apply and change parameters on elements in your model.
What is a Key Schedule and why should I use Shared Parameters in it?
Key Schedules and Shared Parameters have been around since the early days of Revit. In Revit 2022 Key Schedules and Shared Parameters have been brought together to make both of them more powerful.
A Key Schedule allows you to build key "types" that are made up of groups of parameter values. Instead of assigning the parameters individually to each element, you can assign a key type defined in your key schedule. Once the key type is assigned to the element, all the parameter values making up the key type are assigned to the element at one time. With a key type applied, the parameters are changed using the key schedule. When a change is made in the key schedule, all elements assigned that key type will have the parameters changed.
For example, use a key schedule for elements like doors or rooms. Door hardware selections are unique to a specific door and how it is used. Instead of making family type for each individual door configuration, you could make a key schedule made up of all the door hardware configurations and assign the values to each door with a key schedule. The different finish selections for a room could also be applied to room elements in this way. These are just two examples; with some imagination you can think of other opportunities where key schedules can be used.
Prior to Revit 2022, key schedules were limited. They could not include shared parameters. In 2022, this limitation was removed. This makes key schedules far more flexible because now you can customize the information you include and control with the key schedule. If you have used shared parameters extensively in previous releases, you may not be using key schedules. It is worthwhile to look at them again and see how they can enhance your workflows.
Where do you find the tools?
- Add Shared Parameters to a shared parameter file. This is where you create the parameters to hold the information you want to track. See Create Shared Parameter Files, Groups, and Parameters.
- Add parameters to your project or families. The parameters are added to the project or families so they will appear on elements in your model file. In order to be used in a Key Schedule, the shared parameter must be added as an instance parameter. Type parameters are not supported. To add a shared parameter to the project see: Create shared Project Parameters. To add a shared parameter to a family see: Add Shared Parameters to Families.
- Create the Key Schedule and assign values to the parameters. For additional information see Create a Key Schedule.
- Apply the key to elements. For additional information see Apply a Key to an Element.
Review the following video to see an overview of how to use shared parameters in a key schedule.
Example
Create Shared Parameters
- Border
- Floor Tile
- Laminate
- Wall Tile
- Accent Paint
- Accent Tile

For more information on creating shared parameters and parameter groups see, Create Shared Parameter Files, Groups, and Parameters.
Add Shared Parameters to the Project
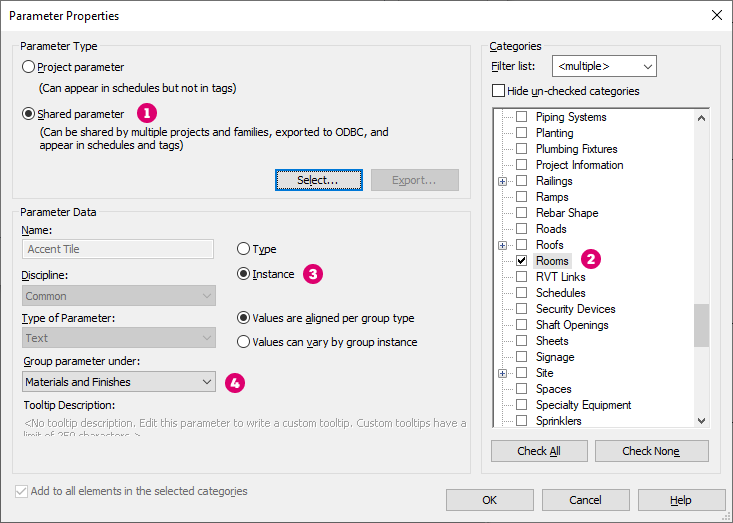
Now the shared parameters need to be added to the project and assigned to the Rooms category. This makes the parameter appear on the room elements in your model so you can populate the parameters with values.
 is added to the Room category
 in the project as an instance parameter
 and set to group under Materials and Finishes
 .
.
For more information on adding shared parameters to your project, see Create Shared Project Parameters.
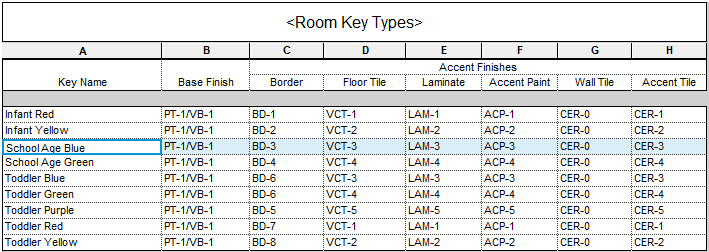
Create Key Schedule/Set Parameter Values
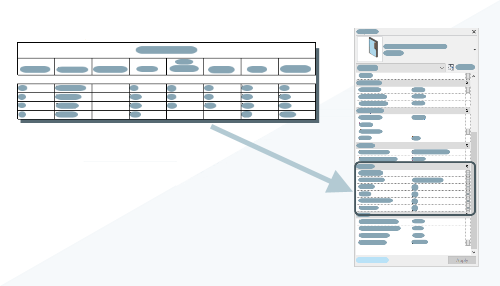
With the parameters available in the project, they can be added as project parameters as we did above, or they could be directly added to a loadable family that is loaded into the project. You can now create the key schedule. When you create the key schedule, you are selecting the parameters you want to control/assign via the key type. In our example, we will make key types for each room finish package. All the "Room Accents" shared parameters will be added to the key schedule. We will also add the built in parameter of base finish. In this case we are using it for the finish of the room before the accents are added.
- Infant Red
- Infant Yellow
- School Age Blue
- School Age Green
- Toddler Blue
- Toddler Green
- Toddler Purple
- Toddler Red
- Toddler Yellow
For more information on creating a key schedule and assigning values, see Create a Key Schedule.
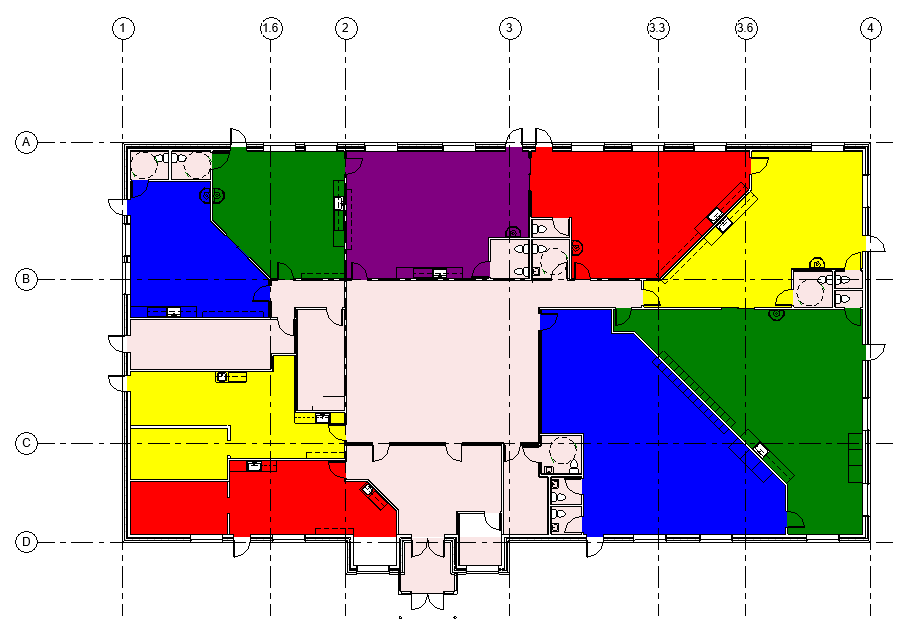
Apply Key Types to Rooms
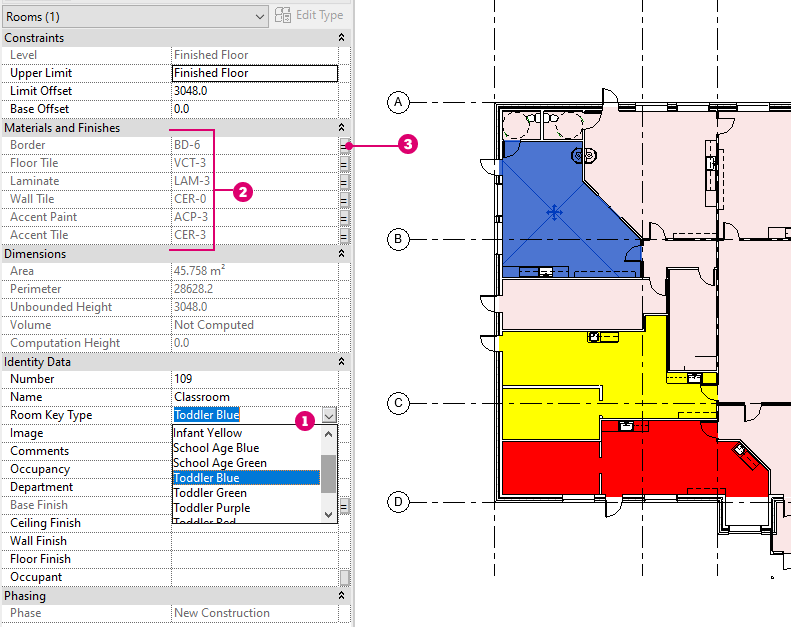
The final step is to apply the key types to the rooms. Select a room element, or multiple elements, in the model and on the Properties Palette, use the pulldown under the Identity section of the Properties palette
to set the room key type. The pulldown menu lists the key types defined in the previous step. As you set the key type, the parameters for room accents are assigned from the key schedule.
The small "equal" sign to the right of the parameter value
indicates the parameter value is controlled from the key schedule. If you later remove the key type from the room, the parameter values are retained, but can be individually controlled instead of being controlled from the key schedule.
For more information on applying a key to an element see, Apply a Key to an Element.