Control how schedule data is presented in your project.
What is Schedule Formatting?
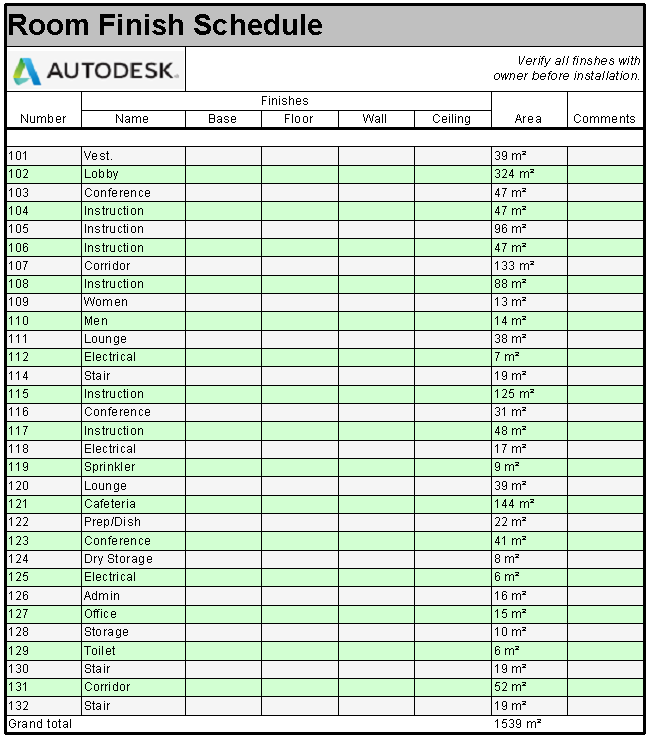
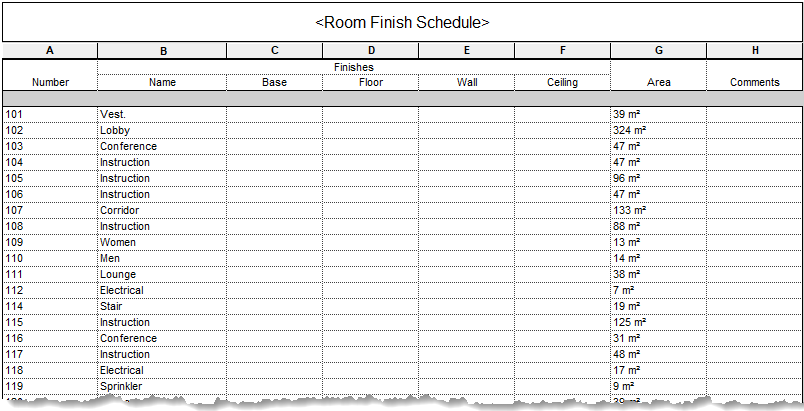 Default Schedule View |
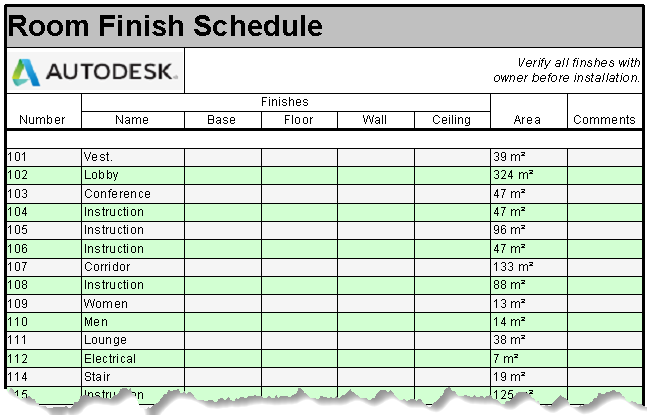 Formatted Schedule View |
Why should you use it?
Use formatting tools to best communicate your schedule information. When you have an office standard you want to use for schedule views, schedule formatting will allow you to customize the default way a schedule is presented in Revit. Setup schedules and modify header formatting in model template files. As you add elements to your model, the schedule is formatted and ready to be placed on your sheets.
Where do you find the tools?

- Filter the contents of a schedule on the Filter Tab.
- Sort and group data in a schedule on the Sorting/Grouping Tab.
- Format headers and conditional data on the Formatting Tab. (Most of the functions of this tab are duplicated in the ribbon tools.)
- Set the default appearance of grid lines and text on the Appearance Tab.
Example
Format Data Rows
Filter Schedule Data
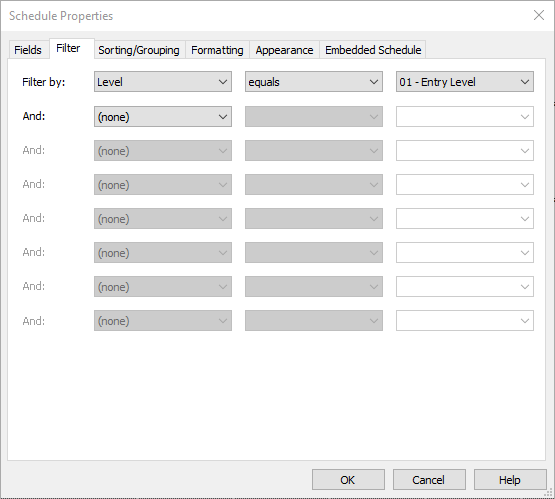
The Level parameter needs to be included in the schedule for the filter to work but does not need to show. Click Hide
 on the ribbon to hide the Level column.
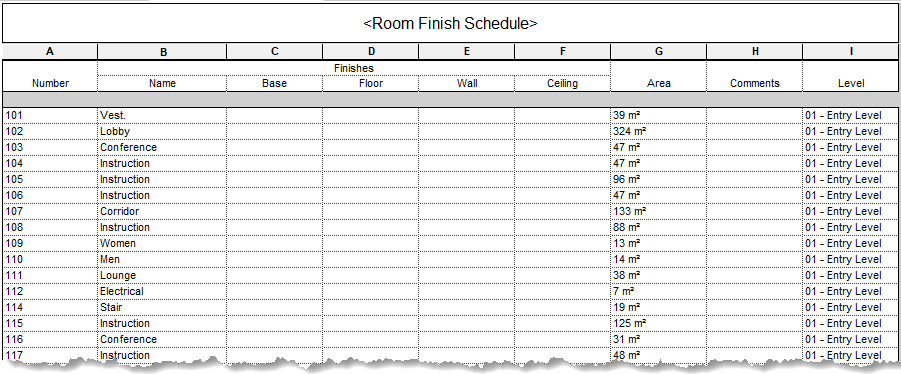
Calculate Total Area
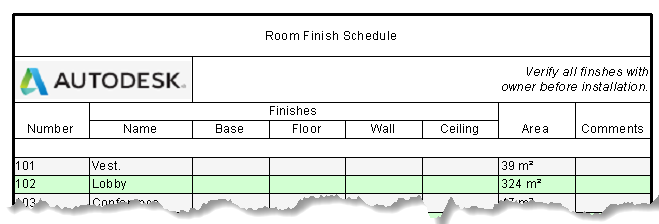
Set totals to calculate in the schedule in the Schedule Properties dialog. First, set a parameter to calculate. On the formatting tab, select the Area field and use the pull down under Field formatting to calculate totals. Then, on the Sorting/Grouping tab, select Grand totals and use the pull down to control how the grand totals are displayed in the schedule. In this example, the Area field is set to display the Grand total for the floor area. The title for the grand total is altered to read; "Total Floor Area".
Video: Calculate Totals in a Schedule
Adjust Graphics
Row striping makes the schedule easier to read. On the appearance tab of the Schedule Properties dialog select Stripe rows and set the desired colors. For additional information see: Display Contrasting Rows in a Schedule. In the same tab of the dialog, set a wider line style for the outer edge of the schedule.
Other settings on the appearance tab allow you to control the default text styles used for titles, headers, and the body of the schedule. Text defaults for the title and headers are overridden with the schedule formatting tools.
Format Schedule Header
Add and Adjust Cells in the Header
Select the title cell and then click Insert 
 Below Selected to add a row below the title. Now select the first two cells in the new row and click
 Merge Unmerge to merge the cells. Do the same to merge the remaining cells to the right.
Now add a logo and general notes for the schedule in the added cells. Select the merged cells below the schedule title. Click
 Insert Image to add a logo into the cell. Select the merged cells on the right side and add text for the general notes of the schedule. In this example the
 Font of the default text style is overridden to be italic and aligned to the right.
Adjust Header Graphics
Select the title cell. On the ribbon click
 Shading and set a color for the cell. Click
Font to override the default font used for the title. Here, the size is increased and set to bold. Then the Alignment is set to Left.
Shading and set a color for the cell. Click
Font to override the default font used for the title. Here, the size is increased and set to bold. Then the Alignment is set to Left.
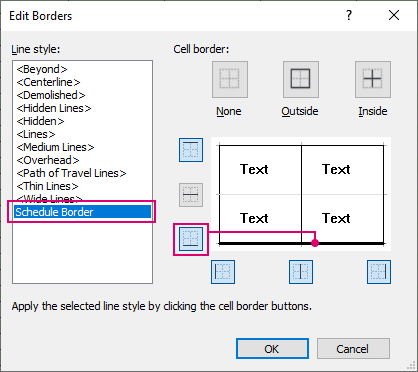
As a final step, a heavy border is added to separate the header of the schedule from the data of the schedule. Click and drag to select the cells in the schedule view. Click
 Borders on the ribbon. In the Edit Borders dialog, select the line style and click the location button where the line style is applied. In this example, only the bottom border is assigned the wider line style.
Conclusion
The next time you are working on a schedule, use the tools for formatting the data and the headers of the schedule. Formatting a default schedule will make it more readable and make it easier for you to communicate information to your team. Once you find a format that works for your schedules, include the preformatted schedules in your template files to save you time on your next project.