Most lighting fixtures are hosted components that must be placed on a host component (a ceiling or wall).
To place a lighting fixture in a view
- In the Project Browser, expand Views (all)
 Floor Plans, and double-click the view where you want to place the lighting fixture.
 - Click Systems tabElectrical panel
 Lighting Fixture.
 - In the Type Selector, select a fixture type.
- On the ribbon, verify that Tag on Placement is selected to automatically tag the fixture.
- Move the cursor over the drawing area.
The lighting fixture is previewed as you move the cursor over a valid host or location in the drawing area.
- Click to place the lighting fixture.
- Click Modify.
Note:
In some cases, lighting fixtures may be placed so that the location of the connector is not inside a space. The room calculation point is used as a search point to determine what space the lighting fixture is in. You can edit the family for the lighting fixture to enable the Room Calculation Point, and then move the location of the calculation point so that it is located inside the space. In the Family Editor, in the Properties palette, enable Room Calculation Point. Edit the location of the Room Calculation Point so that it is located inside the space. 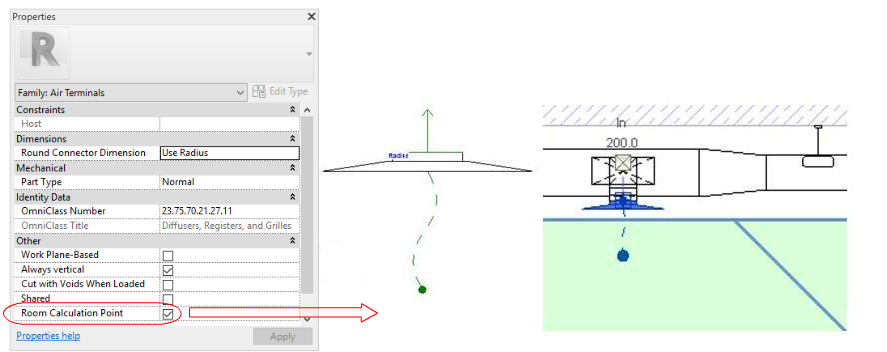
Since the room calculation point specifies which space the lighting fixture is in, it is also reflected in schedules. For example, if you include a column in the schedule with Space data, such as name and number, the space dictated by the room calculation point will be used.