You can to place freestanding components in the building model.
- Open a project view appropriate for the type of component you want to place.
For example, you can place a desk in a plan or 3D view, but not in a section or elevation.
- Click Architecture tab
 Build panelComponent drop-down
 (Component).
 - In the Type Selector at the top of the Properties palette, select the desired component type.
If the desired component family has not yet been loaded into the project, click Modify | Place Component tab
Mode panel  Load Family. Then navigate to the appropriate category folder in the Load Families dialog, select the family, and click Open to add the family to the Type Selector.
 - If the selected component family has been defined as face-based or work plane-based (see the Note following this procedure), click one of the following options on the Placement panel, which displays on the Modify | Place Component tab:
 Place on Face. This option allows placement on faces regardless of orientation.
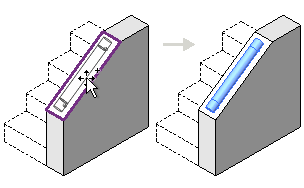
 Place on Work Plane. This option requires an active work plane to be defined in the view (see Showing the Work Plane of a View). You can place the component anywhere on the work plane.
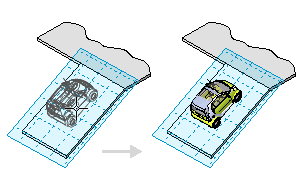
- In the drawing area, move the cursor until the preview image of the component is in the desired location.
- If you want to change the orientation of the component, press the Spacebar to rotate the preview image through its available positioning options.
- When the preview image is in the desired location and orientation, click to place the component.
After you place a component, you can specify that it moves when a nearby wall moves. See Moving Lines and Components with Walls.
Note: How you can place a component depends on how the component family was originally defined. See Choosing a Family Template.