Using the Reference Editor
Use the Reference Editor for seeing all references in your scene, identifying their type, checking their status, seeing when something was last modified, who made modifications, and the file location. See About the Reference Editor for more information on its features.
For loading a project containing references, see How to Import a Non-VRED File. For importing references, see Using the Reference Editor.
Working with Source References
When a non-VRED file is imported into VRED, references can be automatically created. These references will appear in the Scene Graph, as well as the Reference Editor.
- From the menu bar, select File > Import.
- Select the files containing smart references, then click Open.
- In the Import File(s) dialog, set file specific options, such as Import Sub-Referenced Files or Reference Behavior.
- Click Import.
Working with Smart References
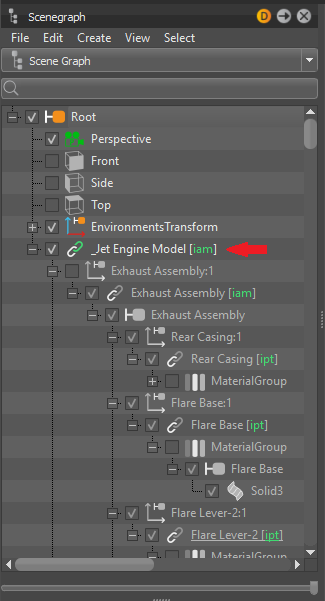
If the opened VRED project is a reference to a source file, then the root icon changes in the Scene Graph. The usual Scene Graph Root icon  is replaced with this icon
  . When VPBs are imported, the root is not replaced. The usual Scene Graph Root icon is used and the VPBs are added as children of the root.
When working with smart references, enable Incremental Save to ensure files are backed up.
Check the reference preferences to ensure the settings are correct. Ensure Converter Output Format is set to VPB.
To Load Smart References into VRED
Open one or more smart references in VRED.
- From the menu bar, select File > Open.
- Select one or more VPB files, then click Open. The files appear in the scene.
To Import Reference Files
Use Import to set parameters for the imported files, such as tessellation and scene location. Only options specific to the file format appear.
From the menu bar, select File > Import.
Select VPB files, then click Open.
In the Import File(s) dialog, set file specific options, such as Import Sub-Referenced Files or Reference Behavior.
Tip:To add more files to the import, click the Add... button.
Click Import.
Working with Source References
When a non-VRED file is imported into VRED, references can be automatically created. These references will appear in the Scene Graph, as well as the Reference Editor.
- From the menu bar, select File > Import.
- Select the files containing smart references, then click Open.
- In the Import File(s) dialog, set file specific options, such as Import Sub-Referenced Files or Reference Behavior.
- Click Import.
Working with Smart References
VRED projects (VPBs) containing references can be opened or imported. When smart-source reference files are opened in VRED, the usual Scene Graph Root icon is replaced with this icon in the Scene Graph. When VPBs are imported, the root is not replaced. The usual Scene Graph Root icon is used and the VPBs are added as children of the root.
Check the reference preferences to ensure the settings are correct.
To Load Smart References into VRED
Open one or more smart references in VRED.
The usual Scene Graph Root icon will be replaced with this icon in the Scene Graph.
- From the menu bar, select File > Open.
- Select one or more reference files, then click Open. The files appear in the scene.
To Import Reference Files
Use Import to set parameters for the imported files, such as tessellation and scene location. Only options specific to the file format appear.
From the menu bar, select File > Import.
Select multiple reference files, then click Open.
In the Import File(s) dialog, set file specific options, such as Import Sub-Referenced Files, Import As Smart Reference, or Reference Behavior.
Tip:To add more files to the import, click the Add... button.
Click Import.
Converting to Smart References
To convert an assembly file into smart references to distribute among the team, follow these steps. This way, different people can work on different parts of the file.
Select File > Import, locate a CAD file, set the import options in Import File(s), and click Import.
In the Scene Graph, perform a validity check on the file to ensure all files are there and everything is green. This indicates the files are up to date.
Select Scene > Reference Editor to open the editor.
Within the Reference Editor, select either the entire file or only the files you want to convert.
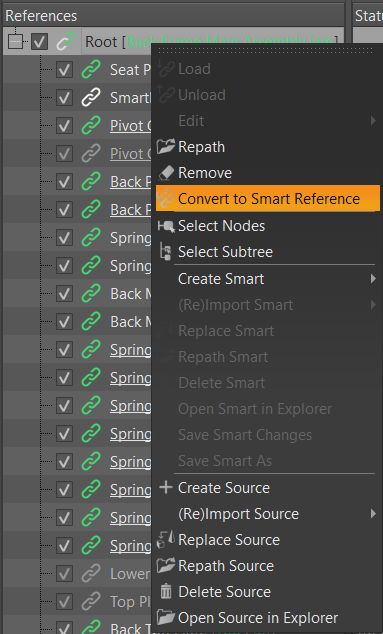
Right-click and select Convert to Smart Reference.
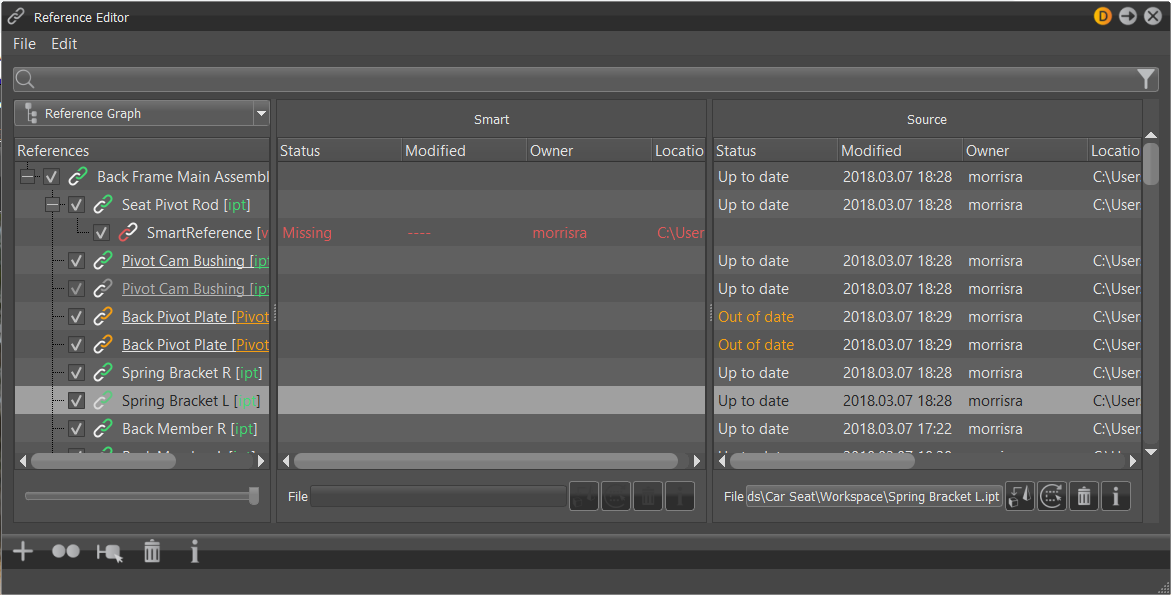
In the Smart section of the Reference Editor, new entries will appear and their status will be displayed as Unsaved, as they have yet to be saved.
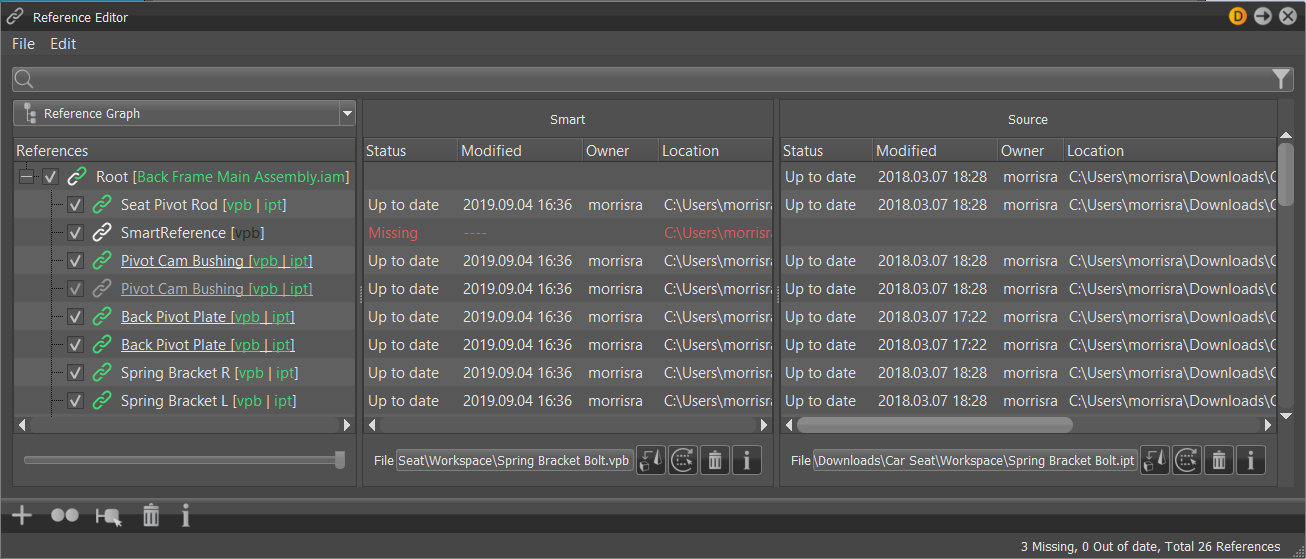
Once saved, the other fields, Modified, Author/Owner, and Location, will populate. The Source section will display an Up to date status, along with a modified date and file location.
If you save the project, the references are automatically saved, as well.
Working on a Smart Reference
When working on a smart reference, you can work with it in-structure or individually opened.
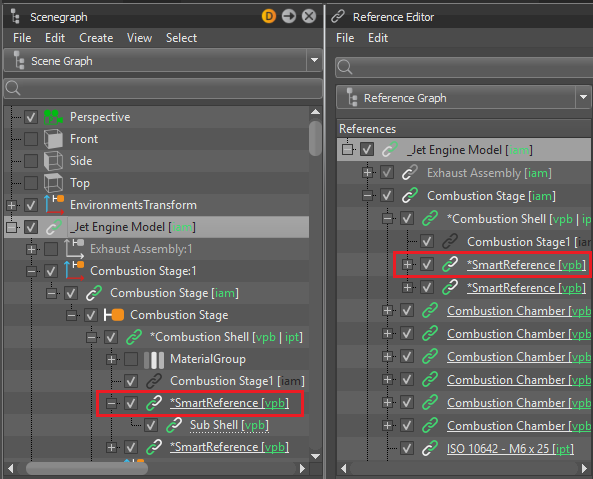
In-structure - With projects containing many smart sub-references, work directly on them within the Scene Graph and Reference Editor's Reference Graph. When a change is made, the reference will appear in a modified state, displaying an asterisk (*) in the file name in the structure.
Individually opened - Open and work on references within the Scene Graph and Reference Editor. References can be identified by the reference icon
 and indicates the loaded files is linked to the a source reference file. When a change is made, the opened file will appear in a modified state, displaying an asterisk (*) in the file name at the top of the VRED window.
If monitoring is enabled, when someone modifies a smart reference that others have loaded, the others will see no change to its status. However, once the modified smart reference is saved, the others are notified by a change in the reference's status from Up to date to Out of date (in orange text).
Where to Find References
This section is for anyone who is given a smart reference to work on.
In the Toolbar, click  , locate and select the file (VPB), then click Open. The file is loaded into VRED.
The loaded smart reference appears in the Scene Graph Tree View and looks like this:
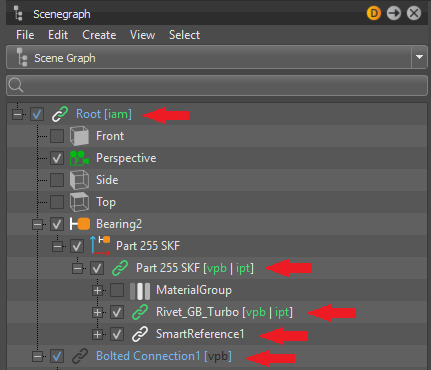
Notice the Root node is assigned a link icon . This is one of the differences when a VPB with a link to a source reference is opened in VRED. The next point of interest is icon colors, which indicate the status of a file. See About the Reference Editor for more information on what these colors mean and an explanation of the icon variations.
The main place to work with References is the Reference Editor, which provides information on the status, location, and author, as well as when the file was last modified. When changes are made a reference file has been modified, if update monitoring is enabled and the file has been saved, its status in the main project updates, as well as the icon color.
If notifications are disabled, see Enable and Change Notifications in References Preferences.
How to Remove a Reference
Removing reference is different to deleting one. Instead of deleting the reference from the scene, Remove removes the reference information from the node and convert it to a Transform node. The node disappears from the Reference Editor and VRED treats it as a normal Transform node.
In the Scene Graph, select the reference you want to remove.
Right-click and select References > Remove Reference. This converts the reference to a VRED native node
and removes it from the Reference Editor.
You can use the Optimizer for the same thing. Select the reference you want to remove, then Scene > Optimizer > Filter, enable Remove FileInfo/References and click Optimize. This removes the reference, but is NOT undoable.
Updating References
When references are out of date, this means changes have been made to the files by another user. To update the files, use (Re)Import. Once they are updated, their status in the Reference Editor changes to Up to date.
Updating a Smart Reference
In the Reference Editor, select the smart reference files that need to be updated.
Right-click, then select (Re)Import Smart. The Import dialog appears with a progress bar to indicate how long the import will take.
Updating a Source Reference
In the Reference Editor, select the source reference files that need to be updated.
Right-click, then select (Re)Import Source. The Import dialog appears with a progress bar to indicate how long the import will take.
Saving Unsaved Smart References
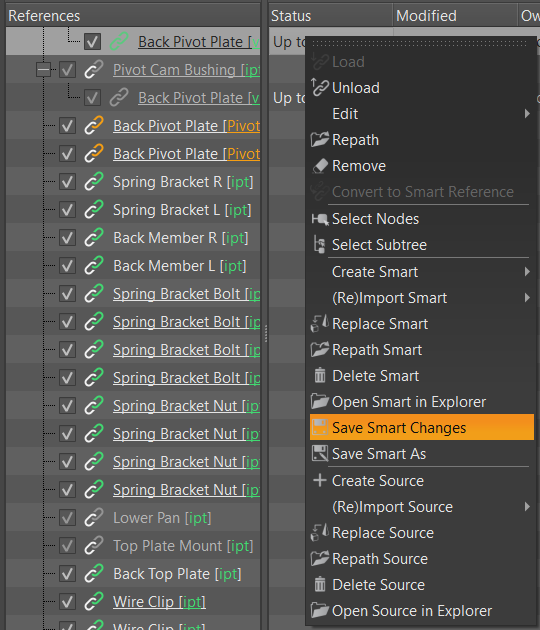
To save the smart references, right-click and select Save Smart Changes.
A notification appears indicating that smart references are about to be created.
Choose or set a location for the saved VPBs of the references:
Next to Source File - Choose this option if you have write access to the location where the source files are stored and want the smart references to be stored in the same area for ease of accessibility.
Custom - Choose a location where you have write access and want the smart references to be stored.
Click OK, then Save.
The smart references are converted, saved, and the changes (icon color, status, modified information, and location) appear in the Reference Editor.
If you save the project, the references are automatically saved, as well.
Saving a Smart Reference to a New File
Use Save Smart Changes As when wanting to save changes made to a smart reference in VRED and create a new file.
To save a copy of a smart reference, select a reference
 , then right-click and select Save Smart Changes As.
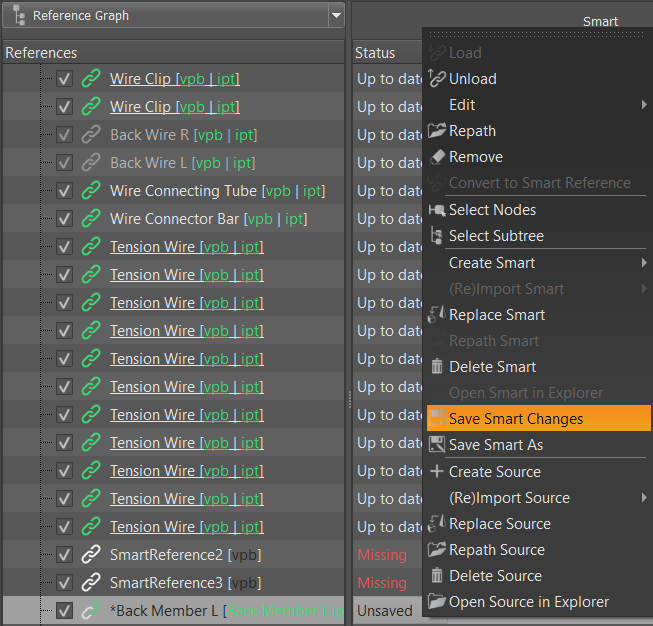
A notification appears indicating the newly created smart references will be saved to VPB files.
Choose or set a location for the saved VPBs of the references:
Next to Source File - Choose this option if you have write access to the location where the source files are stored and want the smart references to be stored in the same area for ease of accessibility.
Custom - Choose a location where you have write access and want the smart references to be stored.
Click OK.
Rename the file and click Save.
The smart references are converted, saved, and the changes (icon color, status, modified information, and location) appear in the Reference Editor.
Save Smart As, while useful in some cases, should generally be avoided, especially for smart-source references, as it breaks the naming sync between the source and smart.
Saving a Project with References
When saving a project with references, smart and source references behave differently.
Saving a Project with Smart References
To save a project with references, select File > Save or click  . Any unsaved or modified smart references are automatically saved to their individual reference VPB files.
Saving a Project with Source References
To save a project with references, select File > Save or click . All source references are saved in the project file you are currently saving.