Shotgun Versions
Tasks are composed of versions. Each version is an iteration of the work for a task.
Creating a Version
-
Click the Create a new Version button.
-
In the Create Versions dialog, add a description.
-
Click the Uploaded Movie field to browse for content, such as images or movies.
Tip:Use multi-selection for uploading many files.
Tip:Notice the number next to Manage files. This indicates the number of files uploaded.
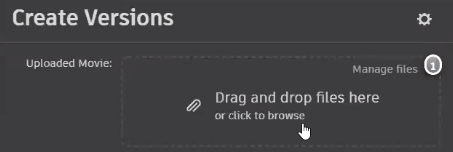
-
Set the version name and click Create Version.
The version appears on the page. This version (a piece of data) is stored on the Shotgun server.
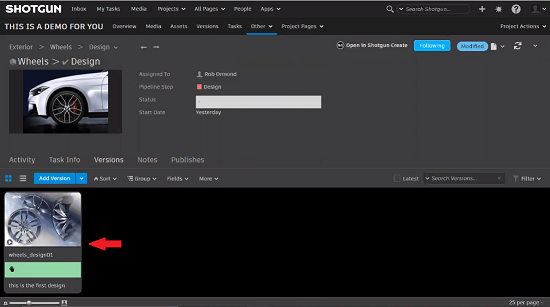
To change the way versions are displayed on this page, use these:  . The first displays versions as thumbnails. The second displays them in a list.
Looking at a Version
There are four ways to look at a version in Shotgun. One is to use the Overlay Player. Click the version thumbnail image to open it in the Overlay Player. This is the default method for viewing an uploaded version. The Screening Room, RV, or Shotgun Create are the other methods used for viewing a version.
Using Overlay Player
The Overlay Player consists of content, such as a sketch (the version), annotation tools, and a panel to the right for notes with extra information about the status of this version.
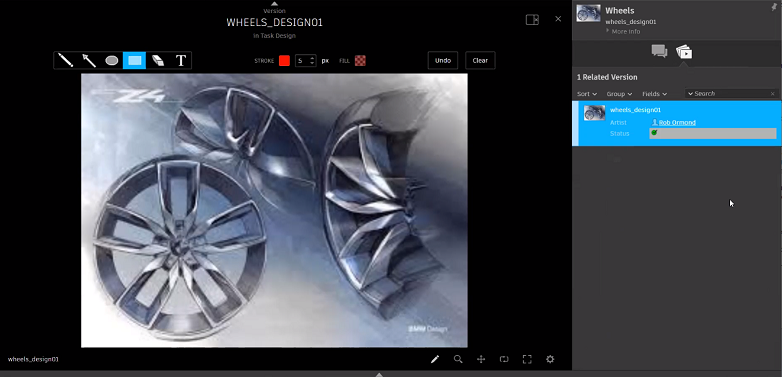
In the Overlay Player, when a version is created and you click  for the first time, the version's status changes to Pending Review.
If the status of a version is Pending Review, no one has looked at it, but someone needs to.
Reviewing a Version
- Use the annotation tools for your review.
- When finished, click
 , enter a message to the designer, and click Submit.
 - In the notes to the right, change the status to Viewed to track that work has been done.
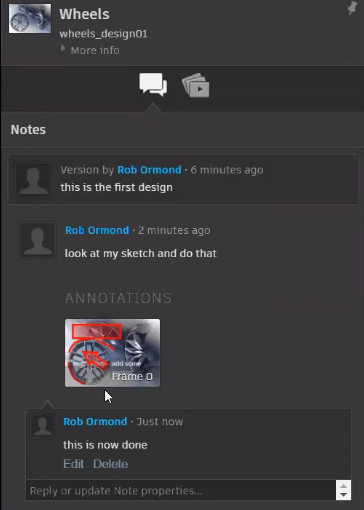
The designer is notified of any changes in status. A new image is created with the annotations associated with that note. Clicking the reviewed image opens a page view of the image with the annotations.
When the Overlay Player is closed and the Activity option clicked, the Viewed version appears on its own card above the uploading of the version.
If you go to the project's Overview page (click the Overview option next to the title of the project), you will see the same thing.
At this point, the designer would see the reviewer's notes. They can reply within a field in the reviewer's card from the Overlay Player notes or the project's Overview page.
OR
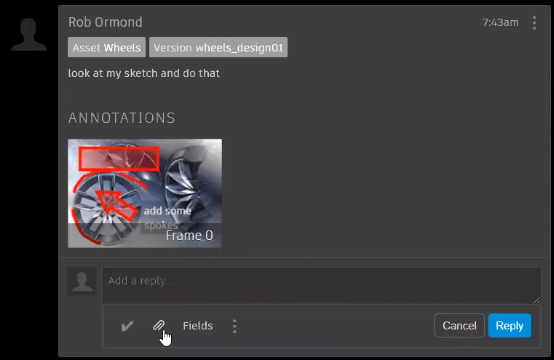
As versions are changed and viewed, a stream of communication is created through the notes, and new versions are created.
Reviewing a Version in VRED Presenter
From within Shotgun Versions pane, select a version and right-click to select Review with VRED. This launches VRED Presenter, displaying the content for review.
Creating Another Version
There are two ways of creating another version. Either use the Versions page or Overlay Player. Once another version is created, it appears on the Versions page.
Creating Another Version Through The Versions Page
-
From the Versions page, click Add Version.
-
In the Create Versions dialog, add a description.
-
Click the Uploaded Movie field to browse for content, such as images or movies.
Tip:Use multi-selection for uploading many files.
Tip:Notice the number next to Manage files. This indicates the number of files uploaded.

-
Set the version name and click Create Version.
Creating Another Version Through The Overlay Player
-
In the Notes section of the Overlay Player, click the Attachments icon.

-
Select Upload, then Choose File.

-
Locate another image file and click Open.
-
Click Submit.