Markers in Mixed Reality
Only available for Varjo XR HMD users.
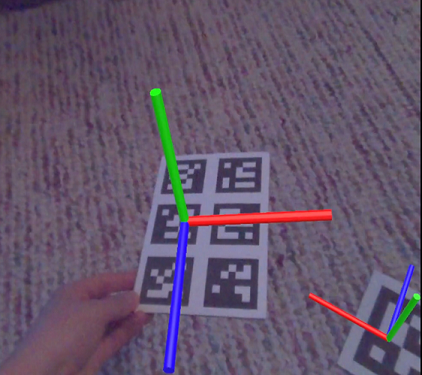
 Use a visible marker, known as the origin marker, for easy placement of objects in a mixed reality scene. The coordinate system is automatically synced; however, your nodes need to be prepared before entering MR.
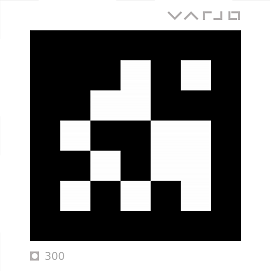
Varjo provides a PDF with several markers of different sizes that can be printed out.
Use  from the xR Home Menu to enable supported HMDs to detect markers. Once the HMD recognizes the marker, if a node is tagged with
 VarjoMarker, the node content is moved to the marker's location. The marker's ID number needs to be set as a separate tag.
Tag syntax is case-sensitive.
Multiple markers can be combined into a single marker. This improves tracking stability.

For example, multiple nodes are tagged with VarjoMarker, but each has a different tag number. The marker tracking system detects the markers and assigned a confidence value to each, ranging from 0.0 to 1.0. If deems correct, the node content is moved to the marker's location. For more about confident values, see the Min Marker Confidence Virtual Reality preference.
Marker Tracking
Only available for Varjo XR HMD users.
The marker tracking system detects each marker and assigned a confidence value to it, ranging from 0.0 to 1.0.
0.0 means the system deems the detected result (marker ID and position) 100% incorrect.
1.0 means the system deems the detected result (marker ID and position) 100% correct.
For example, a marker that gets a value of 0.9 means there is a 90% confidence in the correctness of the marker's position and IDs.
A marker with a low confidence value appears to be jumping around. Setting the minimal accepted confidence to a higher value makes the system ignore unreliable detected results.
A marker that was detected with high confidence value, but later is detected to have a confidence value lower than the minimum value will be ignored and its position will not be updated.
Preparing Nodes for Markers
Only available for Varjo XR HMD users.
Follow these steps to prepare your nodes before entering MR. Note that objects that won't fit in your room will need to be scaled down before entering MR.
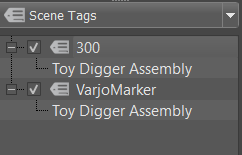
Add a tag and rename it
VarjoMarker.Drag and drop an object node onto this tag to assign it.
Create another tag and rename it to the number printed on the Varjo marker.
Drag and drop the same object node onto this tag.
Using Markers
Only available for Varjo XR HMD users.
Nodes from your scene must be tagged before continuing. If this has not been done, follow the instructions in Preparing Nodes for Markers.
Wearing a connected Varjo HMD that supports MR, in VRED, select View > Display > Varjo HMD. The objects that were tagged with the
VarjoMarkerand number tags appear in MR.Open the xR Home Menu with your controller and select
(Markers). The geometry jumps directly onto the marker.Tip:Disable Markers in the xR Home Menu to stop any jiggling of the object that may occur.
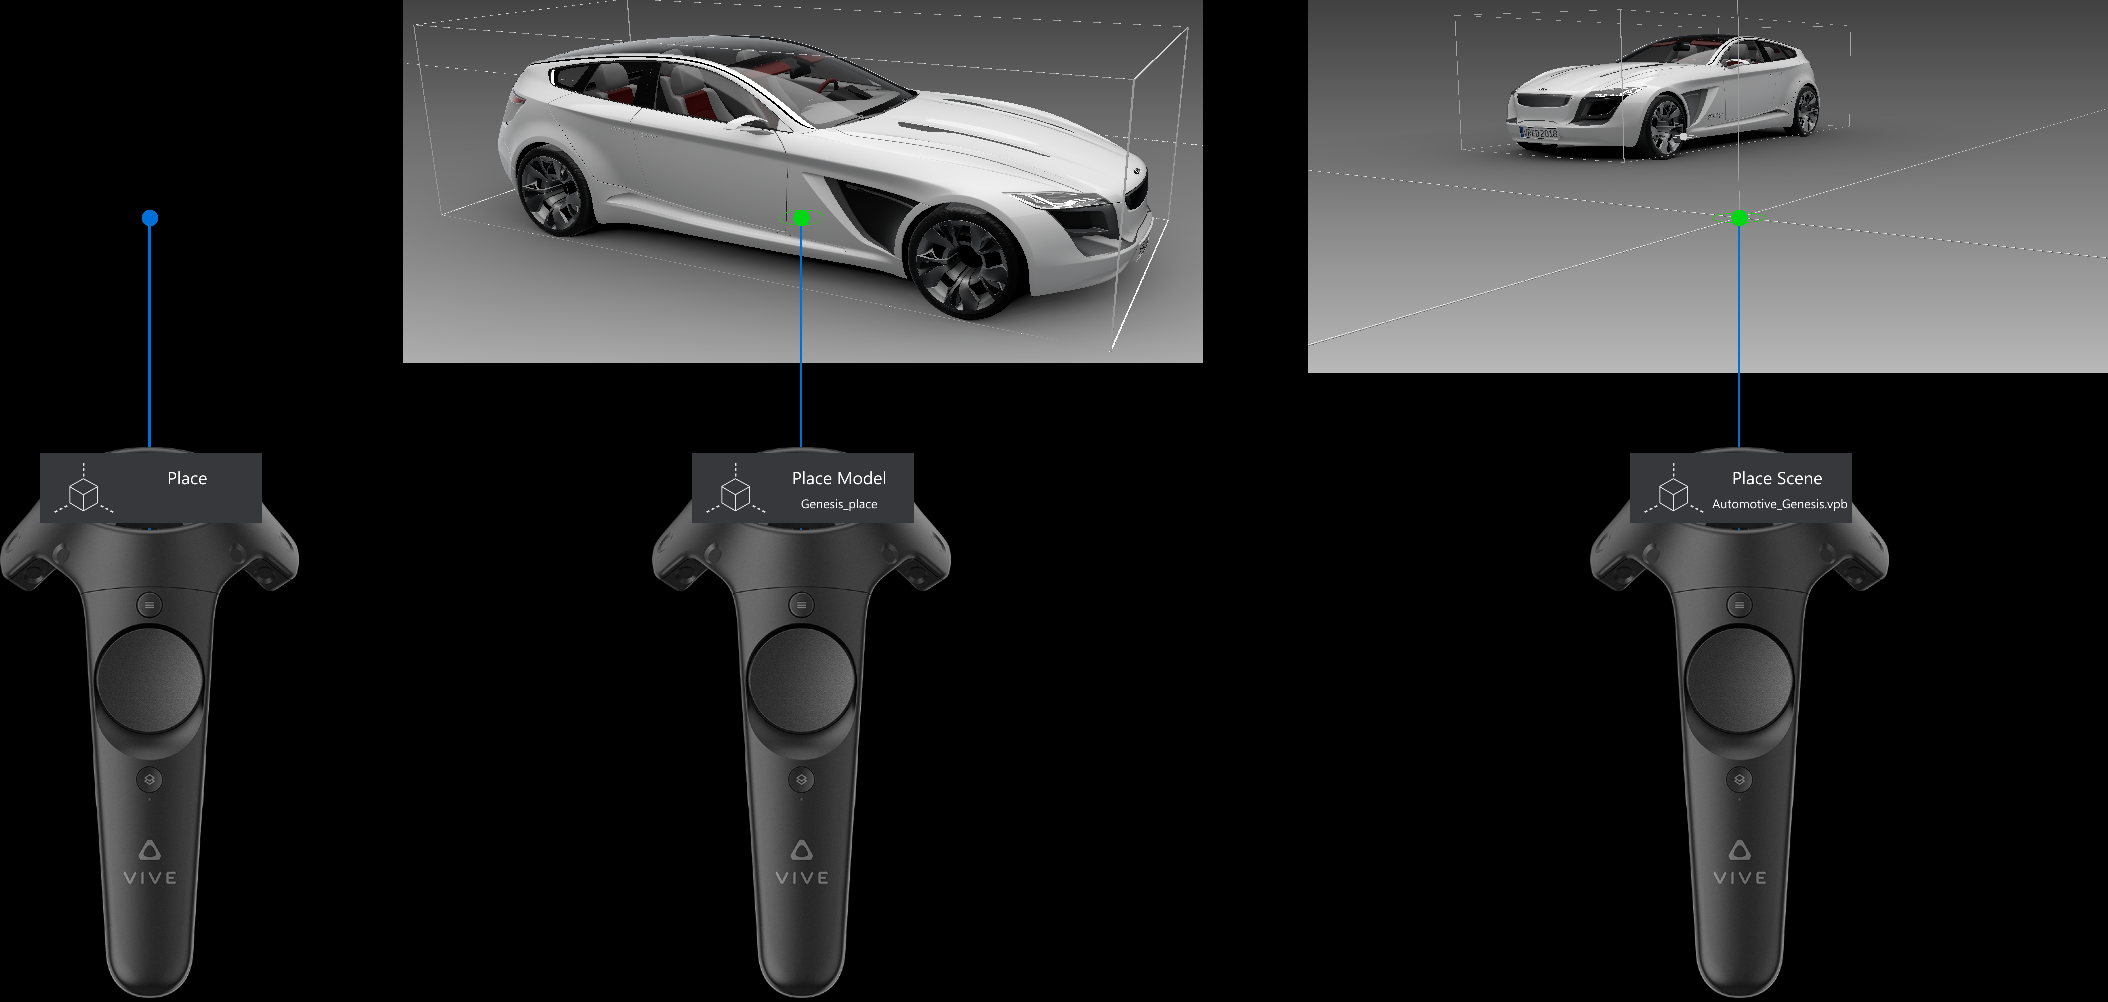
Place Tool
Only available in MR mode.
When in a collaborative MR session, the position of objects are syncronized for users.
 Use for placing objects on and moving them along the ground of the scene, using the laser pointer. These objects must have an assigned scene tag, called
 Place.
The Place tool uses a similar approach to Teleport for rotating objects, that is rotating your wrist. You can snap the rotation to a 10° angle by pressing the controller's Grip button. Use this when trying to align one object with another. It is also possible to place objects atop one another.
Preparing Nodes for Placement
Only available in MR mode.
To pick and place objects in MR, you must first prepare the nodes. If objects are too large or small for your room, they will need to be scaled to an appropriate size before entering MR.
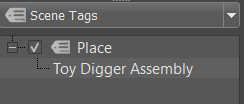
- Create a tag and rename it
Place. - In the Scene Graph, drag and drop an object node onto this tag.
Using Place
Only available in MR mode.
Nodes from your scene must be tagged before continuing. If this has not been done, follow the instructions in Preparing Nodes for Placement.
Wearing a connected Varjo HMD that supports MR, in VRED, select View > Display > Varjo HMD. The objects that were tagged with the
Placeappear in MR.Open the xR Home Menu by pressing the menu button on your controller, then select
 (Place).
When highlighted orange, the tool is enabled. When gray, the tool is disabled. An indicator appears above your controller stating what is active and picked.
Point to an object and continually squeeze the trigger to pick and move it along the virtual ground.
Rotate your wrist to rotate the object around the up axis. This action is similar to that of the Teleport tool.
Tip:Squeeze the Grip button to snap to 10 degree angle increments. Use this to help with the alignment of your object to another.
Python for Markers
These are the functions for the Python interface for implementing a custom version of marker tracking. They can be found in the vrImmersiveInteractionService documentation.
createMultiMarker
vrImmersiveInteractionService.createMultiMarker(multiMarkerName, markerNames, markerType)
Creates a multi marker by averaging the pose of multiple regular markers.
Parameters
- multiMarkerName (string) – The name the multi marker will have. Can be chosen freely
- markerNames (List[string]) – The names of the marker the multi marker will consist of
- markerType (vrXRealityTypes.MarkerTypes) – The type of the markers the multi marker will consist of
Returns
Return type
vrdMultiMarker
getDetectedMarkers
vrImmersiveInteractionService.getDetectedMarkers(markerType)
Gets all detected markers of a given type.
Parameters
- markerType (vrXRealityTypes.MarkerTypes) – The type of the marker
Returns
The detected markers
Return type
List[vrdMarker]
getMarker
vrImmersiveInteractionService.getMarker(name, markerType)
Gets a marker that has already been detected.
Parameters
- name (string) – The name of the marker
- markerType (vrXRealityTypes.MarkerTypes) – The type of the marker
Returns
The marker or a null marker if the name and type combination is undetected
Return type
vrdMarker
getMinMarkerConfidence
vrImmersiveInteractionService.getMinMarkerConfidence()
See also: setMinMarkerConfidence.
Returns
The minimum marker confidence
Return type
float
setMinMarkerConfidence
vrImmersiveInteractionService.setMinMarkerConfidence(confidence)
Sets the minimum marker confidence. When markers are detected with a lower confidence they will be ignored. Markers that are already known to the system will not be updated, if the updated data has a lower confidence.
Parameters
- confidence (float) – The minimum confidence
markersDetected
vrImmersiveInteractionService.markersDetected(markers)
This signal is triggered when new markers are detected that have a confidence that is equal or higher than minimum marker confidence.
Parameters
- markers (List[vrdMarker]) – The detected markers
markersUpdated
vrImmersiveInteractionService.markersUpdated(markers)
This signal is triggered when new markers are detected that have a confidence that is equal or higher than minimum marker confidence.
Parameters
- markers (List[vrdMarker]) – The detected markers