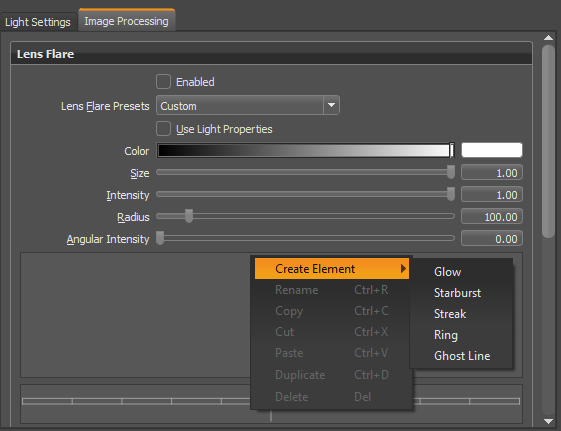
About Lens Flares and Elements
Everything you need for lens flares is found in the Image Processing tab of the Light Editor. Lens flares are composed of one or more elements. To create an element, right-click and select one.
Lens Flare Element
Choose from the following lens flare elements when creating lens flares in VRED:
 Glow
Glow
Creates a glowing shape.

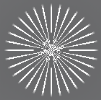
 Starburst
Creates a sun-like effect, made up of multiple streaks. Use it for things such as street lamps at night, objects with stationary lights, or a light source that's partially obscured by an object, like a tree or building's edge.
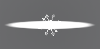
 Streak
Creates a streaking effect, like what you get when using an anamorphic lens.
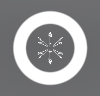
 Ring
Ring
Creates a ring-like element for the light source.
 Ghost Line
Opens the Ghost Line Editor for adding elements that move with the light source.
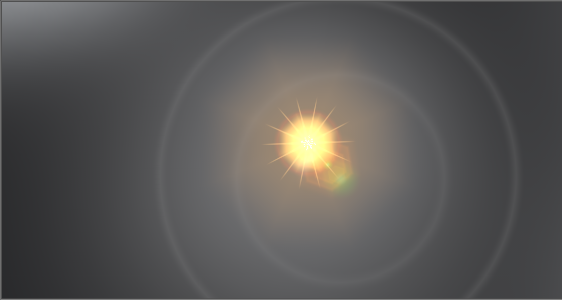
Element Parameters
When an element, such as Glow or Starburst, is selected, additional parameters appear below it. Keep in mind, some parameters are element-specific. When this is the case, it will be noted.
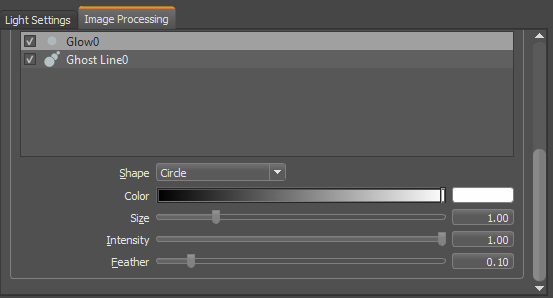
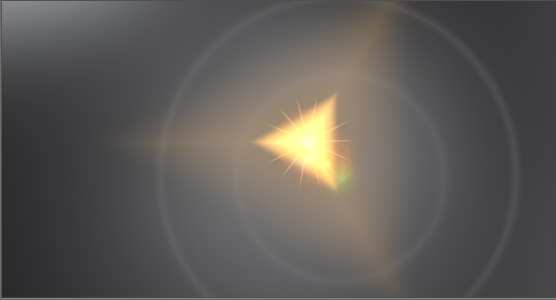
Shape
Use to change the shape of the following elements:
-
For a Ghost Line or Glow, change their current shape to a circle, triangle, square, pentagon, hexagon, heptagon, octagon, nonagon, decagon, or custom loaded texture, using the option selected from the Shape list.
-
For a Starburst, change its current shape to a fan, spike, blade, or texture.
Glow Shape Example
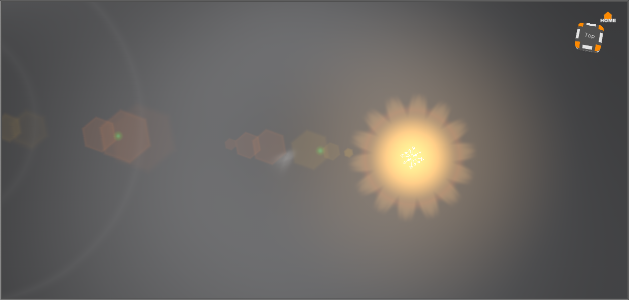
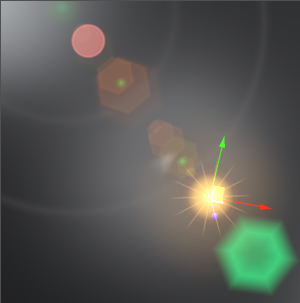
In the following example, this lens flare is a combination of many elements, 2 glows, 1 ring, 2 starburst, and 5 ghosts in a Ghost Line. The shape used for the glow was a Circle.
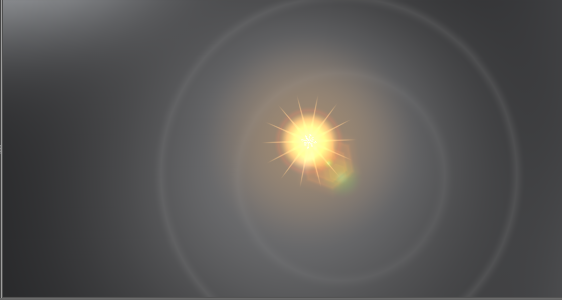
The shape used for this glow was Triangle.
The shape used for this glow was Octagon.
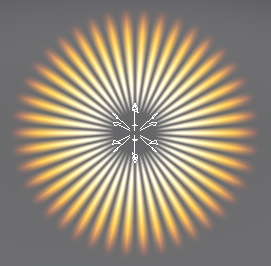
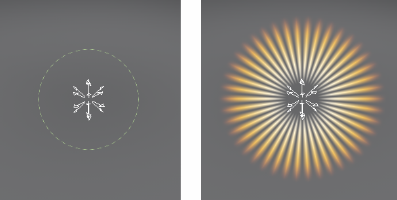
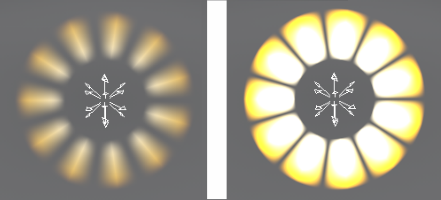
Starburst Shape Example
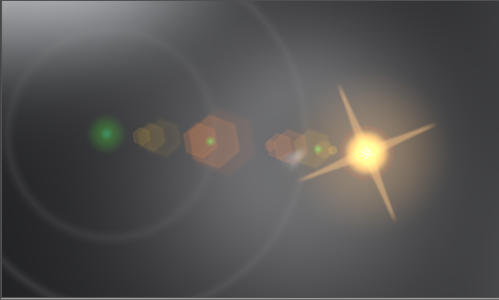
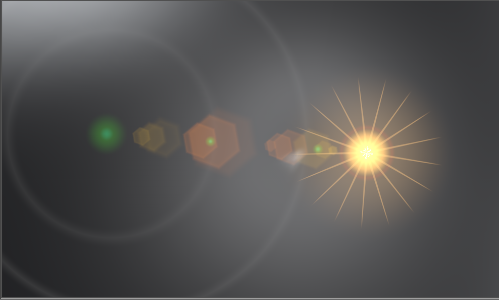
In the following example, this lens flare is a combination of many elements, 2 glows, 1 ring, 2 starburst, and 5 ghosts in a Ghost Line. The shape used for this starburst was Spike.

The shape used for this starburst was Fan.

The shape used for this starburst was Blade.
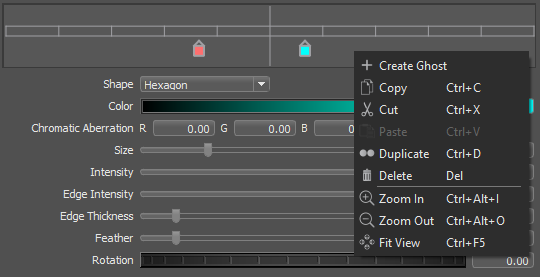
Create an element
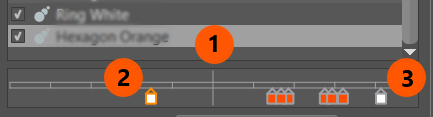
Once you create an element, it appears in the empty space below the global parameters, the Element List. All elements are listed by name and can also be identified by their icon, such as this one for ghost elements ![]() . To view only certain elements in the Render Window, click the check box in front of elements to remove the check and turn off visibility.
. To view only certain elements in the Render Window, click the check box in front of elements to remove the check and turn off visibility.
-
Right-click within the empty area below the global lens flare parameters, the Element List.
-
Select Create Element, then select an element from the list. The selected element appears in the Render Window and in the Element List.
-
Use the parameters to customize the selected element. Each element contains at least one unique parameter.
Shape (Glow)
Changes the shape of a glow from its current shape to a circle, triangle, square, pentagon, hexagon, heptagon, octagon, nonagon, decagon, or custom loaded texture, using the option selected from the Shape list.
Shape (Starburst)
Changes the shape of the starburst to a fan, spike, blade, or a custom loaded texture, using the option selected from the Shape list.
Color
Use to change the color of the lens flare. If the light already has an assigned color, this color will be mixed with it. Click Accept.
Number
Use to set how many arms a Ring or Starburst element has.
Starburst Number Example
This starburst has Number set to 4.
This starburst has Number set to 17.
Ring Number Example
Use Number to divide a ring into segments. Zero creates a solid ring. Values of one or greater divide it into segments.
When used in combination with the other parameters, you can create endless effects.
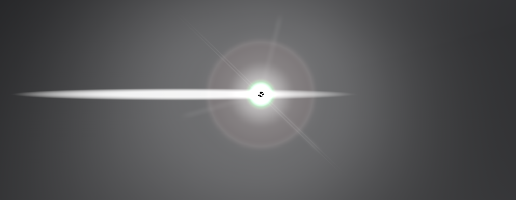
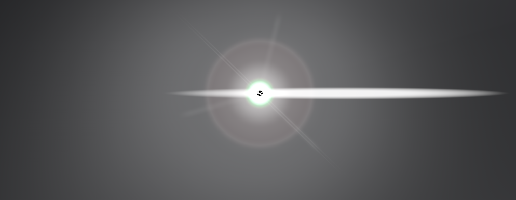
Offset
Use to offset the streak(s) from the center of the light source. Negative values will move the streak to the left and below the light. Positive will move it to the right and above the light.
In the following example, this lens flare is a combination of many elements, 3 glows, 1 ring, 3 streaks, 2 starburst, and a ghost. The streak has an offset of 0.00 and 0.00.

One streak was offset -0.25 and 0.00, moving the streak to the left of the light source.
The same streak was then offset +0.25 and 0.00, moving the streak to the right of the light source.
The same streak was then offset 0.00 and -0.25, moving the streak below the light source.

That same streak was then offset 0.00 and +0.25, moving the streak above the light source.

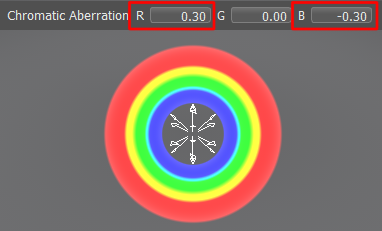
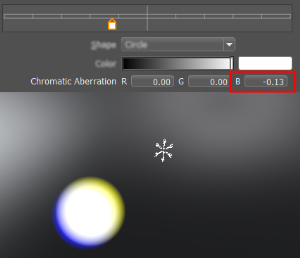
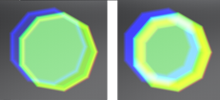
Chromatic Aberration
Use Chromatic Aberration with the Ring element to distort the colors of the ring and create a rainbow-like effect. The R, G, and B values are spacial values, meaning that a negative value moves that color spectrum inside of the ring and a positive moves the color outside the ring. As you change the color, it takes that color away from the other parts of the ring, creating a multi-ringed effect.
Ring Chromatic Aberration Example
In the example below, the R value is positive, which pushes the red away from the center. The B value is negative, which pulls the blue toward the center. As you travel away from the center, the amount of blue is reduced and the red is increase, creating the other bands of color.
Ghost Line Chromatic Aberration Example
Use Chromatic Aberration with the Ring element to distort the colors of the light. The R, G, and B values are spatial values, meaning that a negative value moves that color spectrum further away from the light source. A positive value moves the color closer to the light source. As you change the color, it moves that color further away from or closer to the light source.
In the example below, the B value is set to a negative value, resulting in the blue moving in a direction away from the light.
Thickness
Controls the thickness of the rays of light. For some elements, an additional parameter, Streak Thickness, can be used to further influence Thickness.
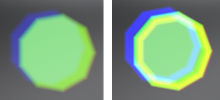
Ring Thickness Example
In the example below, the ring expanding outward from the center. When set to 0, if Streak Thickness is also set to 0, then the ring is barely visible. As the value approaches 1, it expands, becoming thicker.
Streak Thickness
Controls the thickness of the segments created using Number.
Edge Intensity
Makes the edge color of the Ghost Line element more or less intense. Changing it to 0 will make the edge disappear.
Edge Thickness
Controls the thickness of the edges of the Ghost Line element. When Edge Intensity is high, it is much easier to see the difference.
Ghost Line Editor
Select a Ghost Line element to load the Ghost Line Editor. Use it for adding elements that move with the light source. Create, place, and edit ghost elements.
Hover below the horizontal lines. Your cursor to change to a +. When you click, a ghost element is created. To move the ghost element closer to the light source, drag it toward the center line. To move it away from the light source, drag it away from the center line.
 Represents the position of the light source.
 A ghost element that appears before the light source. This means it will appear in front of the light in the Viewport.
 Other ghost elements that appear after the light source. This means they will appear behind the light in the Viewport.
From within the Render Window, use the Transform tool to reposition things.
Context Menu
With your cursor in the Ghost Line Editor, either right-click and select an option or use a shortcut.
 Shortcuts for users with a mouse with MMB (middle mouse button) or scroll wheel:
| Shortcut | Mouse Wheel | Action |
|---|---|---|
| Ctrl+Alt+I | Scroll wheel forward | Zoom In |
| Ctrl+Alt+O | Scroll wheel back | Zoom Out |
| Ctrl+F5 | N/A | Fit View/Reset View |
| None | MMB drag mouse left | Move View Left |
| None | MMB drag mouse right | Move View Right |
 Shortcuts for users without a mouse or one with MMB (middle mouse button) or scroll wheel:
| Shortcut | Mouse Wheel | Action |
|---|---|---|
| Ctrl+Alt+I | Scroll wheel forward | Zoom In |
| Ctrl+Alt+O | Scroll wheel back | Zoom Out |
| Ctrl+F5 | N/A | Fit View/Reset View |
| None | MMB drag mouse left | Move View Left |
| None | MMB drag mouse right | Move View Right |