Working with Lens Flares
Scene > Light Editor > Image Processing
Find out how to use lens flares. Use the Image Processing tab of the Light Editor to add lens flares, tweak preset flares, or create one from scratch. When finished, save them.
Click here to view the Lens Flares video.
How to Use Lens Flares
Use lens flares found in the Lens Flare Presets dropdown menu. Tweak these presets or create custom ones. When finished, save them for reuse. If you select a preset lens flare, followed by the Lens Flare Preset Custom option, you can see how the preset was constructed. Notice how it combines elements, such as glows, rings, streaks, starbursts, and even ghost lines. Select an element to see how its attributes were set. When creating your own lens flare, use what you've observed to combine elements and experiment.
How to Add a Lens Flare
Use the presets to add a lens flare to a light.
-
Select Scene > Light Editor, then from the Icon Bar, click + and select either Point Lights or Spot Light.
-
Click Lens Flare Preset and select a preset.
-
Right-click and select Create Element, followed by one of the elements.
-
Use the Transform tool to move it into position.
How to Customize a Preset
Make changes to a preset lens flare to make it your own.
-
Follow the instructions in How to Add a Lens Flare.
-
Change some of the parameters under Lens Flare to customize your flare.
How to Create Custom Lens Flares (Elements and Element Attributes)
Create custom lens flares from scratch or by adding to and tweaking existing lens flares.
-
Select Scene > Light Editor, then from the Icon Bar, click + and select either Point Lights or Spot Light.
-
Once the Custom Lens Flare Preset is selected, right-click in an empty place in the Image Processing tab and select Create Element, followed by one of the following elements: Glow, Starburst, Streak, Ring, or Ghost Line.
-
Select the created element and change any of the advanced lens flare parameters listed below it.
How to Save Lens Flares
The custom lens flares you create can be saved to be reused or shared. You will need your Scene Graph and Asset Manager to do this.
-
In the Menu Bar, select Scene > Asset Manager to open the Asset Manager.
-
Select Scene > Scene Graph to open your Scene Graph.
-
In the Scene Graph, select the light with the lens flare and drag it into the Asset Manager onto the folder connected to your local machine or network.
-
A warning will appear letting you know the light does not have a valid Asset Root node. Click Yes.
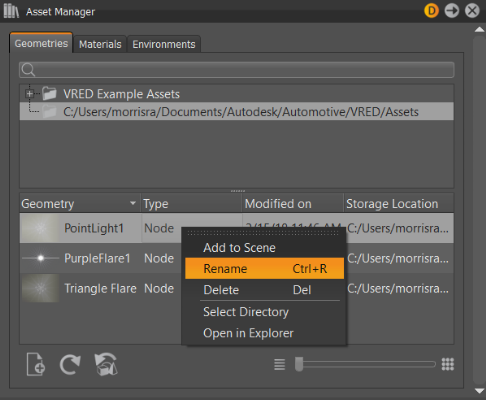
The light appears in the Asset Manager in a section below the folders.
-
Though a thumbnail preview appears next to light, select the light, then right-click and select Rename to give it an identifiable name.