Working with Substances in VRED
Material Editor > Create/Convert > Create Material > Substance
Click here to view the Substance Material Support video.
What is a Substance
A Substance is created with Substance Designer and can be loaded into VRED through the Material Editor. When a Substance is loaded into VRED, it is converted into VRED readable texture images, which are used for rendering. The file format for it is .sbsar.
A Substance contains one or more graphs with texture outputs. These textures are generated by the Substance Render Engine. We use the texture maps to render the material in VRED. Besides the original Substance graphs, the generated textures are stored within the VRED material. Therefore, if you use a large texture resolution (Output Size), the file size of your VRED scene will also increase.
If a Substance isn't quite to your liking, tweak it. Change its parameters and create presets. Keep in mind, though a Substance can be tweaked and presets created and exported, there is no way to create an actual Substance in VRED. To create one, use the Allegorithmic Substance Designer.
For a more in-depth look at what substances are, see Allegorithmic's website.
Metal/Roughness Workflow
VRED supports the Substance metal/roughness default workflow; however, at present, we do not support the specular/glossiness workflow. For information on the metal/roughness workflow, see this short description from the Allegorithmic forum or this longer one from Substance Academy.
If one of these textures (Base Color, Roughness, Metallic) is missing, the Substance metal/roughness result will be incorrect.
Loading a Substance
Substances (.sbsar files) need to be brought into VRED to use them. If you already have some, access them through the Material Editor. If not, visit these Allegorithmic links to download and buy substances.:
How to Load Substances
-
From the Quick Access Bar, tap Materials to open the Materials Editor.

-
Select Create/Convert > Create Material > Substance to load a Substance.
-
Click
 and locate a Substance on your machine.
 -
Select a Substance.
-
Click OK to load your selection into the Material Editor.

Whenever you open the Load Substance Archive dialog, it opens to the last opened directory.
Applying a Substance to Geometry
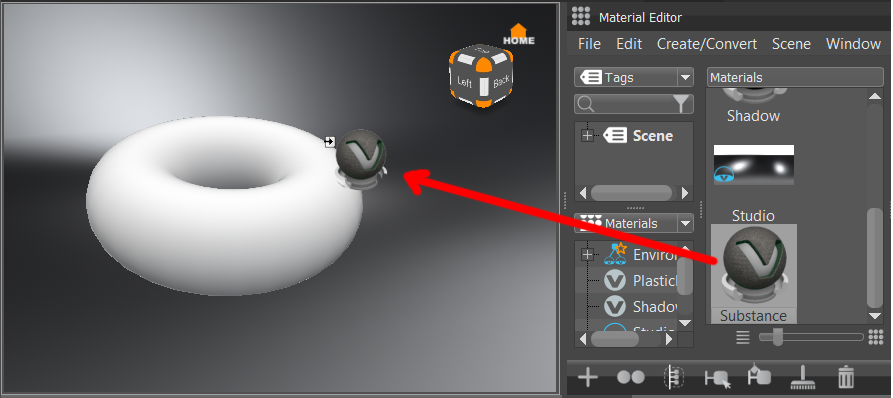
With your scene loaded, click-drag the Substance from the Material Editor onto the geometry in the Viewport.

To assign a different Substance, in the Material Editor, drag and drop a different Substance onto your geometry. The material will automatically update on the geometry.
Reloading a Substance
When changes have been made to a Substance, using Substance Designer, you can grab the updated version by clicking ![]() Reload.
Reload.
Creating a Presets
When creating a preset, you can make changes to the parameters before creating it or after it. If you do it after, use Recapture Preset.
In the Presets area, right-click and select Create Preset or use the Insert hotkey. A new preset is added to the list.
Recapturing a Preset
If you tweak a preset and you want to recapture it with these changes, right-click the preset and select Recapture Preset.
Applying a Preset
When you apply a preset, it changes the appearance of the Substance.
If you apply a preset with double-click LMB (left mouse button) or with the context menu, the output size will be contained in the preset. However, if you apply it with double-click MMB, the output size will be overwritten by the specified value from the preferences.
In the Presets area, with a preset selected, do either of the following:
- right-click and select Apply Selected Preset.
- double-click the preset.
Renaming a Preset
- In the Presets area, with a preset selected, right-click and select Rename or use the Ctrl + R hotkey. The preset name is highlighted.
- Enter a new name and press Enter to set the name.
Importing a Preset
When a Substance archive file is loaded into VRED, if there are presets with the same name, in the same directory, they are automatically loaded with the Substance archive file.
What if you have a project where a preset was created for everyone to use and it wasn't in the Substance directory? Use Import Preset File, then Apply Selected Preset to add this to the Substance.
- In the Presets area of the Substance, right-click and select Import Preset File.
- In the Load Substance Presets dialog, locate a preset.
- Click Open. The preset appears in the Preset list.
Exporting a Preset
Have you created a preset for your team to use? If so, use Export Preset File to share it with them. They can then import and apply the preset.
- In the Presets area, with a preset selected, right-click and select Export Preset File.
- In the Export Substance Presets dialog, locate the directory where you would like the preset saved.
- Click Save.
Deleting a Presets
If you created a preset that is no longer needed, use Delete Presets or the Delete key to delete it.
In the Presets area, with a preset selected, right-click and select Delete Presets. The selected preset is removed from the Preset list.
Tweaking a Substance
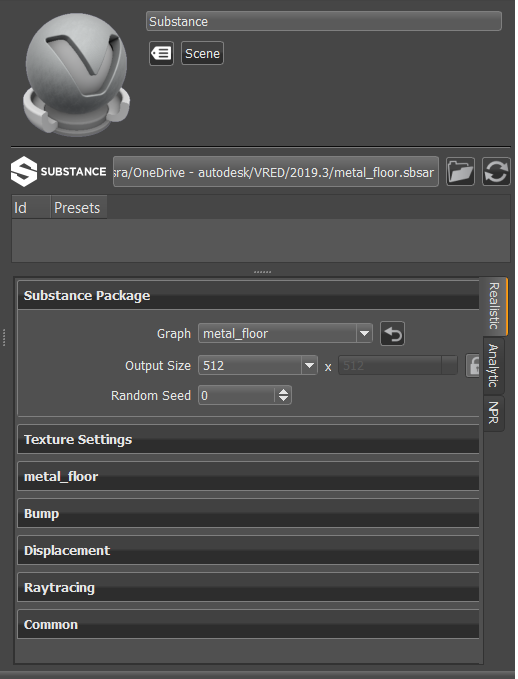
Substance parameter names are not changed upon import and appear as is in VRED. The Substance Material Designer set default values to all material properties. This is stored in Substance archive files. We read these values and attach all default values as fields in the created VRED material. We can use these defaults to reset the material to the original state. See the section, Resetting a Graph, that follows.
Changing Substance Resolution
Set the resolution of the current Substance material in the Material Editor. For example, one Substance material needs a lower resolution, but another Substance material needs a higher one. Using Change Substance resolution, you can do this.
Keep in mind, lowering the resolution reduces memory usage, but also image quality. Increasing the resolution improving image quality, but also increases memory usage.
-
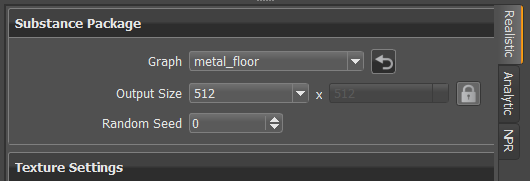
In the Material Editor, with a Substance selected, open the Substance Package section.

-
Click the arrow next to Output Size to access values. Sets the resolution of the rendered Substance. The larger the value, the higher the image quality and more memory required. The Viewport updates to show the change.
Resetting a Graph
When a Substance has been tweaked, you can reset its default values by using ![]() , found next to Graph. It resets the current selected graph. Changes made to some of the parameters within the materials are not reset. See Substance Package Parameters in About the Substance Attributes.
, found next to Graph. It resets the current selected graph. Changes made to some of the parameters within the materials are not reset. See Substance Package Parameters in About the Substance Attributes.
Raytracing Substances
Substances can be raytraced. This section contains options for setting the material ID and line tube radius and enable or disabling use of the local environment and ignoring the photon map, as well as options for overriding the illumination mode, IBL sampling quality, reflection and refraction, and trace depth.
For additional information on raytracing, see The Render Setting Module.