VRED Stream App
VRED Stream and Streaming App Video Captions: VRED 2021 is now able to stream its render window content to a web browser, so you can now run VRED on a desktop or serve and stream the content to a browser. You just have to enable the web server and preferences, where you can also select the streaming port. Here I am opening up my web browser and use the IP address ":8888" to enter the web server's web interface. From here, you can access the VRED Stream and also the VRED Stream App. In the VRED Stream, it's also possible to navigate in the scene, use touch sensors, and interact with HTML 5 content. The VRED Stream App is an app epic sample that uses the H264 stream, plus HTML UI to control the scene. Here, I can trigger variant sets, viewpoints, and certain VRED quality scene settings. I can also explore the scene on a mobile device when not in the office and not having access to a high-performance system. While I am connecting to a host, using a template, while presenting the VRED scene on a big screen. Also, streaming the content back into a VR scene using the Media Editor is possible. So, you can contol the VR scene using its own stream. Or, you can stream a collaboration session, where people are exploring a scene in VR at the same time. This gives you much more freedom when exploring your VRED scenes. Thanks for watching the video.
When using the VRED Stream App or the VRED Stream HD (H264), please download the OpenH264 codec library from GitHub first, then copy the uncompressed openh264-2.0.0-win64.dll to C:\Program Files\Autodesk\VREDPro-13.0\bin\WIN64. If the H.264 codec is missing, an error message appears.
The VRED Stream App is a new web interface for VRED. It live streams rendered images from the VRED window with controls for switching viewpoints and variants.
Run the VRED Steam App using a desktop solution or mobile device.
-
On desktop, use a double-click MMB for navigation.
-
For mobile users, VRED Stream App supports the Add to Home Screen option found on most mobile device browsers. This option adds an icon to your mobile device's home screen. Use it to run the VRED Stream App in fullscreen mode, without any browser user interface, such as tabs or the navigation bar. This will improve your user experience on these devices.
How to Install a Certificate on iOS
For running the VRED Stream App on an iPad, the app requires a trusted certificate in iOS 13 with a certificate duration no longer than two years.
To install the data/Certificate/vredCA.cert.pem certificate on iOS, we recommend using Safari.
-
Send the certificate via email to the Apple device.
-
Open the email and click the certificate attachment. If asked to download a configuration profile, click Allow.
-
Go to Settings > General > Profile.
-
Click on the profile you see, then click Install.
Note:If you have a PIN set on your device, you many be asked to enter it and click Install, again.
-
Click Install once more.
-
Go to Settings > General > About > Certificate Trust Settings.
-
Enable the Enable full trust for root certificate option and click Continue. The certificate should now be installed and trusted.
Starting the VRED Stream App
-
Open a VRED scene.
-
Select Edit > Preferences > WebInterface and ensure Enable Web Server is enabled.
Note the port number. The default is 8888.
-
Click OK.
-
Open a web browser and enter the URL
localhost:8888. This opens the VRED Web Server app.Note:This could be on another machine. Using localhost runs everything on the local machine. To drive the software from another machine, change
localhostto the IP address of another machine that's running VRED. -
Click the Stream App link.
-
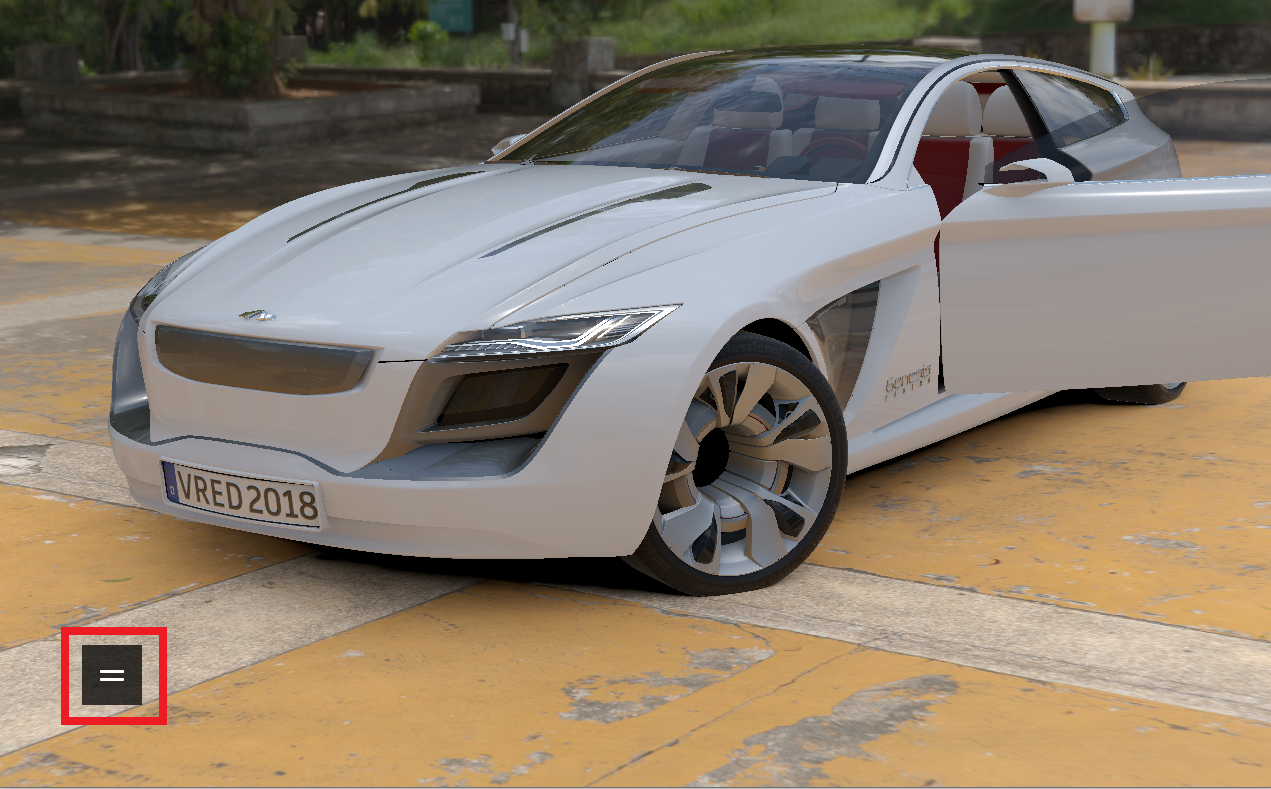
Click the = button, then select any of the following.
 Note:
Note:If your scene has variants or viewpoints, but they are not appearing in the VRED Stream App, click
 to refresh the app.
Variants
Displays all set variants for the scene. If there are options along the top, click them to see other variants.
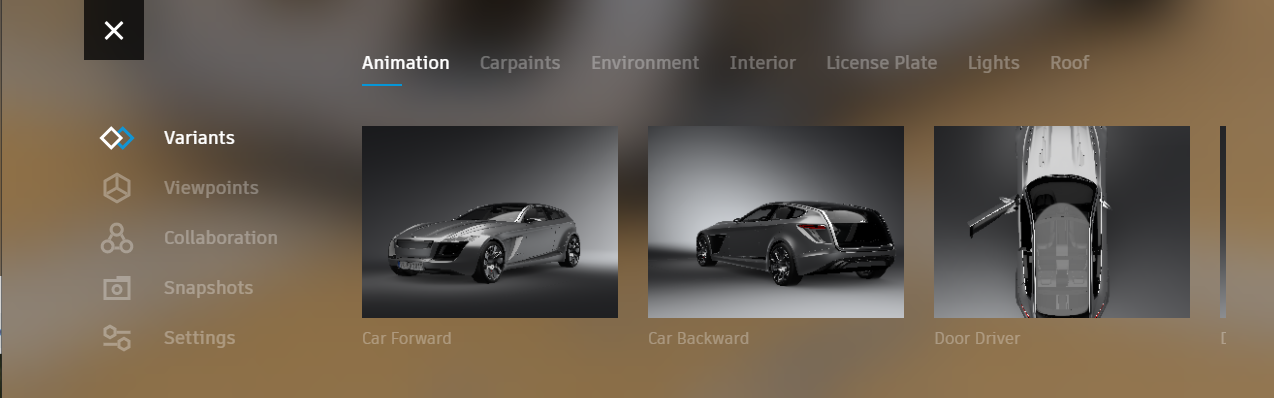 Tip: Since there could be variants off screen, click-drag to the left to expose more.
Viewpoints
Displays all set viewpoints for the scene.
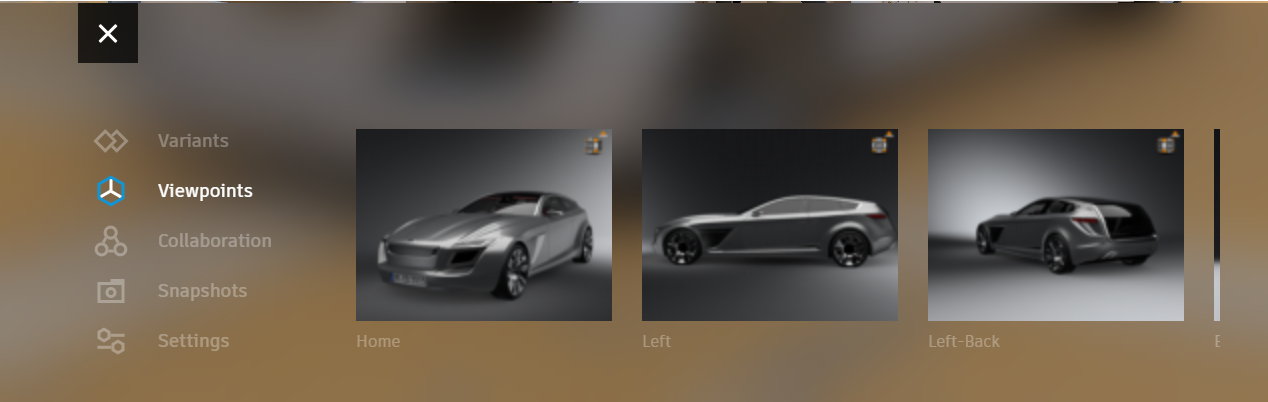 Tip: Since there could be viewpoints off screen, click-drag to the left to expose more.
Collaboration
Sets the level of interactivity for the collaboration session. Select a mode:
Annotations
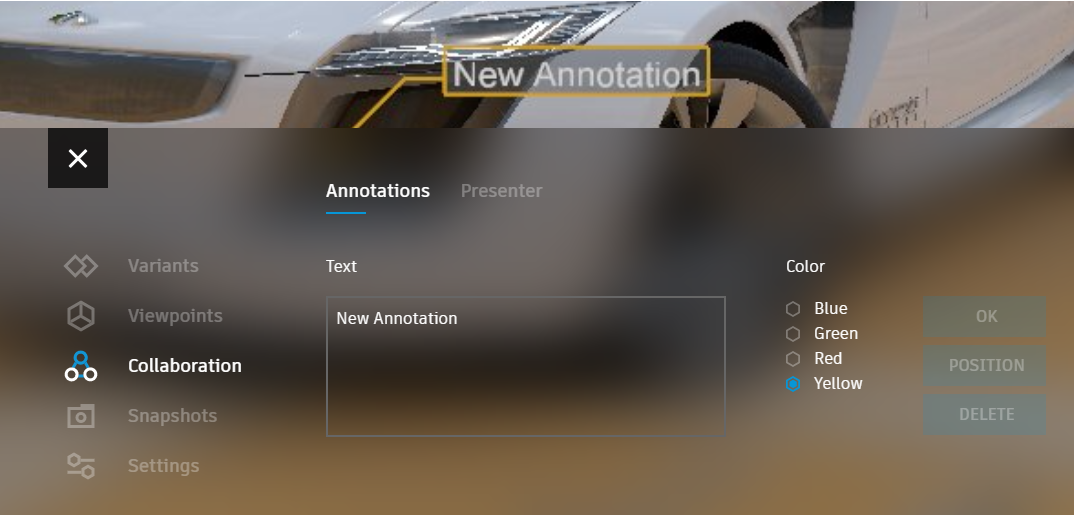
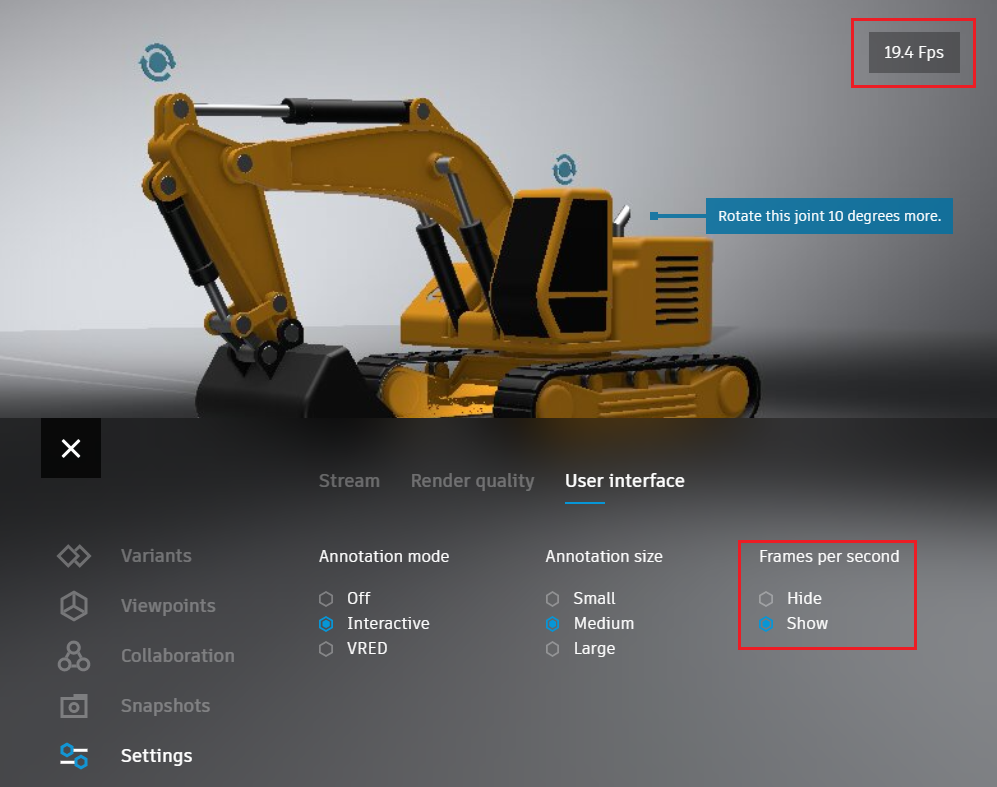
Provides functionality for interactive annotation creation, editing, and deletion to the VRED Stream App. Create the text, choose the color, then place the annotation directly in the viewport. Annotations are stored in the scene file. Besides streaming VRED annotations, you can switch to interactive HTML annotations in the Stream App.
Note: If the annotations aren't displayed, ensure Raytracing is disabled.Presenter
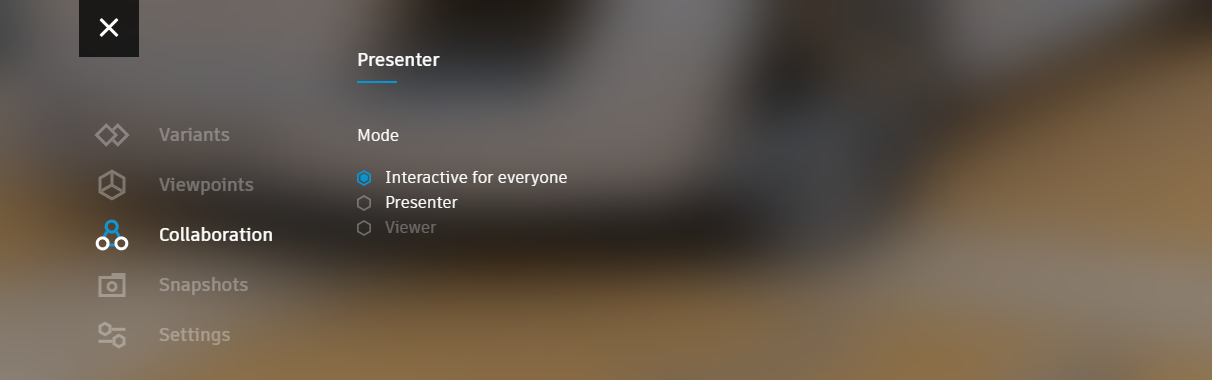
- Interactive for everyone - Enables interactivity for all participant (Presenter and Viewer). Use this so Viewers are free to explore and fully interact during the session. If the Presenter is not in a session, select this to provide interactivity to all present. See Interacting Within a Collaboration Session for Desktop Users and Interacting Within a Collaboration Session for HMD Users for the different interactions available to users.
- Presenter - This is the person hosting a session. This option provides the Presenter with access to all the settings, navigation, variants, etc., while locking out Viewers. If the Presenter closes their VRED application, Viewers can still view the stream; however, it will be in a frozen state.
- Viewer - This is anyone in a session who is not the Presenter. Their interactivity is determined by the Presenter. When Interactive for everyone is enabled, all settings, navigation, variants, etc. are available. When disabled, only the Presenter can interact within the session.
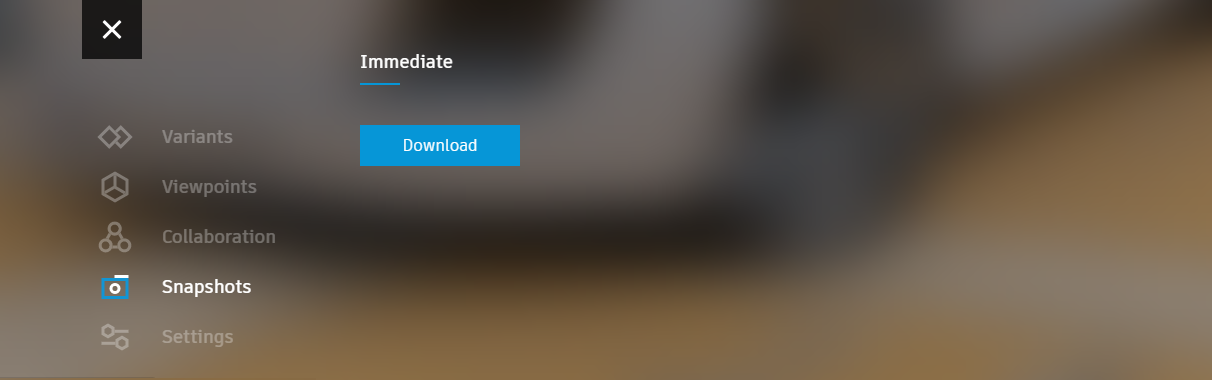
Snapshots
Takes screenshots of the scene directly from within the app and saves it to your Downloads folder. See Taking a Rendered Snapshot for another why to take a snapshot.
Settings
Provides options for changing render quality and streaming settings.
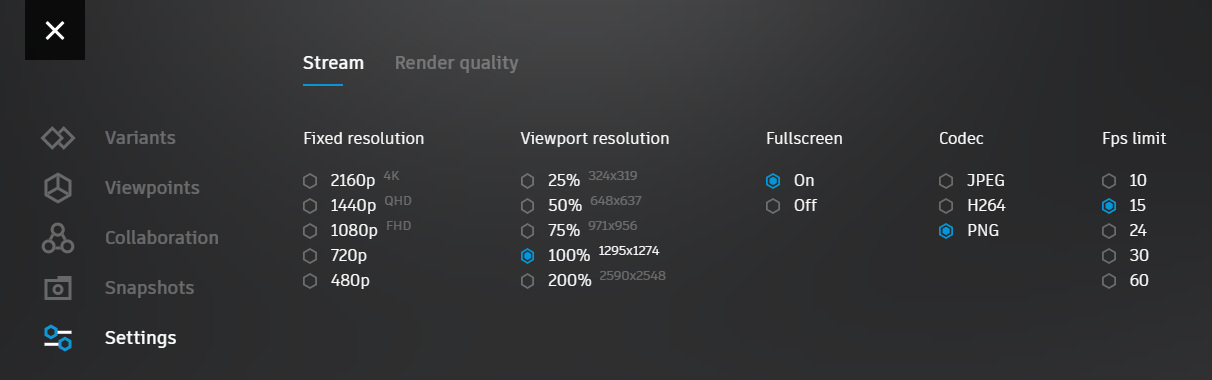
Stream
Use these options to set the resolution of the scene, viewport resolution, whether to view in fullscreen mode, and set the codec used.
Render Quality
Use these options to set the render mode, toggle anti-aliasing on or off, toggle raytracing downscale on or off, set the raytracing image samples, illumination mode, and realtime anti-aliasing level.
User Interface
Use these options to turn on or off annotations, switch between streaming or interactive annotations, set annotation size, and show or hide the frames per second.
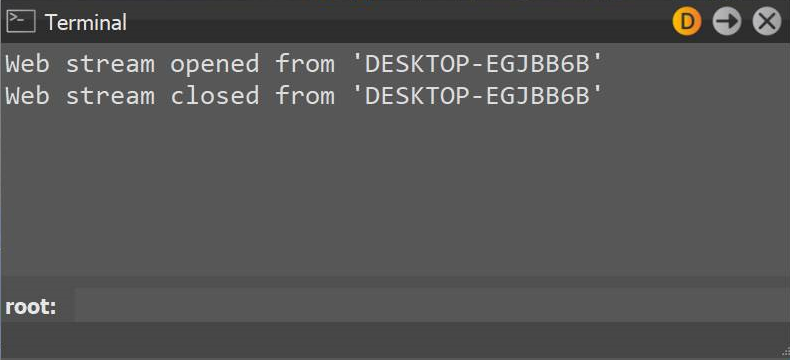
VRED will display a terminal message when the VRED Stream App is connected to VRED. It will also display one when your device disconnects from the VRED Stream App.
Dynamically Managing FPS
Dynamic FPS management has been implemented in 2021.3 for the web Stream App, so multiple clients can have different frame rates. Now, you can automatically adjust the fixed frame rate, matching the synchronization events from the client, so a slow client does not block others.
-
In the VRED Stream App, select Settings.
-
Change the frame rate, using the Fps limit settings.

Streaming the VRED Stream App to a Sceneplate
Stream content onto a sceneplate within your scene, using the VRED Stream App.
-
In the Sceneplate Editor, in the Properties section, set Content Type to Web.
-
Enter the URL from the VREDStreamApp into the Sceneplate Editor > Properties > Url field and press the Enter key.
Note:If
localhostwasn't changed when starting the VRED Stream App, use the default URL,localhost:888/apps/VREDStreamApp/Index.html.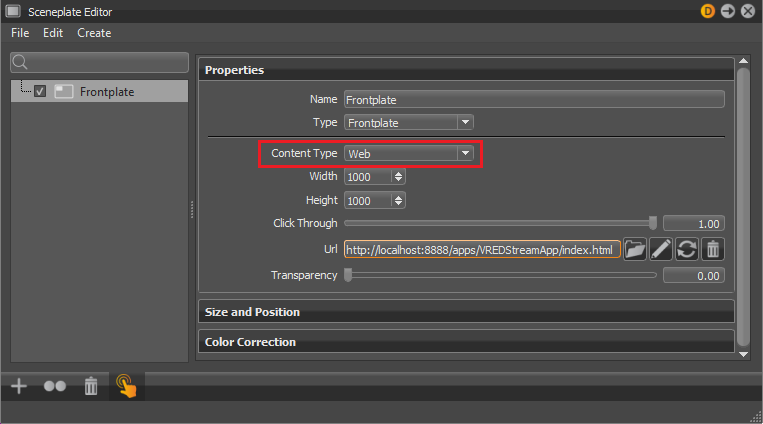
The sceneplate is now streaming the content. Any setting changes made from the sceneplate automatically affect the scene.
-
Use the parameters in the Sceneplate Editor to make changes to the sceneplate, such as size or position.
Creating an Annotation
- In the Stream App, select Collaboration > Annotations.
- Press CREATE.
- Select a color to set the annotation frame color.
- Enter your annotation to the Text window.
- Click OK.
Changing an Annotation Color
Sets the color of the annotation frame. Use it to differentiate one user's annotations from another's.
To change the color of an interactive HTML annotation, see Editing Interactive HTML Annotations.
- In the Stream App, select Collaboration > Annotations.
- Click the annotation to select it.
- Under Color, select a color.
- Click OK.
Positioning an Annotation
To reposition an interactive HTML annotation, see Editing Interactive HTML Annotations.
- In the Stream App, select Collaboration > Annotations.
- Click the annotation to select it.
- Press POSITION.
- In the Stream App viewer, click the new location to relocate the annotation.
- Click OK.
Editing an Annotation
To edit an interactive HTML annotation, see Editing Interactive HTML Annotations.
- In the Stream App, select Collaboration > Annotations.
- Click the annotation to select it.
- In the Text window, edit the text.
- Click OK.
Deleting an Annotation
To delete an interactive HTML annotation, see Editing Interactive HTML Annotations.
- In the Stream App, select Collaboration > Annotations.
- Click the annotation to select it.
- Press DELETE.
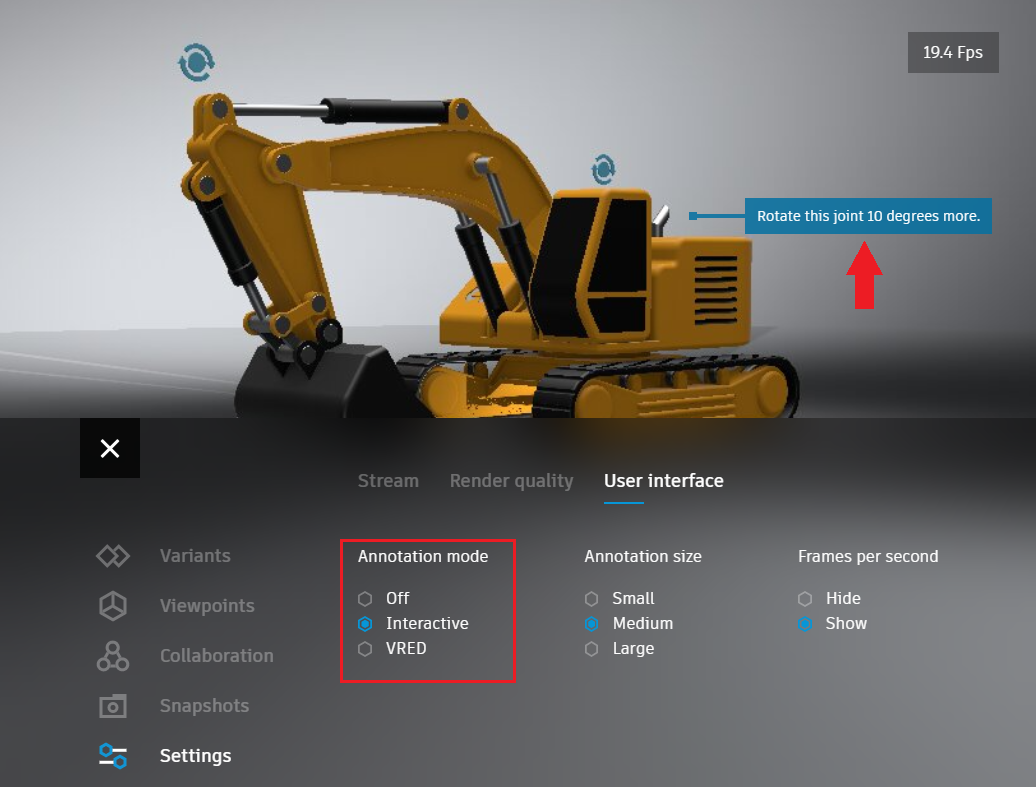
Making Annotations Interactive
-
In the Stream App, select Settings > User interface.
-
Under Annotation mode, click Interactive. The look of the annotations changes, indicating they are now interactive.
How to Return to Streaming Annotations
- In the Stream App, select Settings > User interface.
- Under Annotation mode, click VRED. The look of the annotations changes, indicating they are now streamed.
Changing the Size of an Interactive Annotation
- In the Stream App, select Settings > User interface.
- Under Annotation size, click the size you want. The annotations will automatically resize.
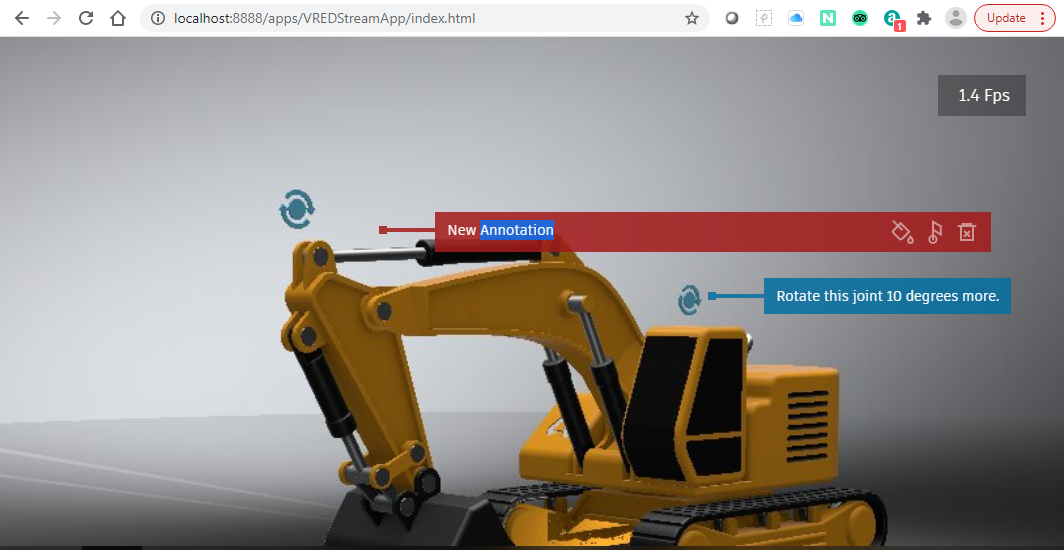
Editing Interactive HTML Annotations
When you click an interactive HTML annotation in the Stream App, it changes to display these tools:
 - Change the annotation color.
 - Reposition the annotation.
 - Delete the annotation.
Click the text of the annotation to edit its content.
Customizing your Stream
Use the Settings > Stream options to customize your stream.
-
In the Stream App, select Settings > Stream.
-
Select any of the following:
- Fixed resolution - To set the resolution of the streamed scene.
- Viewport resolution - To set the resolution of the viewport. This option is not available when in the Collaboration mode.
- Fullscreen - To display the scene either fullscreen.
- Codec - To set the format used for video encoding.
- Quality - To set the quality of the streamed video.
- Fps limit - To set the maximum frames per second for playback.
Customizing your Render Settings
Use the Settings > Render quality options to set the quality of the render.
-
In the Stream App, select Settings > Render quality.
-
Select any of the following:
- Render mode - To set the rendering mode used. Choose from OpenGL, CPU Raytracing, or GPU Raytracing.
- Anti-aliasing - To toggle anti-aliasing on or off. Use this to give surfaces a more realistic appearance, but be aware that the frame rate might be affected.
- Raytracing downscale - To set a level of downscaling to control the quality of the raytracing in the render view (Viewport) by controlling the calculation of the raytracing. Select the downscale quality level. See the Downscale video for more information.
- Raytracing image samples - To set the number of samples taken for the calculation of an image.
- Illumination mode - To set the default lighting mode for interactive and still frame anti-aliasing of materials. See Illumination Mode for a description of each setting.
- Realtime anti-aliasing - To set the level of realtime anti-aliasing applied. Choose from disabling it, so none is applied, to setting from low to high.
Displaying the Frame Counter
Display the frames per second as an overlay in the Stream App to monitor your streaming performance.
- In the Stream App, select Settings > User interface.
- Under Frames per second, click Show. The frame count will appear in the top right corner of the Stream App.
Hiding the Frame Counter
- In the Stream App, select Settings > User interface.
- Under Frames per second, click Hide.
Taking a Rendered Snapshot
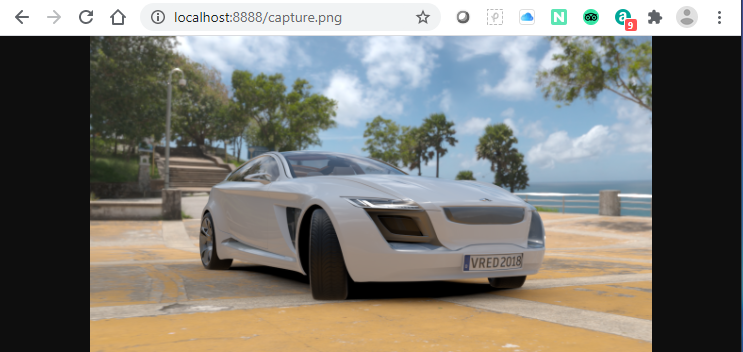
This feature enables Stream App users to immediate rendering of a snapshot, using either http://localhost:8888/capture.png or the Snapshots feature.
-
With a scene loaded in VRED, in a browser, enter http://localhost:8888/capture.png to render a snapshot of the current scene from the Stream App.
-
Start the VRED Stream App, click the = button, select Snapshots, then click Download to create a snapshot of the current scene and save it to your Downloads folder.
Streaming a PNG with an Alpha Channel
The PNG codec provides a way to stream a PNG image with a transparent background that can be placed over custom web content. It can also be used when an image with no visible compression artifacts is required. It creates a lossless image format, but requires more bandwidth.
- Start the Stream App.
- Click the = button, then Settings.
- Under Codec, select PNG to stream a PNG with an alpha channel.
Configuring Screen Resolutions
What if you want to configure screen resolution for a laptop and screen plate? You can configure the stream resolution relative to the browser window size. To achieve the perfect resolution for a laptop and screen plate, try either of these:
-
Join the stream session with your laptop, first. Adjust your browser's window size and set a relative resolution of 100%. Then a desktop user can join.
-
Join the stream session in whatever order you want. When 2 or more users are connected, open the Stream H264 or Stream JPEG from the VRED Hub in another browser and set the desired resolution using the query parameters in the browser's address field:
For example, http://localhost:8888/apps/VREDStream/index.html?width=1536&height=722 to set the resolution to 1536x722.
This will set the resolution for everybody. The width and height parameter can also be set to "auto" which means 100% of your browser's window.
Customizing Resolution or Quality
If want to work with a different resolution or quality settings not available in the VRED Stream App interface, add the query parameters in the browser URL.
For example, if you want the width set to 999, height to 333, and quality to 85, you would add ?width=999&height=333&quality=85 after localhost:8888/apps/VREDStreamApp/index.html. It would look like this:
localhost:8888/apps/VREDStreamApp/index.html?width=999&height=333&quality=85
Additionally, you can adapt the Stream App yourself with VRED 2021.3. Use the source code in the VRED Example folder.
Thanks to Shawn Collin-Lopez for asking this question and Norman Geirersback for providing the answer.