Maintenance plans can be used to schedule tasks required to make sure that the database performs well, such as keeping database and transaction log file sizes small and checking the database for inconsistencies.
Autodesk recommends that the plan be run at least once per week, during out of office hours.
In a Connected Workgroup Environment, this should be configured on each SQL Server.
Part of the Administrators tasks should be to regularly check that the plan ran successfully.
If the plan was configured for an earlier release of Vault Server, ensure that you check and update the plan in accordance with this article.
The following steps are universal across all versions of SQL in use with Vault Server (Express and Full SQL). The complete list of supported database engines is located in the product readme file.
- Login to the SQL Management Studio.
- Expand Databases, expand System Databases.
- Right Click on tempdb and select properties.
- Select the Files page.
- If using a multi-core system, additional data files should be configured, using the guidelines below. If using a single-core system, skip to step d below.
- Data files should equal the number of Logical\Virtual processors available. For example, if the machine has 12 Logical Processors, there would be 1x .mdf file and 11x .ndf files. If disk space is important, "Size" of 512MB can be used instead of 1024MB.
Note: In case of SQL 2016 or later, Data file will default to the lower value of 8 or number of logical cores as detected by setup. The value can be increased as required for a specific workload. The file names for secondary data files will follow the tempdb_mssql_#.ndf naming convention where # represents the file ordinal for each additional file.
- Click the Add button to add additional data files.
- Name the new file(s) tempdev_2, tempdev_3, … as needed.
- Set the size of each data file to 1,024 MB. If using a total of 8 datafiles, size of 512 MB can be used.
- Set Autogrowth to 100 MB, unrestricted growth for each data file.
- Set the LDF log file to combined data file total. (example; if there are 2 data files total, the resulting LDF should be set to size of 2048 MB)
- The results will appear similar the image below.
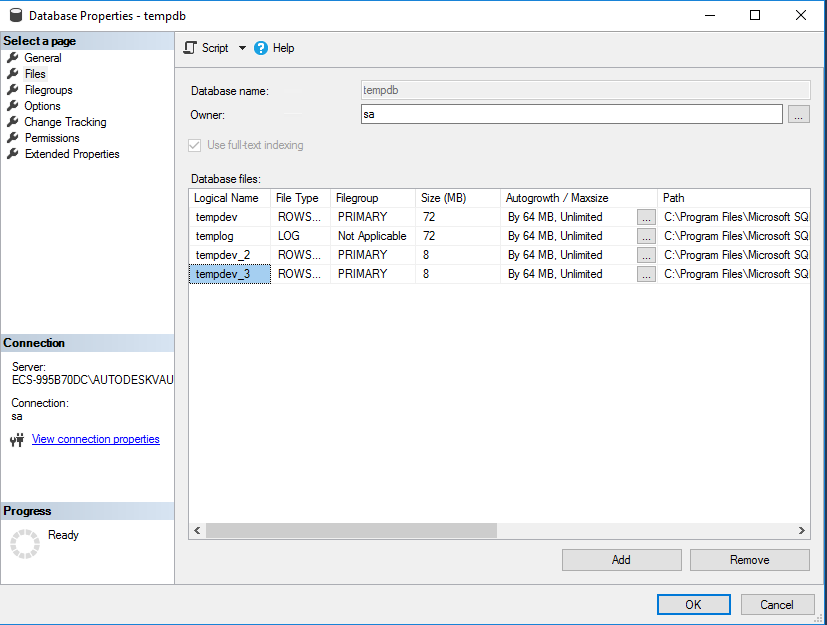
- Data files should equal the number of Logical\Virtual processors available. For example, if the machine has 12 Logical Processors, there would be 1x .mdf file and 11x .ndf files. If disk space is important, "Size" of 512MB can be used instead of 1024MB.
- Under the Options page, set the Recovery model to Simple and the Compatibility level to SQL Server 2012 (110).
Note: The system databases are not defined by Autodesk, and it is safe to leave them at the default compatibility level (2016 etc). The user databases, KVM, and other Vault databases should stay at compatibility level for 2012.
- Select OK.
Create a SQL Maintenance Plan for Full SQL
Maintenance plans can be used to schedule tasks required to make sure that the database performs well, such as keeping database and transaction log file size small and checking the database for inconsistencies.
SQL Standard/Enterprise 2012
- Verify that the vaults have been backed up with the Autodesk Vault Server Console before proceeding.
- Make sure that all users are logged out of the vault server.
- From the Control Panel, double-click Administrative Tools and then double-click the Services icon.
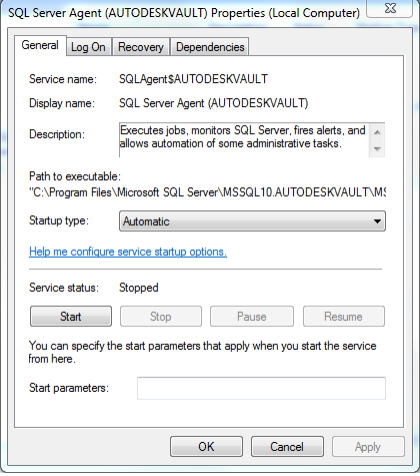
- Locate the SQL Server Agent (AUTODESKVAULT) service
- Right-click on the SQL Server Agent (AUTODESKVAULT) and select Properties.
- . Change the Startup Type to Automatic and start the service.
- Open the Microsoft SQL Management Studio and connect to the AutodeskVault instance. Use <ComputerName>\AUTODESKVAULT as the server name and press Connect.
- Right-click on the Vault database and select properties.
- On the Files page set:-
- the Autogrowth value for all <Vault> databases to by 100MB, unrestricted growth
- the Size value of all <Vault>_log files to 500MB
- the Autogrowth value for an <Custom_Library> files to 25MB
- the Autogrowth values for all _log files to By 10 percent, unrestricted growth
Or, in table form:
Logical Name
Size (MB)
Autogrowth
KnowledgeVaultMaster
By 10MB, unrestricted growth
KnowledgeVaultMaster_log
By 10 percent, unrestricted growth
<Vault>
By 100MB, unrestricted growth
<Vault>_log
500
By 10 percent, unrestricted growth
<Custom_Library>
By 25 MB, unrestricted growth
<Custom_Library>_log
By 10 percent, unrestricted growth
<Standard_Library>
By 25 MB, unrestricted growth
<Standard_Library>_log
By 10 percent, unrestricted growth
Note: A blank cell in the above table indicates that the default setting should not be changed.Grey cells, indicate default values and should be set to the above if they are different.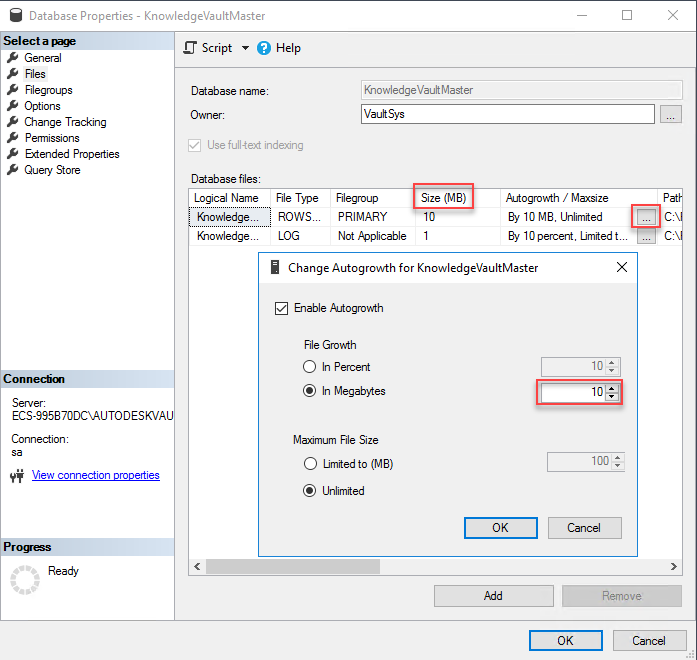
- On the Options page, change the Recovery Model to Simple, Compatibility Level to SQL Server 2012 (110) and change the Auto Shrink drop-down list to False.
- Perform these same steps for all of the KnowledgeVaultMaster, Vault, and Library Vault databases (steps 8 – 10).
- Expand the Management folder and select the Maintenance Plan folder.
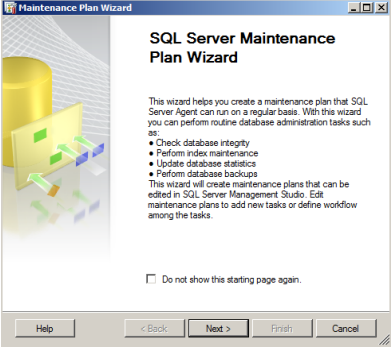
- Right-click on the Maintenance Plan folder and select Maintenance Plan Wizard, hit next if the following dialog appears.
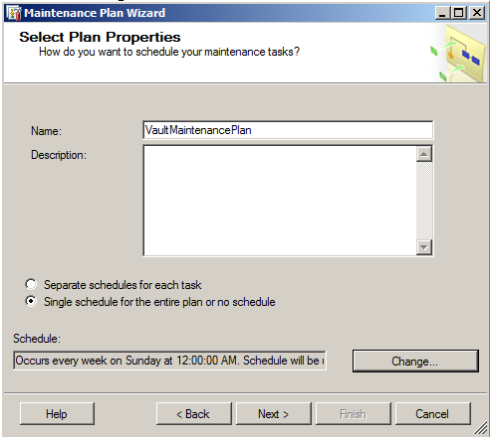
- In the Select Plan Properties dialog, enter Vault Maintenance Plan for the name and then click on the Change button to set the schedule.
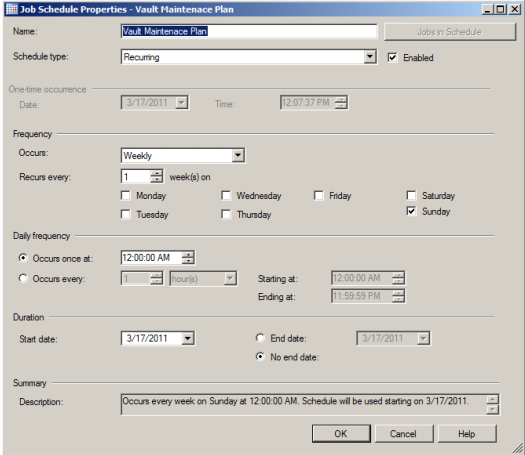
- In the Job Schedule Properties dialog, set the plan to run after an Autodesk Vault Server Console backup has completed. Depending on the size of your dataset, this schedule may have to be run on a different day and time of the week. You may want to run this task on a Saturday to determine the amount of time it will take to complete and then decide the best day and time to run this job on a regular basis.
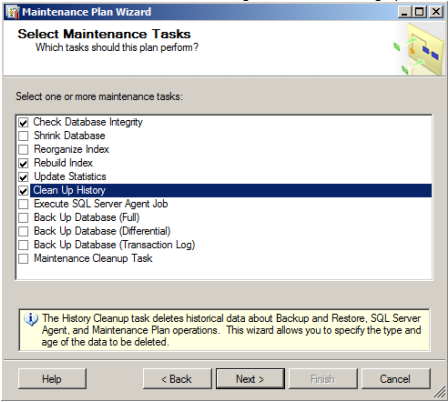
- In the Select Maintenance Task dialog, check the following options:
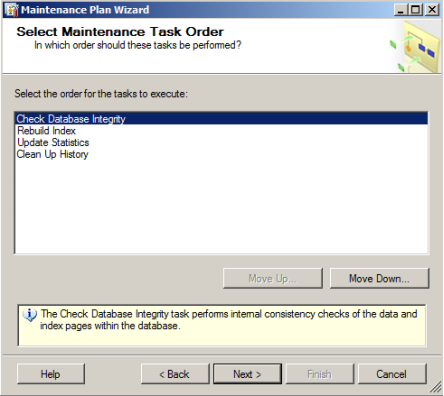
- In the Select Maintenance Task Order dialog, set the order to the following:
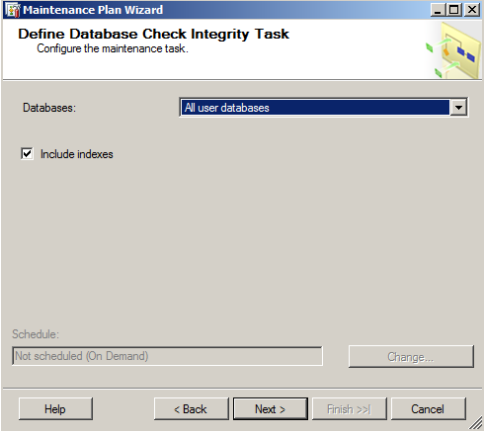
- In the Define Database Check Integrity Task dialog, select All user databases from the databases drop-down list and check the box next to Include Indexes.
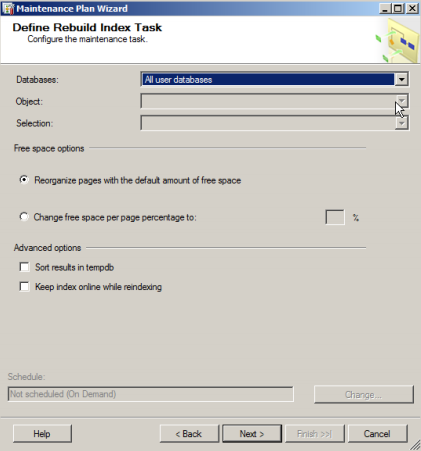
- In the Define Rebuild Index Task dialog, select All user databases from the Databases drop-down list.
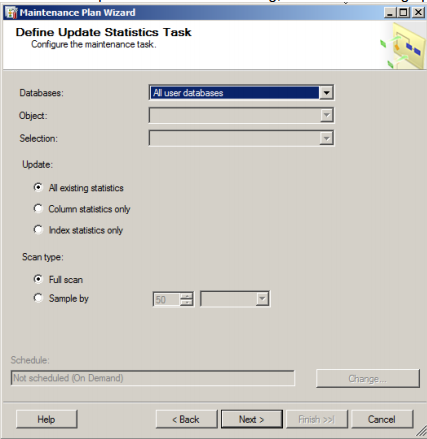
- In the Define Update Statistics Task dialog, select the following options.
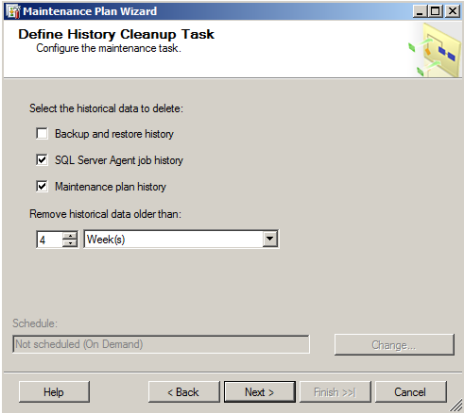
- In the Define Cleanup History Task dialog, select cleanup options as needed.
- In the Select Report Options dialog, specify the location for the maintenance reports.
- Click Next and then Finish.
Create a Maintenance Script for Microsoft SQL Express
Microsoft SQL Express does not allow you to create a maintenance plan inside of SQL Server Management Studio Express.
Make sure that the OS (Windows) user that is running the SQL maintenance plan has the sysadmin role inside of SQL.
Tempdb Modifications through the Command Prompt
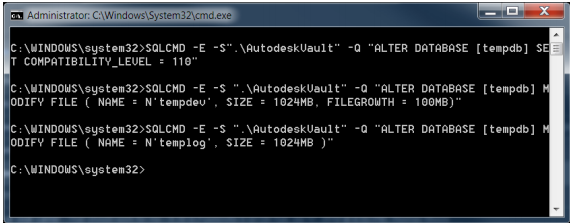
- Open the Command Prompt as Administrator.
- Copy and Paste each line below into the command prompt and press Enter.
SQLCMD -E -S".\AutodeskVault" -Q "ALTER DATABASE [tempdb] SET COMPATIBILITY_LEVEL = 110"
SQLCMD -E -S ".\AutodeskVault" -Q "ALTER DATABASE [tempdb] MODIFY FILE ( NAME =
N'tempdev', SIZE = 1024MB, FILEGROWTH = 100MB)"
SQLCMD -E -S ".\AutodeskVault" -Q "ALTER DATABASE [tempdb] MODIFY FILE ( NAME =
N'templog', SIZE = 1024MB )"
- If using a multi-core system, additional data files should be configured using the guidelines below. **Note The file system path used under FILENAME = should be the same location as the SQL data directory. In the example below, it is 'C:\Program Files\Microsoft SQL Server\MSSQL10.AUTODESKVAULT\MSSQL\DATA. You will want to modify the script to list your correct path.
- Data files should equal the number of Logical\Virtual processors available. For example, if the machine has 12 Logical Processors, there would be 1x .mdf file and 11x .ndf files. If disk space is important, "Size" of 512MB can be used instead of 1024MB.
Note: In case of SQL 2016 or later, Data file will default to the lower value of 8 or number of logical cores as detected by setup. The value can be increased as required for a specific workload. The file names for secondary data files will follow the tempdb_mssql_#.ndf naming convention where # represents the file ordinal for each additional file.
SQLCMD -E -S ".\AutodeskVault" -Q " ALTER DATABASE [tempdb] ADD FILE ( NAME =
N'tempdev_2', FILENAME = N'C:\Program Files\Microsoft SQL
Server\MSSQL10.AUTODESKVAULT\MSSQL\DATA\tempdev_2.ndf', SIZE = 1024MB,
FILEGROWTH = 100MB)"
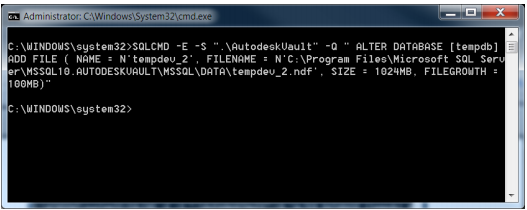
- If additional data files need to be created, simply modify the above example to reflect tempdev_3, etc, for both NAME and FILENAME.
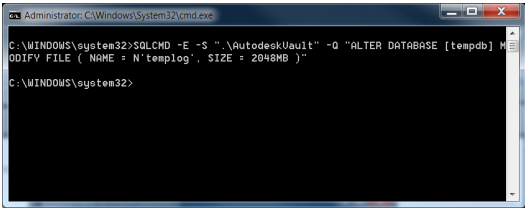
- Set the LDF log file to combined data file total. (example; if there are 2 data files total, the resulting LDF should be set to a size of 2048 MB).
SQLCMD -E -S ".\AutodeskVault" -Q "ALTER DATABASE [tempdb] MODIFY FILE (
NAME = N'templog', SIZE = 2048MB )"
- Data files should equal the number of Logical\Virtual processors available. For example, if the machine has 12 Logical Processors, there would be 1x .mdf file and 11x .ndf files. If disk space is important, "Size" of 512MB can be used instead of 1024MB.
As noted earlier in this section, if the SQL Server Management Studio is not installed, the tempdb database changes can be completed through the command prompt by performing the following:
Maintenance Plan
Copy the script below and paste it into a new file saved as VaultMaintenance.bat.
The following is an example of how to run the batch file from the root of C:\ against a database named Vault and output the results to a text file.
C:\VaultMaintenance.bat Vault > results.txt
REM This begins the maintenance plan.
@echo off
if "%1"=="" goto NOPARAM
set VAULTNAME=[%1]
set VAULTLOG=[%1_log]
@echo Setting %VAULTNAME% database compatibility to 110
sqlcmd -E -S ".\AutodeskVault" -Q "ALTER DATABASE %VAULTNAME% SET
COMPATIBILITY_LEVEL = 110"
@echo Setting %VAULTNAME% database recovery model to simple...
sqlcmd -E -S ".\AutodeskVault" -Q "ALTER DATABASE %VAULTNAME% SET RECOVERY
SIMPLE"
@echo Setting %VAULTNAME% database Autogrowth value...
sqlcmd -E -S ".\AutodeskVault" -Q "ALTER DATABASE %VAULTNAME%  MODIFY FILE
(NAME=%VAULTNAME%, FILEGROWTH=100MB)"
@echo Setting %VAULTNAME% database Log filesize...
sqlcmd -E -S ".\AutodeskVault" -Q "ALTER DATABASE %VAULTNAME% MODIFY FILE ( NAME =
%VAULTLOG%, SIZE = 512000KB )"
@echo Setting %VAULTNAME% database Autoclose to false...
sqlcmd -E -S ".\AutodeskVault" -Q "ALTER DATABASE %VAULTNAME% SET AUTO_CLOSE OFF
WITH NO_WAIT"
@echo Reindexing %VAULTNAME% database...
sqlcmd -E -S ".\AutodeskVault" -Q "USE %VAULTNAME% DECLARE tableCursor CURSOR FOR
SELECT NAME FROM sysobjects WHERE xtype in('U') DECLARE @tableName nvarchar(128)
OPEN tableCursor FETCH NEXT FROM tableCursor INTO @tableName WHILE
@@FETCH_STATUS = 0 BEGIN DBCC DBREINDEX(@tableName, '') FETCH NEXT FROM
tableCursor INTO @tableName END CLOSE tableCursor DEALLOCATE tableCursor"
@echo Updating Statistics on %VAULTNAME% database...
sqlcmd -E -S ".\AutodeskVault" -Q "USE %VAULTNAME% Exec sp_MSForEachTable 'Update
Statistics ? WITH FULLSCAN'"
goto EXIT
:NOPARAM
echo [FAIL] Please indicate Vault database
pause
:EXIT
REM This ends the maintenance plan.