Have you tried custom views to personalize the view of the data in Vault? Most systems hold huge amounts of data (files, folders, items, change orders, and custom objects) and it can be difficult to locate specific files without having adequate data filters.
In this article, we'll show you how to create custom views and modify them for your projects. By efficiently customizing your view, data management becomes tailored to your project.
Where Can I See Existing Views
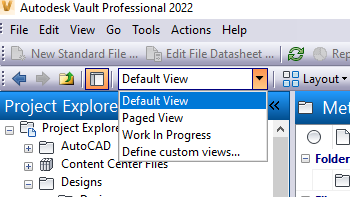
When you customize view, you are modifying the current view. The current view is in the Advanced toolbar. Click the down arrow to select another view option.
Create a Custom View
You can create and save custom views to store different view configurations.
- On the Advanced toolbar, click the down arrow, and select Define custom views.

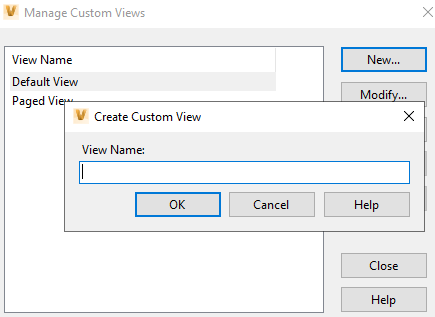
- In the Manage Custom Views dialog box, click New to create a new custom view.
- In the Create Custom View dialog box, enter a name, and then click OK.
You can also edit, copy, rename, or delete a custom view.
- Click Modify to change the settings of the selected view. Changes made to a view are automatically saved to the view definition.
- Click Copy to clone the settings of the selected view into a newly created view. You can only copy one view at a time.
- Click Rename to rename the selected view.
- Click Delete to remove the selected view. You can't delete the default views.
- Click Close to close the dialog box and apply the settings.
Edit a Custom View
Now that you have created a new custom view, let's modify it.
To modify a custom view:
- In the Manage Custom Views dialog box, select the custom view that you want to modify.
- Click Modify to change the settings of the selected view.
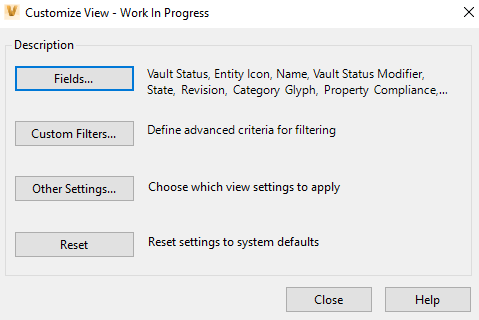
- In the Customize View dialog box, select what you would like to modify.
Customize View Fields
- Click Fields to configure the fields that you want to make available when this view is selected.
- In the Customize Fields dialog box, select the fields you want to make available.
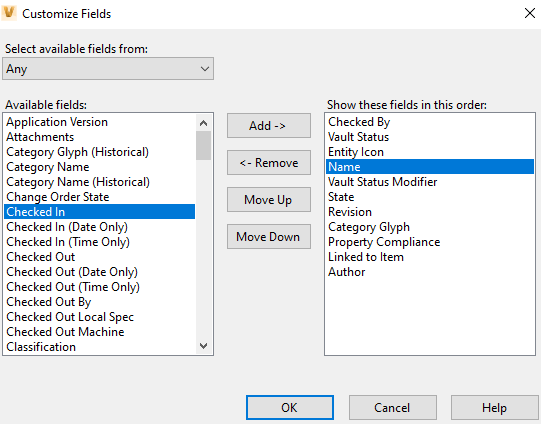
- Select a field from the Available fields list, and then click Add. The field is moved to the list of fields currently displayed in the view.
- To remove a field from the current view, select the field from the Show these fields in this order list, and then click Remove. The field is returned to the Available fields list.
- Change the order of the fields in the current view by selecting one from the Show these fields in this order list, and then clicking either Move Up or Move Down.
- Click OK.
- In the Customize Fields dialog box, select the fields you want to make available.
Custom Filters
- Click Custom Filters to filter data by text string or property values. Click the Basic tab to filter data using the text search, or click the Advanced tab to filter data by property values.

- In the Custom Filters dialog box, select the Advanced tab, and then select any property to filter by.
- Select a condition. This field determines the action of the filter.
- Enter the value that you want the filter to act on.
- Click Add to add the criteria to the filter.
- Click OK to close the dialog box or add more criteria.
This feature allows you to refine the list of data down based on any property, action, and value combination.
Customize Additional View Settings
- Click Other Settings to customize grid options, auto preview for comments, and column sizing.
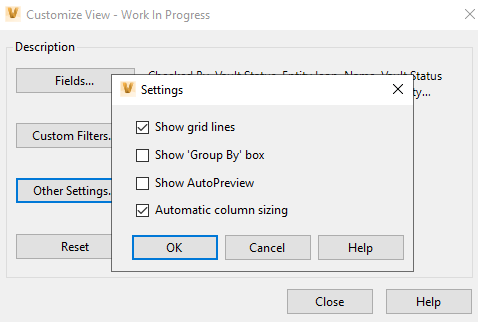
- In the Settings dialog box, select:
- Show grid lines - Turns grid lines on or off when the custom view is chosen. This is enabled by default.
- Show 'Group By' box - Toggles the visibility of the 'Group By' box when the custom view is chosen.
- Show Auto Preview - Toggles Auto preview on and off when the custom view is chosen.
- Automatic column sizing - Toggles the grid column sizing when the custom view is chosen. This is enabled by default.
- Click OK to close the dialog box.
- Click Fields to configure the fields that you want to make available when this view is selected.
You can restore the original view settings by clicking Reset in the Customize View dialog box.
General View Information
- The main pane, change order view, and preview views are customized independently of each other. Custom settings do not apply to all panes.
- When a custom view is selected on a folder, that view is remembered for that folder. The view is not used for all other folders.