The most basic selection techniques use either the mouse, or the mouse in conjunction with a keystroke.
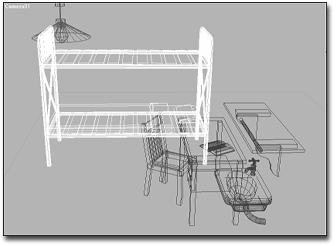
Bed selected in wireframe
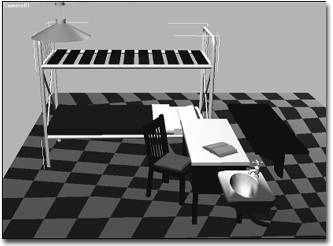
Bed selected in shaded view with Selection Brackets enabled
Procedures
To select an object in the viewport:
- Click one of the selection buttons on the toolbar:
 (Select Object),
 (Select And Move),
 (Select And Rotate),
 (Select And Scale), or
 (Select And Manipulate).
Alternatively, right-click in a viewport to open the quad menu, and from the Transform menu choose Move, Rotate, Scale, or Select.
- In any viewport, move the cursor over the object you want to select.
The cursor changes to a small cross when it’s positioned over an object that can be selected.
The valid selection zones of an object depend on the type of object and the display mode in the viewport. In shaded mode, any visible surface of an object is valid. In wireframe mode, any edge or segment of an object is valid, including hidden lines.
- While the cursor displays the selection cross, click to select the object (and to deselect any previously selected object).
A selected wireframe object turns white.
In shaded views, by default selected objects appear with edged faces. You can also opt to display selected objects with white brackets at the corners of their bounding boxes.
Tip: To cause brackets to appear around selected objects in non-wireframe viewports, click [+] in a viewport to open the General Viewport Label menu, choose Configure Viewports, and on the Visual Style & Appearance panel, in the Selection group, turn on Selection Brackets.
To select all objects do one of the following:
- Choose Edit menu
 Select All.
This selects all objects in your scene.
- On the keyboard press Ctrl+A.
To invert the current selection do one of the following:
- Choose Edit menu Select Invert.
This reverses the current selection pattern. For example, assume you begin with five objects in your scene, and two of them are selected. After choosing Invert, the two are deselected, and the remaining objects are selected.
- On the keyboard press Ctrl+I.
To extend a selection:
- Hold down
Ctrl while you click to make selections.
This adds the objects you click to the current selection. For example, if you have two objects selected and Ctrl+click to select a third, the third object is added to the selection.
Holding down Ctrl also works with Selecting by Region.
Note: In versions of 3ds Max prior to 3ds Max 2011, holding down the Ctrl toggled an object’s selection state. That is no longer the case. To add an object to a selection, use Ctrl. To remove an object from a selection, use Alt.
To reduce a selection:
- Hold down
Alt while you click objects.
This removes the objects you click from the current selection. For example, if you have three objects selected and Alt+click one of them, the third object is removed from the selection.
Holding down Alt also works with Selecting by Region.
To lock a selection:
- Select an object.
- Click
 (Selection Lock Toggle) on the status bar to turn on locked selection mode.
While your selection is locked, you can drag the mouse anywhere on the screen without losing the selection. The cursor displays the current selection icon. When you want to deselect or alter your selection, click the Lock button again to turn off locked selection mode. The keyboard toggle for locked selection mode is Ctrl+Shift+N.
To deselect an object, do one of the following:
- Hold down the Alt key, and either click an object, or drag a region around the object to deselect it.
- To deselect all objects in the scene, choose Edit menu Select None, or click an empty area of a viewport anywhere outside the current selection.
Selection Preview
When you move the mouse over objects in Nitrous viewports, a yellow outline shows the objects you can click to select. When you've selected an object, a blue outline shows the selection.
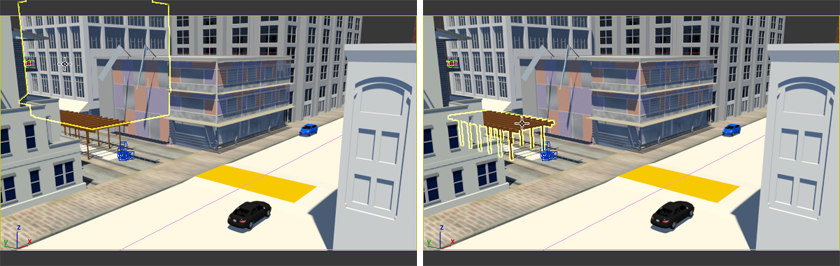
A yellow outline shows objects you can click to select.
A blue outline shows selected objects.
When objects overlap, the outline appears only for the closest or foremost object under the cursor. If an object is completely obscured by another object, there is no preview. Also, the yellow outline appears around the entire object, whether or not it's partly behind or inside another object in the viewport.
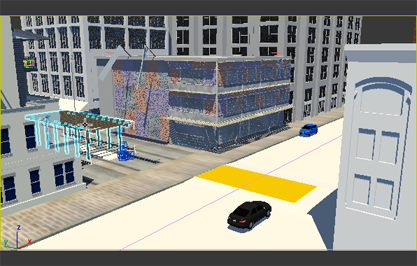
Region selection does not display the preview outline.
To disable the selection preview or the selection outline, or change their appearance, use Customize Preferences Viewports panel.