The Plug-in Manager lets you manage plug-ins. The Plug-in Manager provides a list of all plug-ins found in the 3ds Max plug-in directories, including the plug-in description, type (object, helper, modifier, and so on), status (loaded or deferred), size, and path. The Plug-in Manager provides options to load any plug-in, regardless where it resides on disk. Unlike the File Properties dialog, which only lists plug-ins used in a scene, the Plug-in manager lists all loaded plug-ins, and allows you to manage them.
Interface
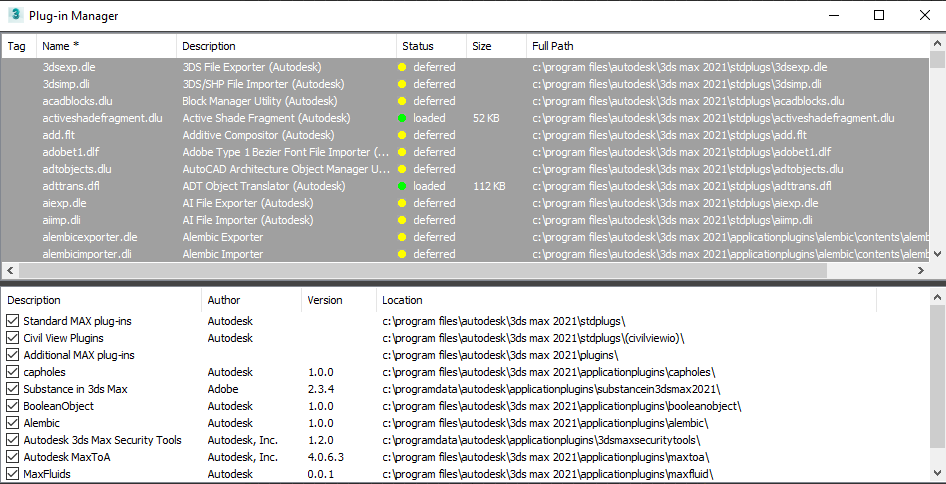
When you start the Plug-in Manager, it scans through all the loaded plug-ins (from the location listed at the bottom of the dialog) and lists them. Note that the Plug-in Manager does not list scripted plug-ins, nor .NET plug-ins, only C++ plug-ins. The information is divided up into columns as described following.
- Tag
-
Use the right-click menu and select Tag Selected to add a check mark for selected plug-ins. Tagging plug-ins lets you perform right-click menu actions on them. Thus you can tag multiple plug-ins and perform a single operation on all of them.
- Name
-
The filename of the plug-in.
- Description
-
A description of the plug-in.
- Status
-
Indicates whether the plug-in is loaded (green) or deferred (yellow). A deferred plug-in is not yet loaded into memory, but is available to load when it is required.
- Size
-
File size of the plug-in.
- Full Path
-
The disk location of the plug-in file.
Plug-in Directories and Plug-in Packages
3ds Max loads plug-ins from several locations.
The Plug-in Manager uses the plug-in directories listed in plugin.ini, Plugin.UserSettings.ini, and the default plug-in bundle paths (the location where Autodesk App Store plug-ins are installed). It also displays the directories for plug-in packages that have been loaded by 3ds Max.
You cannot configure paths in the Plug-in Manager, but you can configure some of these paths with the 3rd Party Plug-Ins Path Configuration tab of the Configure User Paths dialog. You can display or hide all the plug-ins in a directory by toggling its checkbox.
- Description
-
Shows directory description.
- Author
- Shows the author of the plug-in bundle in the directory (Autodesk or third-party provider), if all the plug-ins or bundles in the directory share a common author.
- Version
- Shows the version of the plug-in bundle in the directory, if the directory contains a single plug-in or bundle. This field is blank if there are multiple items in the directory.
- Location
-
The path of the plug-in directory.
Right-Click Menu
The right-click menu for the Plug-in Manager works in the list of plug-ins, and in the blank area beneath the list. It does not work in the list of plug-in directories. The commands apply to two possible states for the listed plug-ins: selected (that is, highlighted) and tagged (a check mark appears to the left of the plug-in name).
- Selected Plug-ins
-
To load plug-ins, highlight one or more plug-ins, choose this item, and then choose Load.
- Clear Selection
-
Removes highlighting from all items in the list.
- Tagged Plug-ins
-
To load tagged plug-ins, choose this item, and then choose Load.
- Tag Selected
-
Tags all highlighted plug-ins.
- Clear Tags
-
Clears all tags.
- Load New Plug-in
-
Loads a plug-in from the hard drive. Use the file dialog to locate the plug-in, and then click Open.
- Refresh View
-
Refreshes the list of plug-ins.