For legacy display drivers (Direct3D and OpenGL), the Lighting And Shadows tab sets preferences for lighting and shadow display in shaded viewports. For Nitrous display viewports, lighting and shadow controls appear in the Viewport Label menus.
Interface
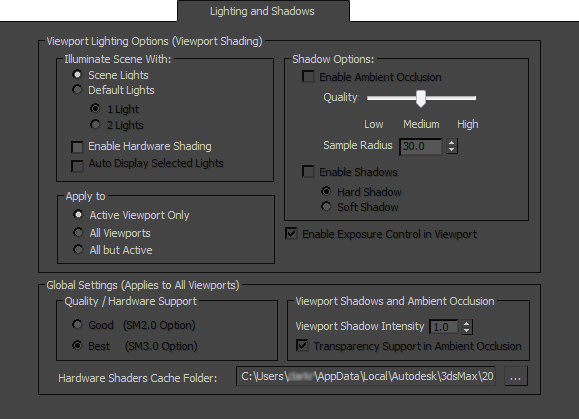
Viewport Lighting Options (Viewport Shading)
Illuminate Scene With group
- Scene Lights (The default.) Illuminates the viewport using light objects in the scene.
-
Default Lights Illuminates the viewport using the default lights. If no lights exist in the scene, the default lighting is used automatically, even when Scene Lights is chosen.
Sometimes the lighting you create in the scene can make objects difficult to see in the viewport. The default lighting displays the objects with even illumination. You can use either one or two lights. By default, 3ds Max uses one default light.
- 1 Light (The default.) Provides an over-the-shoulder light with 20% faster redraws at the expense of less natural illumination.
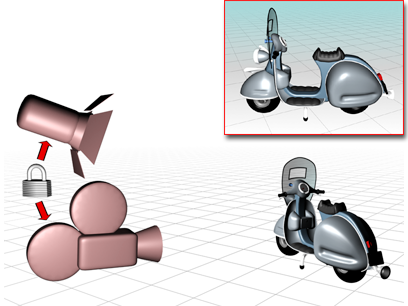
A single default light is linked to the camera and moves when you change your viewport point of view.
- 2 Lights Provides more natural illumination, but slower viewport performance.
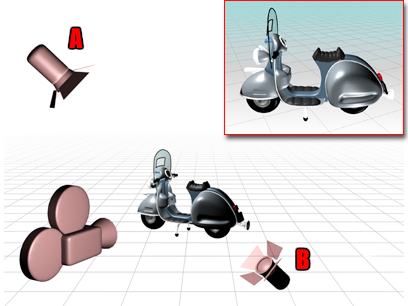
Two default lights are placed opposite to each other.
The key light, A, is in front of the object, on the upper-left side, while the fill light, B, is behind on the lower-right side.
- 1 Light (The default.) Provides an over-the-shoulder light with 20% faster redraws at the expense of less natural illumination.
- Enable Hardware Shading
- When on, the viewport is displayed using your system’s hardware shader. Default=off.
Most of the remaining settings on this panel are available only when Enable Hardware Shading is on.
- Auto Display Selected Lights
- When on, light from selected lights is automatically displayed in shaded viewports. Default=off.
Available only when Enable Hardware Shading is on.
Apply To subgroup
These options set the scope of the settings in the main Viewport Lighting Options group.
- Active Viewport Only (The default.) Settings apply only to the active viewport.
- All Viewports Settings apply to all viewports in the current configuration.
- All but Active Settings apply to other viewports in the current configuration, but not the active viewport.
Shadow Options group
These options are available only when Enable Hardware Shading is on in the Viewport Lighting Options group.
- Enable Ambient Occlusion
-
When on, previews the effect of ambient occlusion in the viewport. Default=off.
You need to be using the Best (SM3.0) option to preview ambient occlusion.
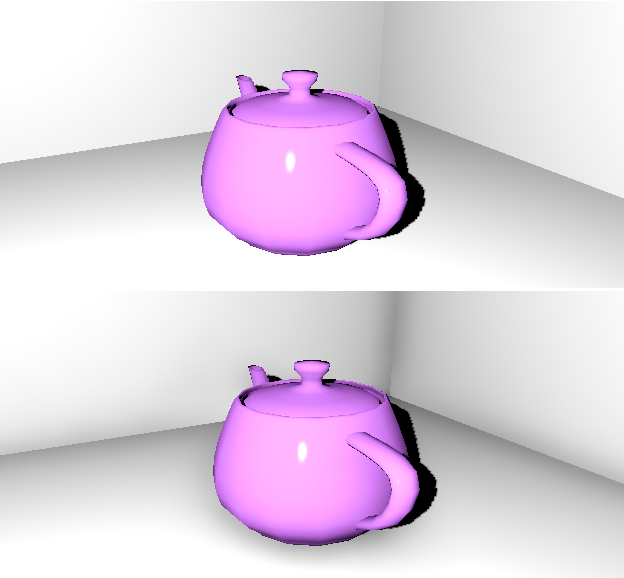
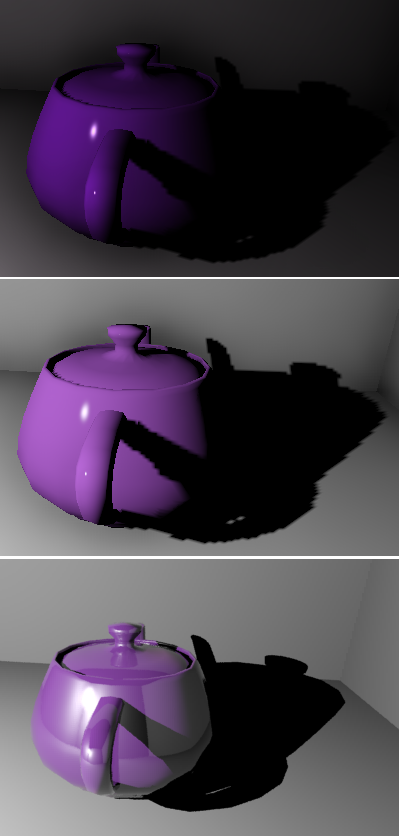
Top: Viewport ambient occlusion off
Bottom: Viewport ambient occlusion on, using default settings. Note the realistic shadowing in the corners and around the teapot.
Note: Viewport ambient occlusion is a global effect, and is not affected by material and other local settings.- Quality slider Sets the quality of the ambient occlusion preview. You can choose Low, Medium, or High. Default=Low.
- Sample Radius Sets the sample radius, in 3ds Max units, to use when looking for occluding objects. Default=30.0.
- Enable Shadows
-
When on, previews shadows in viewports. Default=off.
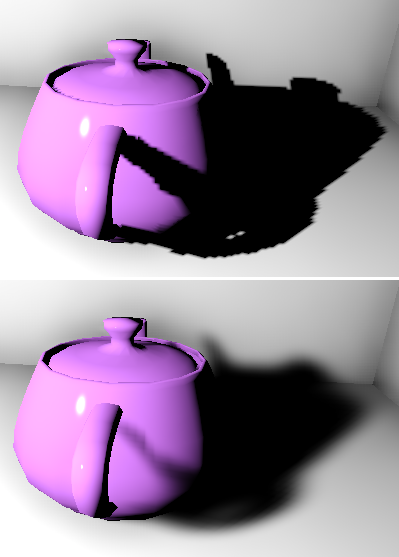
Top: Viewport shadows with hard edges
- Hard Shadow (The default.) Uses hard edges for shadow previews.
-
Soft Shadow Uses soft edges for shadow previews.
You need to be using the Best (SM3.0) option to preview soft-edged shadows.
Bottom: Viewport shadows with soft edges
- Use Environment Background Color
-
When on, displays the viewport using the environment background color. Default=off.
This option does not support background environment maps.
Available only when Enable Hardware Shading is on in the Viewport Lighting Options group.
- Enable Exposure Control in Viewport
-
When on, displays the viewport using the active exposure control. Default=off.
You need to be using the Best (SM3.0) option to preview exposure control.
Top: Viewport without exposure control
Center: Viewport with exposure control
Bottom: Rendered output (without final gathering)
Available only when Enable Hardware Shading is on in the Viewport Lighting Options group.
Global Settings (Applies to All Viewports)
These options are available only when Enable Hardware Shading is on in the Viewport Lighting Options group.
Quality / Hardware Support group
- Good (SM2.0 Option) Displays shadows at the SM2.0 level.
-
Best (SM3.0 Option) Displays shadows at the SM3.0 level, with opacity mapping.
Only the Best level allows you to preview soft-edged shadows, ambient occlusion, or tone mapping.
Viewport Shadows and Ambient Occlusion subgroup
- Viewport Shadow Intensity
- Sets the intensity of shadows in the viewport preview, with 1.0 being full intensity, and zero being no intensity (shadows are invisible). Default=1.0.
- Transparency Support in Ambient Occlusion
- When on, the ambient occlusion preview takes into account the transparency of objects. Default=on.
Note: When you render using ambient occlusion, transparency is always used in the calculation.
- Hardware Shaders Cache Folder
- Manages the location of hardware shaders on your computer.
[cache folder path] Displays the path of the folder used to save hardware shaders.
The default location is in your user settings: /users/<username>/appdata/local/autodesk/3dsmax/2016 - 64bit/enu/plugcfg/.
 Open Configure System Paths Click to display the Configure System Paths dialog, which lets you choose an alternate location for saving hardware shaders.