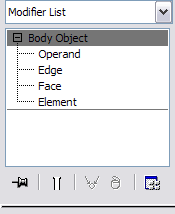
When you work with Body Objects (also Join Bodies and Body Cutter objects) in 3ds Max, you’ll find four sub-object levels available on the modifier stack: Operand, Edge, Face, and Element.
Because Body Objects are not meshes but instead are defined procedurally, their structure differs from that of objects typically found in 3ds Max. For example, the entire circumference of a round object such as a sphere or cylinder can comprise a single face, as shown in the following illustration:
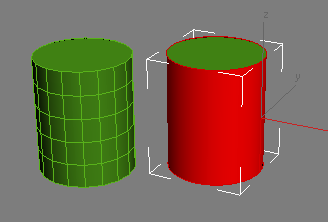
Left: Mesh cylinder has many faces.
Right: Body Object cylinder has only three faces: The top, bottom, and one side.
Following are descriptions of the different sub-object levels:
- Operand
- An operand is a component of an compound object created with Join Bodies or Body Cutter. You can transform Body Object sub-objects only at the Operand level.
The Operand level is available for all Body Objects, but is applicable only to Join Bodies and Body Cutter (that is, Boolean-type) objects. After combining objects using either of these object types, you can access the Operand sub-object level to move the sub-objects around, for example, to cut one shape out of another.
It is not possible to transform Edge, Face, or Element sub-objects at all. However, other operations are available at these levels, as detailed following:
- Edge
- At the Edge level, you can combine edges by welding them.
For best rendering results, it’s generally desirable to avoid unwelded, or “open” edges. You can see the number of open edges in the numeric display at the bottom of the Editable Body Object rollout. Also, open edges are drawn in blue in the viewports, as shown in the following image:
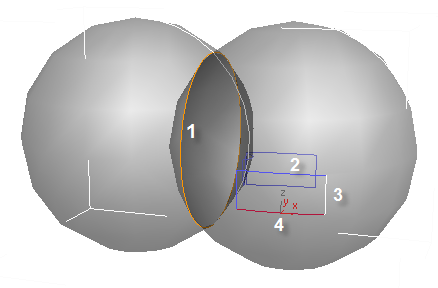
Edges are drawn in four different colors in the viewports to show their state:
1. Orange: Non-manifold edge (connected to more than two faces)
2. Blue: Open (unwelded) edge
3. White: Welded edge
4. Red: Selected edge
Incidentally, the orange non-manifold edge in the preceding illustration was obtained by joining two spheres using the Intersect + Merge Faces operation.
At the Edge sub-object level, you can weld specific pairs of edges by selecting them both (region selection is useful here) and then using Weld Selected on the Editable Body Object rollout. Or you can simply use Weld All to weld all open edges.
Note: It’s important to distinguish between geometry edges and display curves that are used purely for visualizing the Body Object shape in the viewport. The latter are produced by adjusting the Viewport Display Settings Curve Display group
  Lines U/V settings, and cannot be selected. To see edges that can be selected, access the Edge sub-object level and press Ctrl+A (Select All).
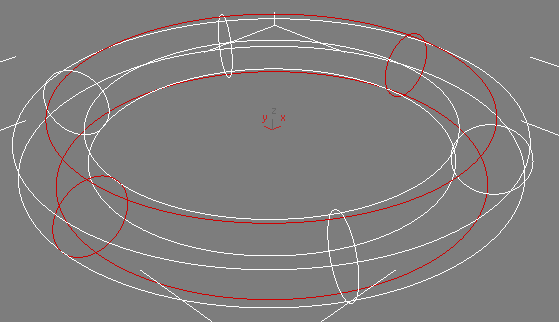
Torus converted to Body Object format, displayed as Curves, with Lines U and V both set to 2. The geometry edges are red (selected), while the display-only curves are white.
- Face
- A face in a Body Object is the part of a surface surrounded by one or more edges. Unlike faces in mesh objects, a face in a Body Object is not necessarily planar. At the Face level, you can use all commands on the Editable Body Object rollout; a selection is necessary for the “Selected” commands.
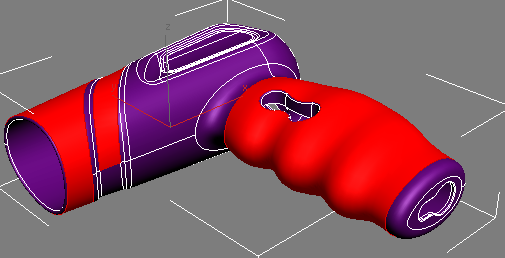
Hair dryer (from Autodesk Inventor) with some faces selected
- Element
- An element of a Body Object is similar to an element of a mesh object: a collection of contiguous faces, physically isolated from the rest of the faces. Most typically, multiple elements are created when combining objects with the Attach command. Selecting an element is the same as selecting all of the faces in the element.