Maps provide images, patterns, color adjustments, and other effects you can apply to the visual/optical components of a material.
Without maps, material design in 3ds Max is limited. Maps give the Material Editor its full flexibility, and can give you dramatic results.

Spheres with various maps applied to them (as well as a reflection map applied to the surface beneath them)
The simplest use of a map is to assign a pattern to a material's Diffuse color. Using Diffuse Color maps is also known as "texture mapping." It “paints” an image or pattern onto geometry the material is applied to.
Map Terminology
The names of individual map types describe the pattern or effect they create, such as Checker map, Bitmap, Gradient, Flat Reflection, and so on.
The term "texture map" is interchangeable with "diffuse map"; that is, a texture map applies colors to geometry, as opposed to a map used to create reflections, bumps, and so on.
Navigating the Material/Map Tree
When you build a material of any complexity, you are building a material/map tree. The root of the tree is the material itself. The branches or “children” are the maps you have assigned to the material's components. Some maps can themselves contain maps (for example, a map applied to one color of a Checker map), so the tree can be more than two levels deep, and can actually be as deep as you need it to be.
In the Compact Material Editor, you can navigate the tree with the buttons  (Go to Parent) and
  (Go Forward to Sibling). (To go down in the tree, click the map button itself.) Clicking
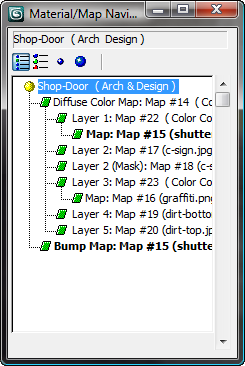
  (Material/Map Navigator) displays a dialog that shows the map hierarchy.

The Material/Map Navigator dialog
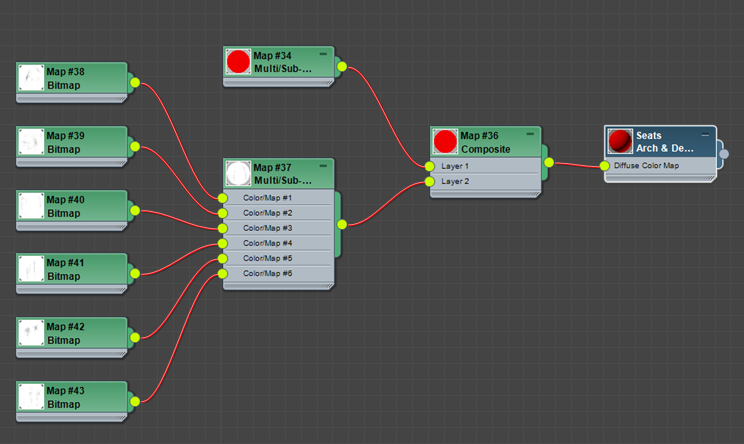
In the Slate Material Editor, you can view the Material/Map tree as a node graph.

A four-level tree that uses Multi/Sub maps and a Composite map