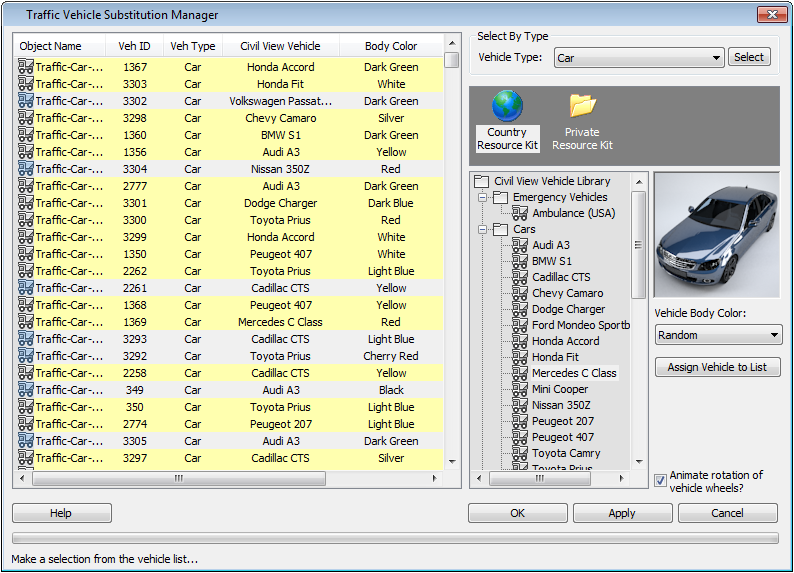
This panel allows the simple box geometry initially applied to each imported vehicle to be substituted with a full vehicle mesh.
The panel uses the standard vehicle library from Civil View as the source for vehicle meshes, and operates in a similar way to the Civil View Object Placement Style Editor.
The panel supports:
- Random vehicle assignments based on imported and stored vehicle types.
- Random body color assignments (only for vehicles that support this feature).
- Instancing of vehicles that share common vehicle and body-color types. This allows the total size of the underlying 3ds Max file to be optimized as much as possible.
- Re-assignment of individual specific vehicle types using re-substitution from this panel at any point in time.
- Optional automatic rotation of wheels on generated vehicle geometry. See below.
The combination of support for random vehicle body types and vehicle body colors makes it easy to realistically show heavy traffic in an animation, even when only a limited vehicle library is available for use.
Interface

- [vehicle object list]
- Lists all imported traffic in the current 3ds Max scene. Each entry in the list represents a single vehicle object originally generated by Civil View. For each vehicle object, the following information is displayed:
- Object Name The name of the vehicle object in 3ds Max.
- Veh[icle] ID The original unique identifier for each imported vehicle, which is derived from the source traffic data file.
- Veh[icle] Type The original vehicle type for each imported vehicle, which is derived from the source traffic data file.
- Civil View Vehicle Indicates the type of Civil View vehicle assigned to the displayed vehicle object. This field will be blank until vehicle substitution has been carried out for the first time on this vehicle.
- Body Color Indicates the vehicle body color assigned to the displayed Civil View vehicle object. This parameter is not currently supported by low-poly cars or RPC vehicles.
- Faces An indication of the geometric complexity of each vehicle. Important: Large numbers of vehicles with complex geometry can result in slow rendering times.
Select By Type group

You can select a vehicle object to receive surface tracking in one of two ways:
- By selecting vehicles individually from the main vehicle object list.
- By using the "Select By Type" option to select all vehicles in the list that match a specific vehicle type.
Use the drop-down list to select the type to substitute, then click Select.
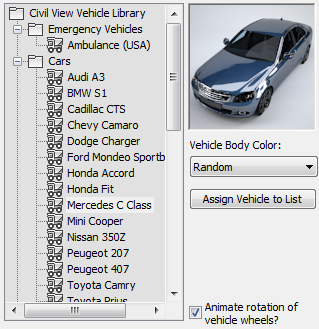
[vehicle library selection view]

Lets you choose random or individual Civil View vehicle types to apply to selected entries in the vehicle object list.
Use this panel to decide which vehicle meshes from the standard Civil View Vehicle Library to assign to the current selection of vehicles from the main vehicle object list. To assign vehicle library definitions to selected vehicle objects, either:
- Select a specific vehicle type, then click Assign Vehicle To List.
3ds Max viewports don't show the substitution until you click the Assign button.
- Select a vehicle sub-category such as Cars, Buses, or Trucks. Civil View assigns vehicles at random from within the specified sub-category. Click Assign Vehicle To List to complete the assignment.
3ds Max viewports don't show the substitution until you click the Assign button.
For instructions on how to customize the Civil View vehicle object libraries, see Civil View Object Library Overview.
- Animate rotation of vehicle wheels?
- When on, the wheels on generated vehicles rotate, appropriate to the speed of the vehicle at any given time. Default=on.
You can turn off this option to reduce the performance overhead when you work with large traffic datasets. Depending on the location of cameras in your scene, it's possible that rotating wheels might not be visible from your chosen viewpoint in the scene.
Wheel rotation works only for vehicles in the Object Library that have been prepared to meet specific requirements. For more details, see Vehicle Library.