About blend curves
Blend curves allow you to create curves by specifying constraints on their shape.
In the Curves tool palette, select the Blend Curve Toolbox  .
.
Blend curves provide higher-level, simpler methods for shaping and manipulating curves. They provide a level of abstraction on top of the actual geometry of the curve. Blend curves let you focus on what the curve needs to do, and have the system calculate the right curve to fulfill those requirements.
Blend curves are normal NURBS curves with more construction history: you can use all the normal curve tools on blend curves, and when you are not using blend curve tools, they look like any other curve.
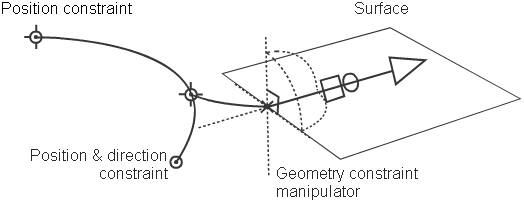
Blend curves are controlled by blend points acting as constraints:

You create the curve by setting up the constraints, such as
- what points in space the curve should pass through,
- which surfaces it should be tangent to,
- which existing curves the blend curve should intersect,
- what direction it should be traveling at a certain point,
...and so on. Alias draws the curve to satisfy the constraints, and automatically updates the curve when the constraints, or the objects the curve is constrained to, change.
Types of blend points
There are three main types of blend points.
Location: forces the curve to pass through the blend point’s location in space.
This is the type you create when you first draw a blend curve.
Direction: forces the curve to pass through the blend point’s location in space traveling in a certain world space direction.
There are two subtypes of direction:
- Directed: you set an actual direction for the curve tangent. Use this type when the specific tangent direction at the point of the blend point is important.
- Parallel: you set a line along which the curve passes (in either direction) at the blend point. This is easier to enforce and results in better curve continuity.
Geometry: forces the curve to pass through a point on a curve or surface and travel in a direction relative to that curve or surface.
The following table shows the icons used to represent the different constraints:
| Type | Not attached | Attached to blend curve | Attached to regular curve |
|---|---|---|---|
| Location |  |  |  |
| Direction |  |  |  |