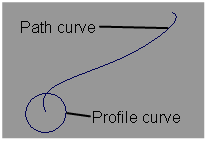
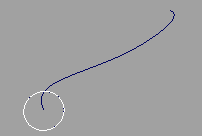
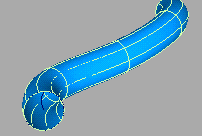
Extrude a profile curve along a single path curve
Use Extrude to create a surface in the form of a profile curve traveling along a path curve. This is normally used to make tubular objects with symmetrical cross sections. This tool does not provide the continuity options of the Rail Surface tool.

Extrude a profile curve along a path curve
Create the curves you will use for the profile and path.

In the Surfaces tool palette, select the Swept Surfaces > Extrude
 tool.
tool.Pick the curve or curves you want to extrude.
You can select free curves, curves on surface, isoparametric curves, or trim edges.

Click Go.
Pick the path curve to extrude along.
You can select a free curve, a curve on surface, an isoparametric curve, or a trim edge.
The Extrude tool creates the new surface starting at the position of the generation curve and following the shape of the path curve.

Tips and notes
The generation curve does not have to be near or intersect the path curve. However, placing it as near as possible will help you visualize the result.
This tool works best for closed and/or symmetrical profile curves. If you need to control the twist of the profile, use the Surfaces > Swept Surfaces > Rail Surface tool.
To extrude a face made of multiple curves (for example, Text) as a single object, select it before choosing the Extrude tool.
In most cases, you will want the profile curve to be perpendicular to the starting point of the path.
To accomplish this, use the Construction > Plane tool to create a construction plane at the start of the path curve, perpendicular to the tangent. Then create the profile curve on the new construction plane.
What if...?
The surface is bent or twisted?
If the path curve has severe bends or corners, the extruded surface can have unwanted twists.
To correct this problem, use the Object Edit > Insert
 tool to increase the number of edit points/CVs on the path curve in the problem areas, so that transitions between CVs are more gradual.