Work with construction history using the History Visualizer
Use the History Visualizer to view, modify, and delete the construction history of objects in your scene.
View construction history
Modify construction history by replacing input geometry
Edit tool options
Revert or delete history
Create and assign construction history presets
Open the History Visualizer
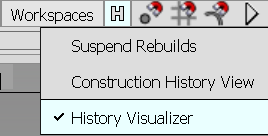
Do one of the following:
Choose Windows > Information > History Visualizer.
Click the History icon to the right of the prompt line.
Viewing construction history
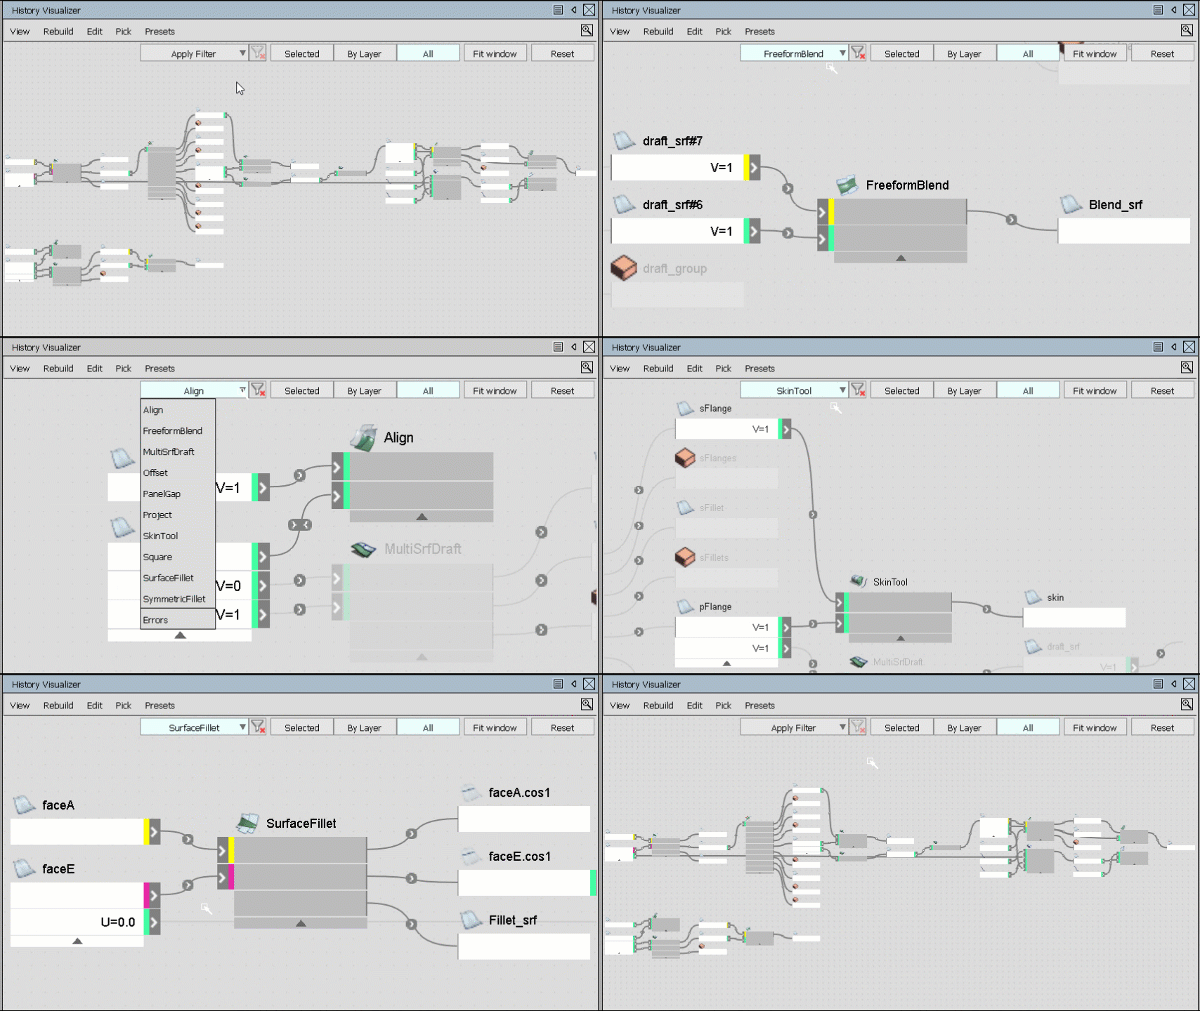
By default, the History Visualizer displays a graph view of the construction history for all the objects in the file. Only objects with construction history appear in the graph.
You can use view filters to locate nodes and node networks of interest in the graph. When using a filter, the graph view automatically zooms into the filtered nodes and associated networks while dimming the display of other nodes in the graph. Filtering the graph view helps you isolate nodes for applying presets, replacing inputs, or reverting history.
You can choose to filter the graph view by tool node type (Apply filter), by selected objects, or by layer.

You can turn off the automatic zooming behavior and adjust the dimming of unfiltered nodes in the View Options. In the History Visualizer select View > View Options >  .
.
View history by tool node type
When you load a WIRE file, the History Visualizer populates a list of tool nodes contained in the file. Selecting a tool node from the list focuses the graph view on the specified tool node networks.
- Click Apply Filter and select a tool node from the list.
- Click this icon
 to turn off the filter.
View history by selected objects
Do one of the following:
- Click Selected.
- Choose View > Selected.
Click All to turn off the filter.
View history by layer
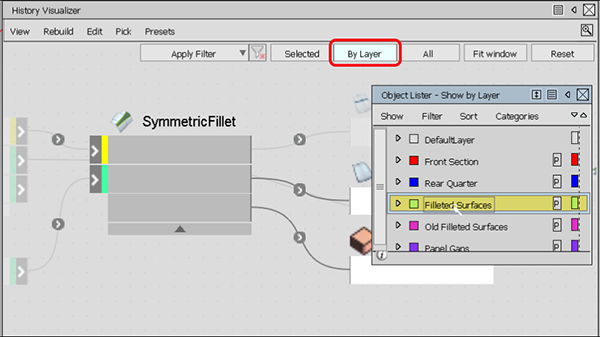
Use the By layer filter to focus the graph view on objects in the selected layer.
Do one of the following:
- Click By Layer
- Choose View > By Layer.
Click All to turn off the filter.
View the history of all objects
Do one of the following:
- Click All in the History Visualizer window.
- Choose View > All.
Modify construction history by replacing input geometry
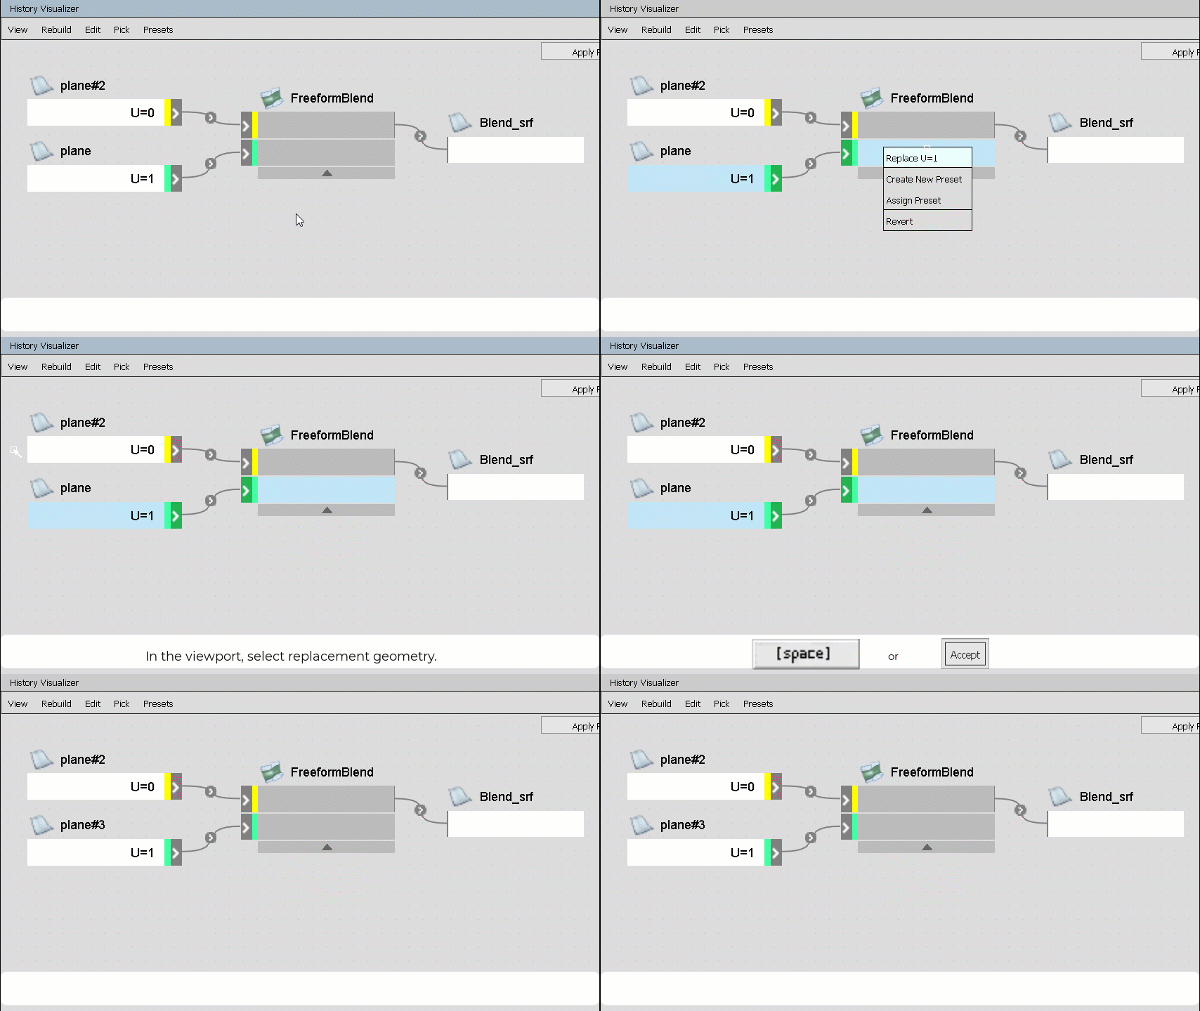
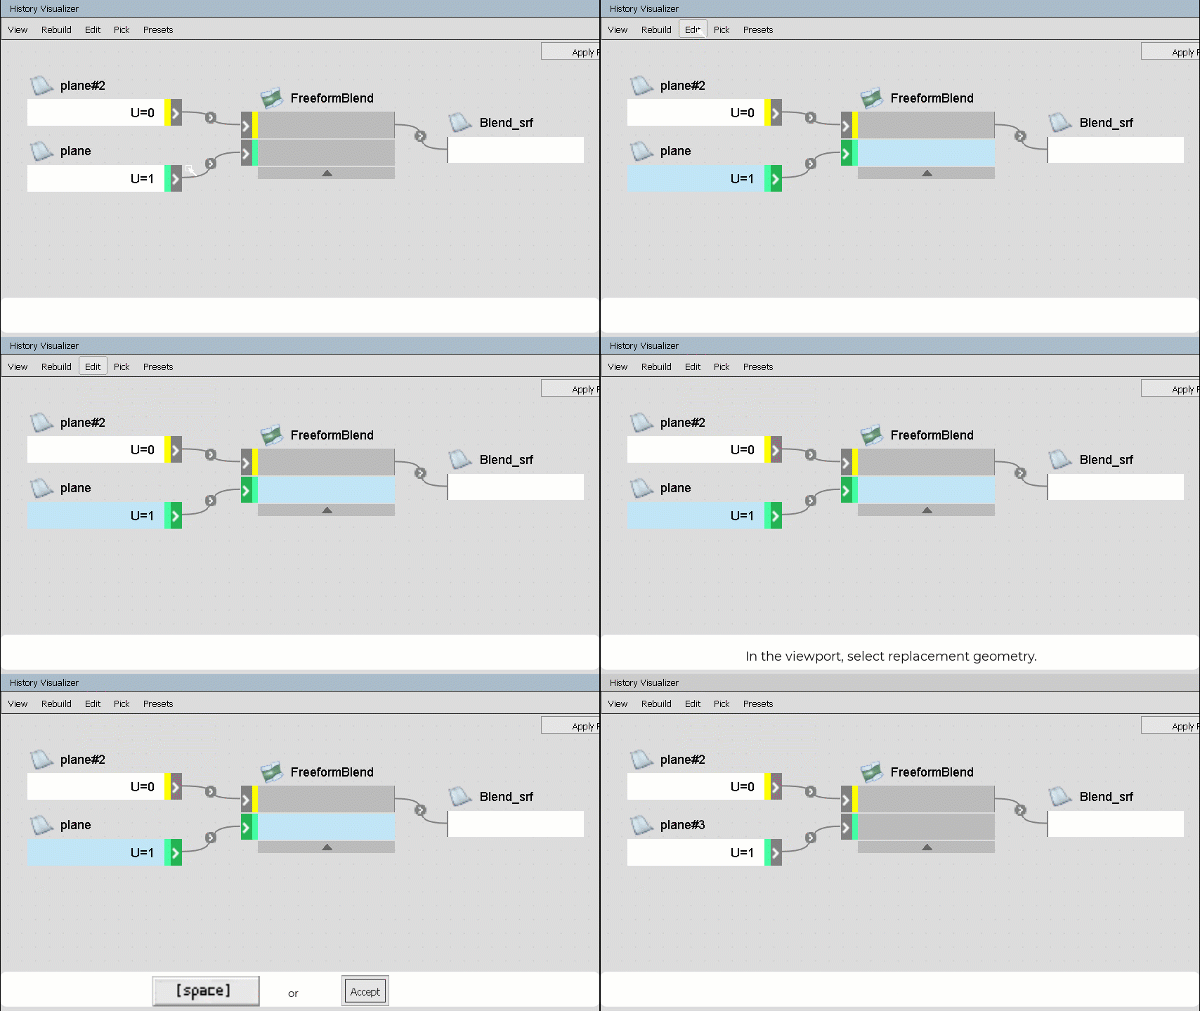
You can modify the construction history of an object by substituting the connected input nodes of geometry with other geometry in the scene. The Alias prompt line assists you in selecting valid input geometry to make the replacement.
Replace a single input
Do one of the following:
- Right-click and select Replace.
- In the viewport, select the replacement geometry.
- Press the Spacebar or click Accept in the viewport.
Or
- Select the ports of the input geometry you want to replace.
- Choose Edit > Replace Selected Inputs.
- In the viewport, select the replacement geometry.
- Press the Spacebar or click Accept in the viewport.
Replace multiple inputs
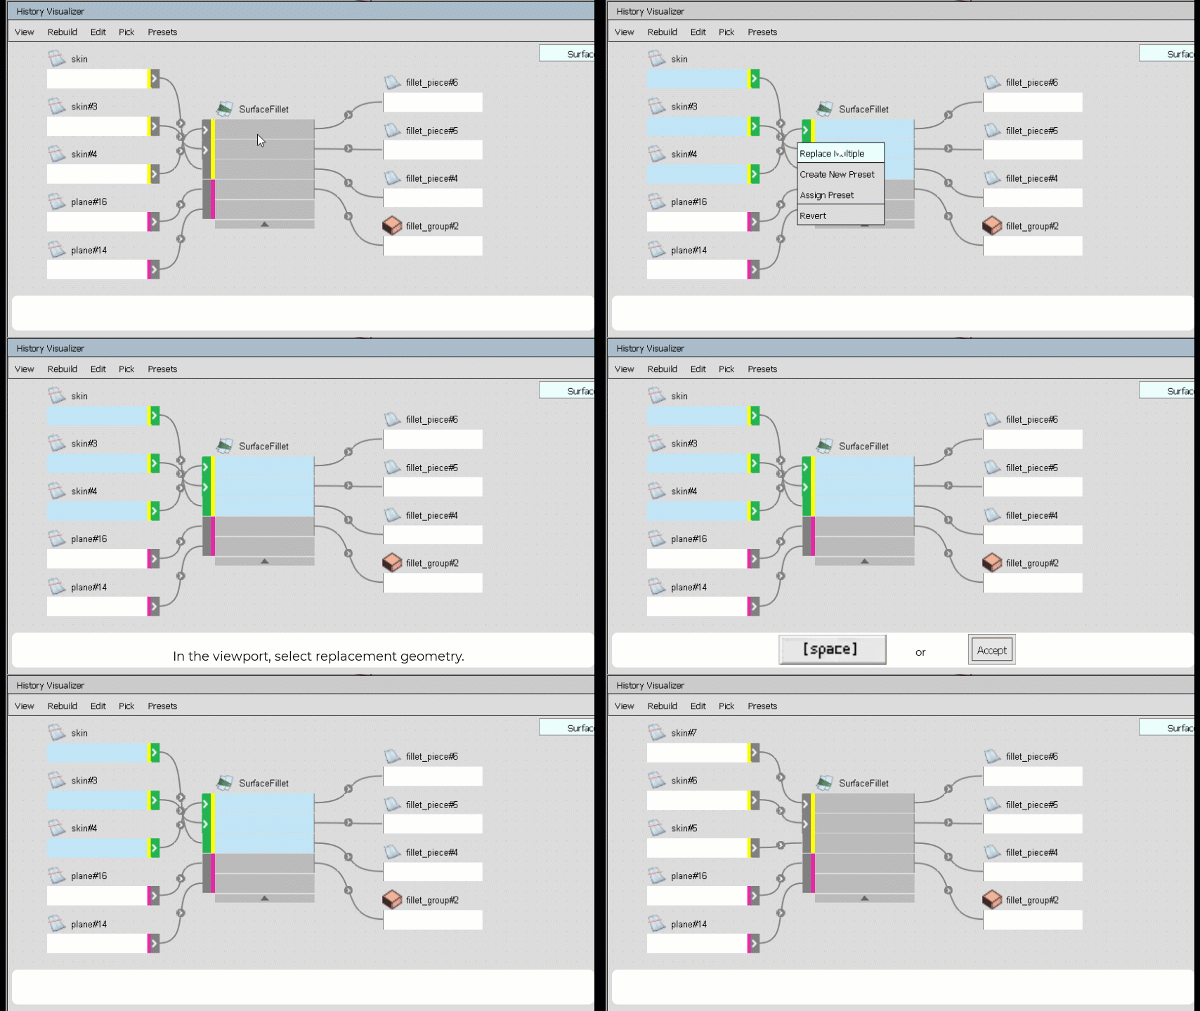
You can replace multiple inputs to any multi-surface tool, such as the Surface Fillet or Freeform tool.
Do one of the following:
- Right-click and select Replace Multiple.
- In the viewport, select the replacement geometry.
- Press the Spacebar or click Accept in the viewport.
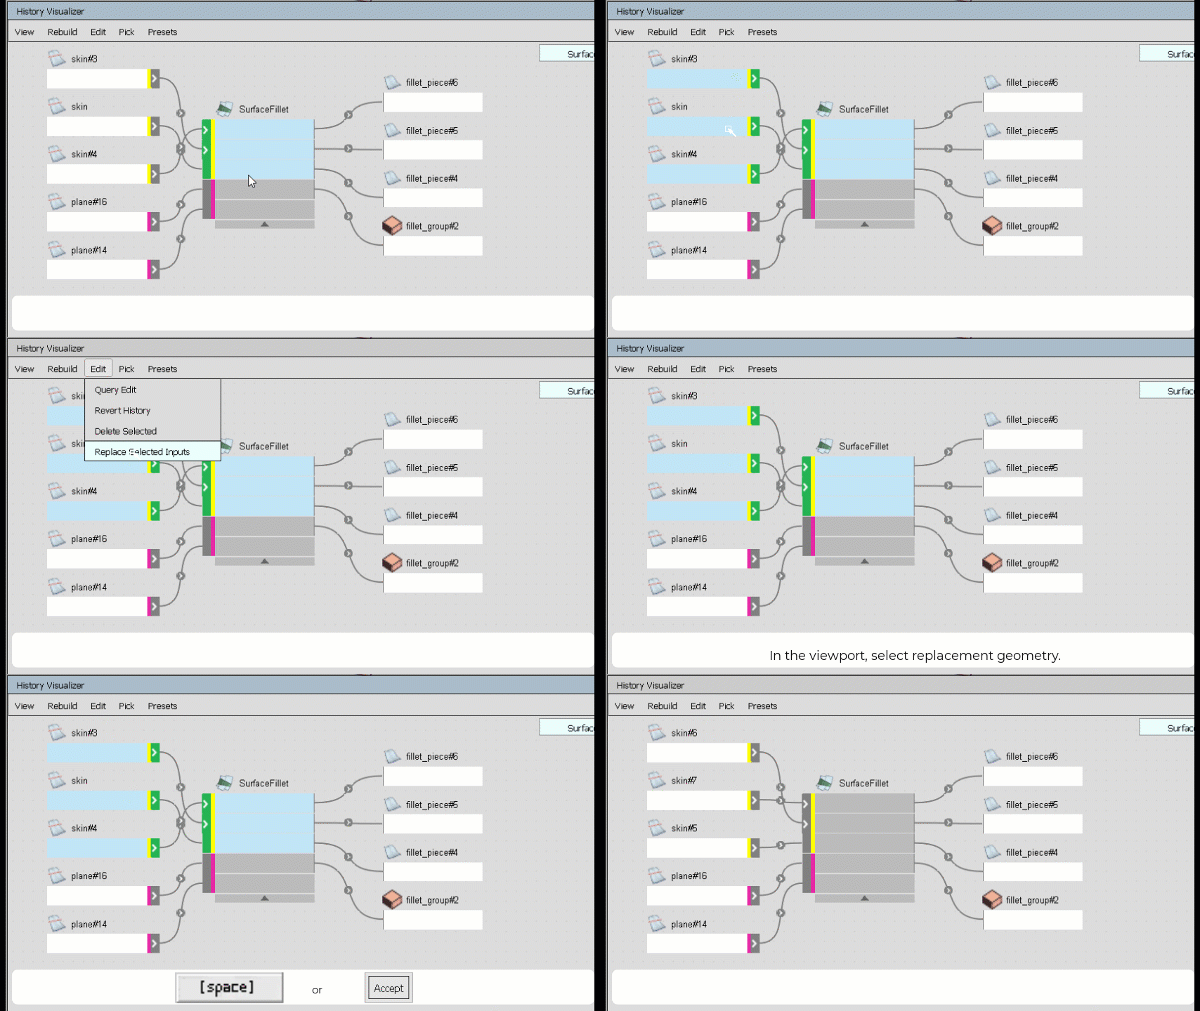
Or
- Shift + select the ports of the input geometry you want to replace.
- Choose Edit > Replace Selected Inputs.
- In the viewport, select the replacement geometry.
- Press the Spacebar or click Accept in the viewport.
Edit tool options
Do one to the following:
- Double-click the tool node.
- Select the tool node, then select Edit > Query Edit.
The tool control window opens from which you can modify the tool settings.
Revert or delete history
No objects are deleted in the viewport when you revert or delete history.
Revert history
Revert removes history and reverts any updates the tool made to the geometry.
To revert history on single tool node, do one of the following:
- Right-click the tool node and select Revert from the context menu.
- Select the tool node, and the in History Visualizer menu, select Edit > Revert History.
To revert history on multiple nodes, box select the nodes, and in the History Visualizer menu, select Edit > Revert History.
Delete history
Delete removes the history and keeps the updates the tool made to the geometry.
- Select the tool node for which you to delete construction history.
- Choose Edit > Delete Selected.
Related Tasks
- Create, query edit, or delete construction history
- Work in the History Visualizer
- Create and assign construction history presets