You can specify design rules within a structural member style to create a custom structural member. The design rules allow you to specify one or more shapes to extrude along the path (axis) of a structural member. You can assign and position a start and end shape for each segment of a structural member.
Creating Single-Segmented Custom Structural Members
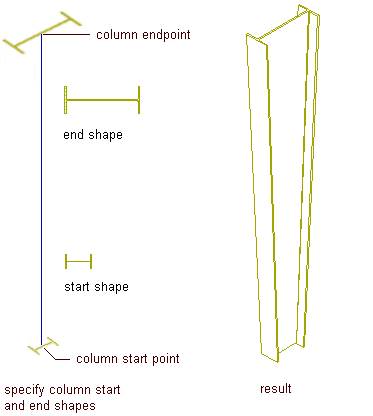
A single-segment member can start and end with the same shape, or you can specify different start and end shapes. For example, you can create a tapered column by assigning different start and end shapes to a single-segment column.

Creating a tapered column
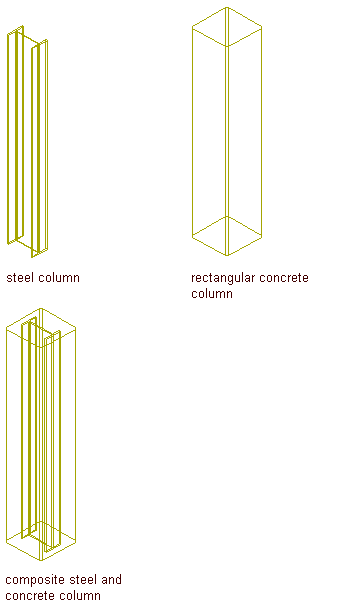
You can also assign different shapes to the same single-segment member by adding a component to the member. By adding a component in the design rules and assigning different shapes to the same segment, you can create a structural member with overlapping shapes. For example, you can create a concrete encased steel column by adding a component with a steel column shape to a concrete column.

Creating a composite steel and concrete column
Creating Multi-Segmented Custom Structural Members
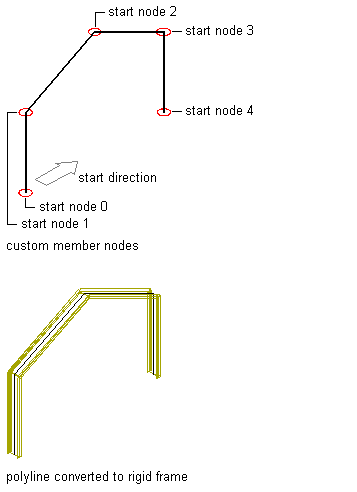
For multi-segmented structural members, you can assign different shapes to each segment of the member as components of the member. A series of nodes (starting at 0 at the start point of the member) correspond to each vertex of the member path. By assigning different shapes to segments between nodes on the member path, you can create a structural member that transforms from one shape to different shapes along the member path. For example, you can use this method to create a rigid frame.

Creating the rigid frame
Creating Custom Shapes for Structural Members
When you create custom structural members, you can use the shapes contained in styles that you create from the Structural Member Catalog or Structural Member Style wizard, or you can create your own custom shapes. When you create a custom shape, you can only add it to a structural members in the design rules of the structural member style.