Custom images for commands can be imported and exported.
Display the Customize User Interface (CUI) Editor
- Click
 .
Find
.
Find
Import a Custom Image into the Image List
- In the Customize tab, Command List pane, select any command to display the Button Image pane.
- In the Button Image pane, right-click the Image list and click Import Image.
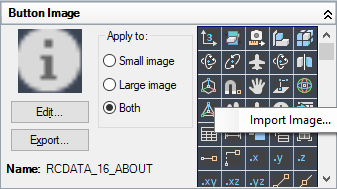
- In the Open dialog box, browse to and select the image file that you want to import. Click Open.
The image is added to the Image list and the working customization file, and can then be assigned to a command.
Export an Image from the Image List
- In the Customize tab, Command List pane, select any command to display the Button Image pane.
- In the Button Image pane, Image list, select the image to export. Click Export.
- In the Export Image File dialog box, browse to the folder you want to export the image to and enter a name for the image in the File Name box.
- Click Save.
Import an Image into a Loaded Customization File Using the Image Manager
- In the Customize tab, Customizations In <file name> pane, click the Image Manager button.
- In the Image Manager, Loaded Customization Files drop-down list, select the loaded customization file into which you want to import a custom image.
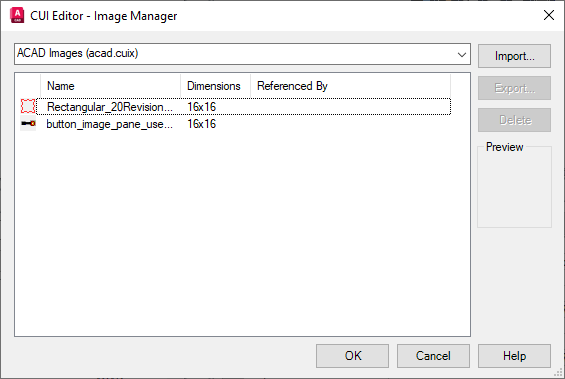
- Click Import.
- In the Import Images dialog box, browse to and select the images you want to import. Click Open.
- Click OK.
Export an Image from a Loaded Customization File With the Image Manager
- In the Customize tab, Customizations In <file name> pane, click the Image Manager button.
- In the Image Manager, Loaded Customization Files drop-down list, select the loaded customization file that contains the custom image you want to export.
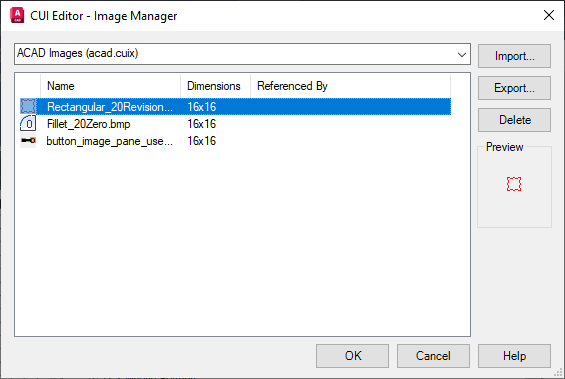
- In the Custom Images list, select the image you want to export and click Export.
- In the Browse For Folder dialog box, browse to the folder to which you want to export the selected image. Click OK.
- Click OK.
Delete an Image from a Loaded Customization File
- In the Customize tab, Customizations In <file name> pane, click the Image Manager button.
- In the Image Manager, Loaded Customization Files drop-down list, select the loaded customization file that contains the custom image that you want to delete.
- In the Custom Images list, select the image you want to remove and click Delete.
- In the CUI Editor - Confirm Deletion of Image dialog box, click Delete Image.
Note: The deletion of the image cannot be undone. Before you delete an image, you might want to export it first so you have a backup of the image that can be re-imported if needed.
- Click OK.