Use the CUI Editor to control the display of the Quick Access toolbar, ribbon tabs and panels, tool palettes, toolbars, and pull-down menus.
Display the Customize User Interface (CUI) Editor
- Click
 .
Find
.
Find
Display a Quick Access Toolbar
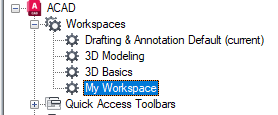
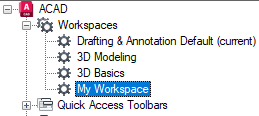
- In the Customize tab, Customizations In <file name> pane, click the plus sign (+) next to the Workspaces node to expand it.
- Select the workspace that you want to modify.
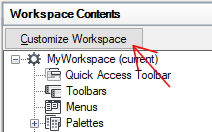
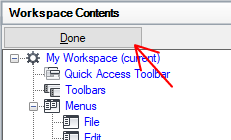
- In the Workspace Contents pane, click Customize Workspace.
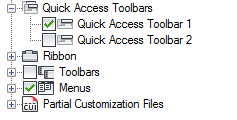
- In the Customizations In <file name> pane, click the plus sign (+) next to the Quick Access Toolbars node to expand it.
- Click the check box next to the Quick Access toolbar to add it to the workspace.
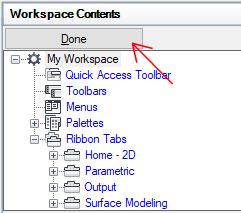
- In the Workspace Contents pane, click Done.
 Note: Make sure to set the workspace current to see the changes.
 - Click Apply.
Display the Quick Access Toolbar Above or Below the Ribbon
- In the Customize tab, Customizations In <file name> pane, click the plus sign (+) next to the Workspaces node to expand it.
- Select the workspace that you want to modify.
- In the Workspace Contents pane, select the Quick Access Toolbar node.
- In the Properties pane, click the Orientation box and select Above Ribbon or Below Ribbon from the drop-down list.
- Click Apply.
Display a Ribbon Tab on the Ribbon
- In the Customize tab, Customizations In <file name> pane, click the plus sign (+) next to the Workspaces node to expand it.
- Select the workspace that you want to modify.
- In the Workspace Contents pane, click Customize Workspace.
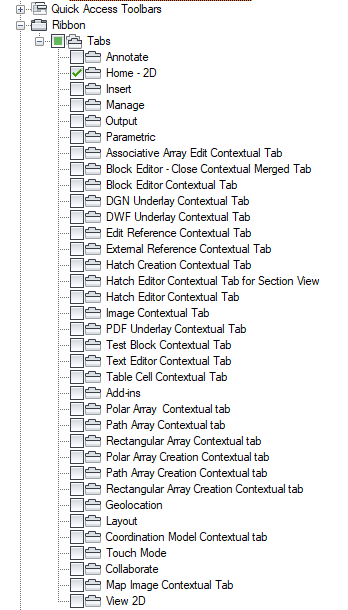
- In the Customizations In <file name> pane, click the plus sign (+) next to the Ribbon Tabs node to expand it.
- Click the check box next to each ribbon tab that you want to add to the workspace.
- In the Workspace Contents pane, click Done.
Note: Make sure to set the workspace current to see the changes.
- Click Apply.
Reposition a Ribbon tab on the Ribbon
- In the Customize tab, Customizations In <file name> pane, click the plus sign (+) next to the Workspaces node to expand it.
- Select the workspace that has the ribbon tab you want to reposition.
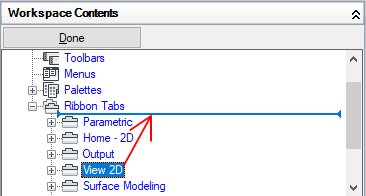
- In the Workspace Contents pane, click the plus sign (+) next to the Ribbon Tabs node to expand it.
- Drag the ribbon tab to the new location.
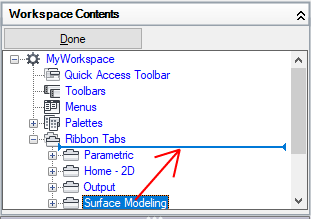
A horizontal bar shows the new location for the ribbon tab.
- Once the horizontal bar is in the place where you want to insert the ribbon tab, release the pointing device button.
Note: Make sure to set the workspace current to see the changes.
- Click Apply.
Reposition a Ribbon Panel on a Ribbon Tab
- In the Customize tab, Customizations In <file name> pane, click the plus sign (+) next to the Workspaces node to expand it.
- Select the workspace that you want to modify.
- In the Workspace Contents pane, click the plus sign (+) next to the Ribbon Tabs node to expand it.
- Click the plus sign (+) next to the ribbon tab with the ribbon panel that you want to reposition to expand it.
- Drag the ribbon panel to the new location.
A horizontal bar shows the new location for the ribbon panel.
- Once the horizontal bar is in the place where you want to insert the ribbon panel, release the pointing device button.
Note: Make sure to set the workspace current to see the changes.
- Click Apply.
Control the Display of Ribbon Tabs on the Ribbon
- In the Customize tab, Customizations In <file name> pane, click the plus sign (+) next to the Workspaces node to expand it.
- Select the workspace that has the ribbon tab you want to change.
- In the Workspace Contents pane, click the plus sign (+) next to the Ribbon Tabs node to expand it.
- Select the ribbon tab that you want to change.
- In the Properties pane, do any of the following:
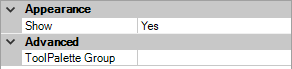
- In the Show box, select an option (Yes or No) to control the default display state of the ribbon tab.
- In the ToolPalette Group box, select one of the listed tool palette groups to associate it with the ribbon tab.
- Click Apply.
Control the Display of Ribbon Panels on a Ribbon tab
- In the Customize tab, Customizations In <file name> pane, click the plus sign (+) next to the Workspaces node to expand it.
- Select the workspace that has the ribbon tab for which you want to change the properties of the ribbon panels.
- In the Workspace Contents pane, click the plus sign (+) next to the Ribbon Tabs node to expand it.
- Click the plus sign (+) next to the ribbon tab for which you want to change the properties of the ribbon panels.
- Select the ribbon panel that you want to change.
- In the Properties pane, do any of the following:
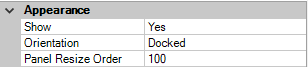
- In the Show box, select an option (Yes or No) to control the default display state of the ribbon panel.
- In the Orientation box, select an option (Docked or Floating) to control the dock state of the ribbon panel.
- In the Panel Resize Order box, enter a value to determine the resize order for the ribbon panel among its siblings when the ribbon is being resized.
- Click Apply.
Associate a Tool Palette Group with a Ribbon tab
- At the Command prompt, enter toolpalettes.
- Click
.
Find
- In the Customize tab, Customizations In <file name> pane, click the plus sign (+) next to the Workspaces node to expand it.
- Select the workspace that has the ribbon tab for which you want to assign a tool palette group.
- In the Workspace Contents pane, click the plus sign (+) next to the Ribbon Tabs node to expand it.
- Select the ribbon tab that you want to assign a tool palette group.
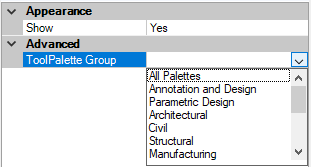
- In the Properties pane, under Advanced, ToolPalette Group box, click the drop-down list and select the tool palette group you want to assign to the ribbon tab.
 Note: The Tool Palettes window must be displayed before you can assign a tool palette group to a ribbon tab.
 - Click Apply.
Display a Palette
- In the Customize tab, Customizations In <file name> pane, click the plus sign (+) next to the Workspaces node to expand it.
- Select the workspace that you want to modify.
- In the Workspace Contents pane, click the plus sign (+) next to the Palettes node to expand it.
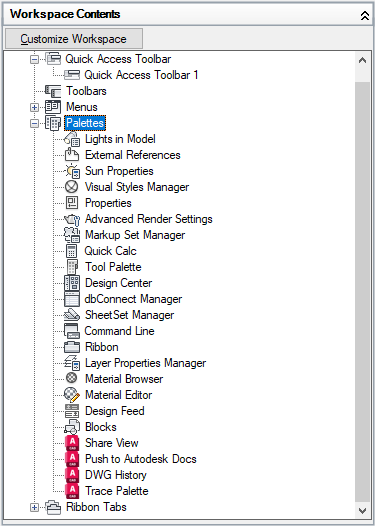
- Select the palette you want to display.
- In the Properties pane, under Appearance, Show box, click the drop-down list and select Show.
- Click Apply.
Display Toolbars
- In the Customize tab, Customizations In <file name> pane, click the plus sign (+) next to the Workspaces node to expand it.
- Select the workspace that you want to modify.
- In the Workspace Contents pane, click Customize Workspace.
- In the Customizations In <file name> pane, click the plus sign (+) next to the Toolbars node to expand it.
- Click the check box next to each toolbar that you want to add to the workspace.
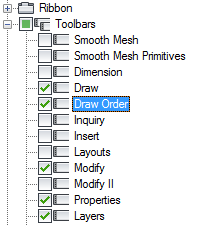
- In the Workspace Contents pane, click Done.
 Note: Make sure to set the workspace current to see the changes.
 - Click Apply.
Change the Properties of a Toolbar
- In the Customize tab, Customizations In
<file name> pane, click the workspace that contains the toolbar you want to modify.
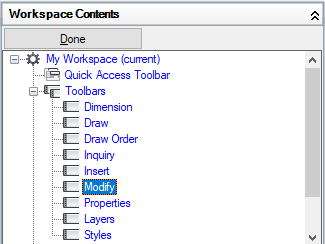
- In the Workspace Contents pane, click the plus sign (+) next to the Toolbars node to expand it.
- Select the toolbar that you want to modify.
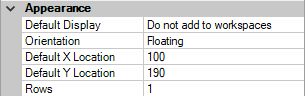
- In the Properties pane, do any of the following:
- In the Orientation box, select an option (Floating, Top, Bottom, Left, or Right).
- In the Default X Location box, enter a number. A value of 0 starts the location of the toolbar at the left edge of the screen, as the number increases the further from the left the toolbar is placed. (Available only if Orientation is set to Floating.)
- In the Default Y Location box, enter a number. A value of 0 starts the location of the toolbar at the top edge of the screen, as the number increases the further from the top the toolbar is placed. (Available only if Orientation is set to Floating.)
- In the Rows box, enter a number. Enter the number of rows to wrap the buttons on the toolbar if possible. 0 is the default value. (Available only if Orientation is set to Floating.)
- Click Apply.
Display Menus
- In the Customize tab, Customizations In <file name> pane, click the plus sign (+) next to the Workspaces node to expand it.
- Select the workspace that you want to modify.
- In the Workspace Contents pane, click Customize Workspace.
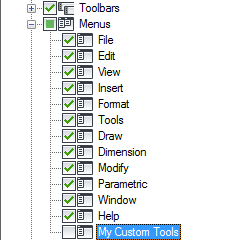
- In the Customizations In <file name> pane, click the plus sign (+) next to the Menus node to expand it.
- Click the check box next to each menu that you want to add to the workspace.
- In the Workspace Contents pane, click Done.
Note: Make sure to set the workspace current to apply the changes.
- Click Apply.
Reposition a Pull-down Menu on the Menu bar
- In the Customize tab, Customizations In <file name> pane, click the plus sign (+) next to the Workspaces node to expand it.
- Select the workspace that you want to modify.
- In the Workspace Contents pane, click the plus sign (+) next to the Menus node to expand it.
- Drag the pull-down menu into the new location.
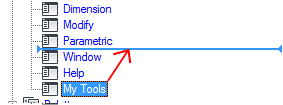
A horizontal bar shows the new location for the pull-down menu.
- Once the horizontal bar is in the place where you want to insert the menu, release the pointing device button.
Note: Make sure to set the workspace current to see the changes.
- Click Apply.
