Sometimes you need to define a location by using an existing point or object as a reference. For instance, maybe you need to draw a line that begins 60 units to the right and 60 units above an existing point, but there aren't any objects in the drawing you can snap to. Or maybe you have a horizontal and a vertical line that don't intersect and you need to find their intersection point. That's where object snap tracking comes in. You can use object snap tracking, together with object snaps, to track along alignment paths to find precise points.
Before You Get Started
First, if they aren't on already, turn on Object Snaps, Polar Tracking, and Object Snap Tracking using the Status Bar in the bottom right.
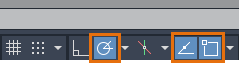
You can also turn Object Snap on and off with the F3 shortcut key, Object Snap Tracking on and off with the F11 shortcut key, and Polar Tracking on and off with the F10 shortcut key.
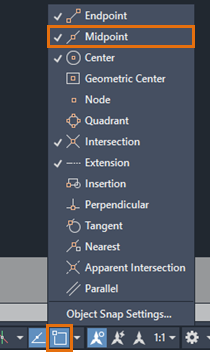
For this exercise, we'll use the Midpoint object snap option. So, let's make sure the Midpoint object snap is on.
Hovering Object Snap Points to Set Tracking Points
Let's try it!
Suppose you have a rectangle and want to draw a circle in the center of it.

- Draw a rectangle like the one shown here.
- Start the circle command.
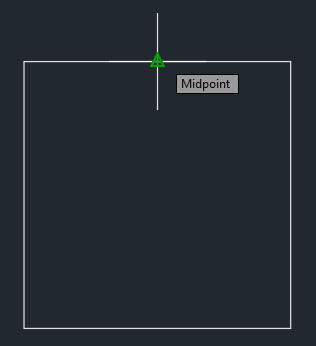
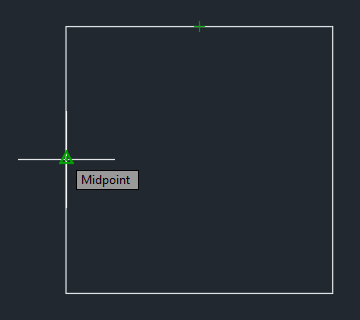
- Hover over (but don't click) the horizontal edge of the rectangle at its midpoint.
- Now move your cursor away from the midpoint. See how it continues to indicate the midpoint? Acquired points display a small plus sign (+).
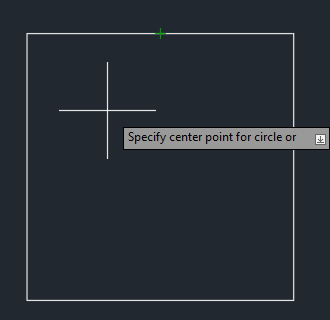
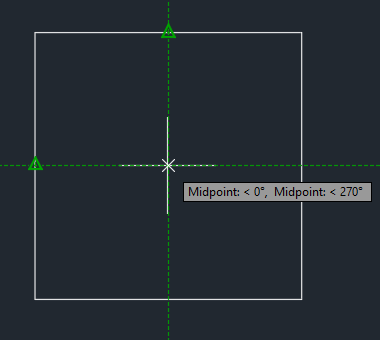
- Hover over the midpoint of a vertical edge of the rectangle to pick up the other midpoint.
- Now that you've identified both of those midpoints, bring your cursor towards the intersection of those points. Pay attention to the dynamic input indicator. Notice how it's showing the degree angle from each of the two midpoints?
- Now click to specify the center point of the circle. Then enter a radius to draw the circle.

Temporary Tracking
Now suppose you want to draw a circle that is 60 units up and 60 units over from a particular point. You can use temporary tracking to find the precise location.

Without object snap tracking, you might first create some temporary construction lines, then create the circle, and then erase the construction lines. Or maybe you would create the circle at the reference point and then move it. But using a temporary tracking point eliminates those extra steps.
- Draw an object like the one shown here.
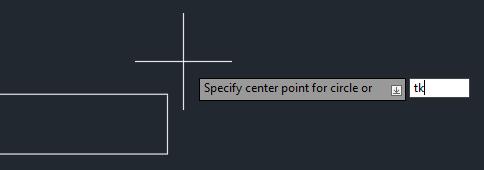
- Start the CIRCLE command.
- At the Command prompt, enter TRACKING (or TRACK, or TK).
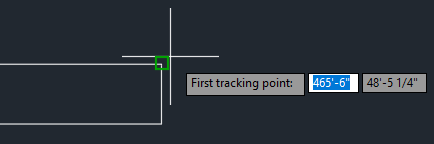
- Click the object snap at the endpoint.
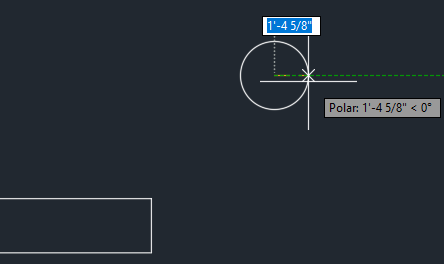
- Move your cursor horizontally from the endpoint.
- At the Command prompt, enter 60.
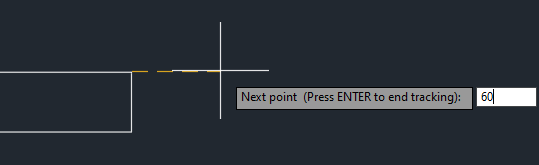
- Now move your cursor vertically from the first tracking point.
- At the Command prompt, enter 60.
- Press Enter to end tracking and specify the center point of the circle.


Incremental Angles
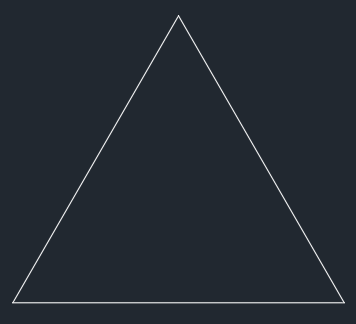
By default, object snap tracking only tracks orthogonally. However, you can change Object Snap Tracking settings to use all polar angle settings. Let's suppose this time you want to draw a circle at the center point of this triangle using object snap tracking.

You won't be able to locate the center point using only orthogonal tracking. You'll need a 30-degree tracking angle.
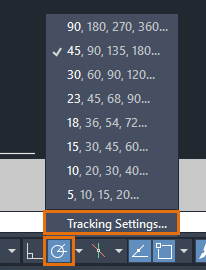
- Click the Polar Tracking drop-down menu and click Tracking Settings.
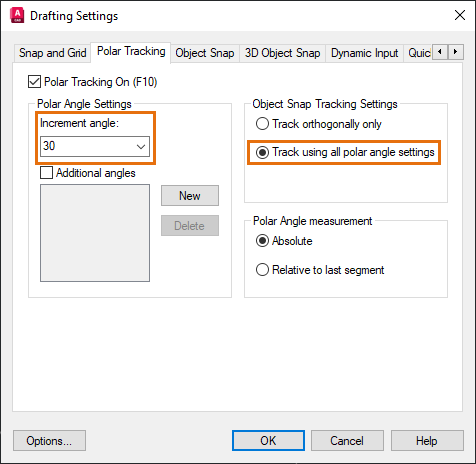
- In the Drafting Settings dialog box Polar Tracking tab, set the increment angle to 30 degrees.
- Under Object Snap Tracking Settings, select Track using all polar angle settings.
- Click OK.
- Draw an equilateral triangle like the one shown here.
- Start the CIRCLE command.
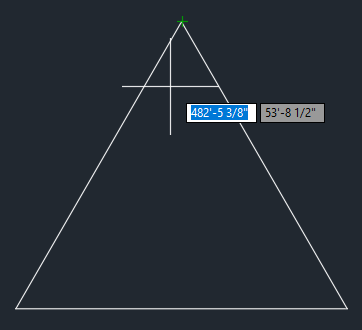
- Hover over one corner of the triangle to acquire the object snap tracking point.
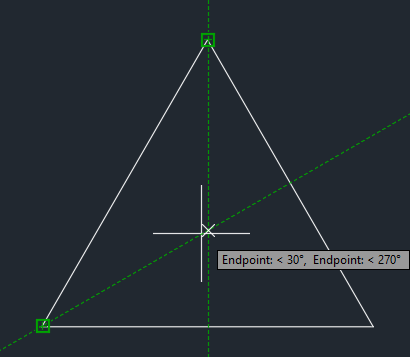
- Hover over another corner, then move your cursor at a 30-degree angle, along the tracking line until you find the intersection point of the two tracking points.
- Click to specify the center point of the circle and then enter a radius to draw the circle.
Mid Between 2 Points
You can also access tracking by holding down Shift and right-clicking to display the Object Snap shortcut menu.
Let's do one more exercise. This time, suppose you want to draw a circle at the midpoint between these two points.
- Draw two lines like the ones shown here.
- Start the CIRCLE command.
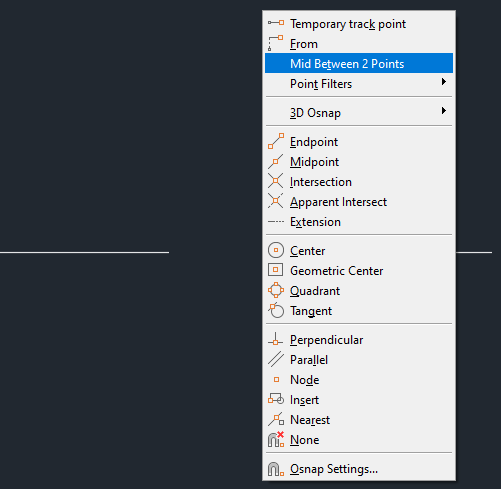
- Hold Shift and right-click to display the object snap shortcut menu.
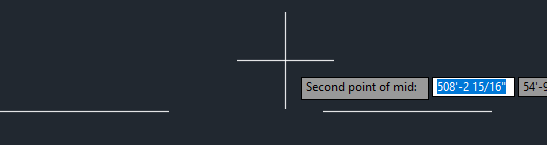
- Select Mid Between 2 Points.
- Specify the first endpoint.
- Specify the second endpoint and draw the circle.


Summary
Object Snap Tracking is a useful drafting aid that helps you find precise points that don't already have a point to snap to. Use the tips in this topic when you're drafting to save time and draft with precision.
Related Have You Tried Articles
- Have You Tried: Status Bar - Provides quick access to some of the most commonly used drawing aids and tools.
- Have You Tried: Command Preview - Temporarily displays the possible outcome of the active editing command before completing the command.
- Have You Tried: Coordinate Entry with Dynamic Input - Allows you to accurately create and position objects within a design.
Object Snap Tracking Related Commands and System Variables
Here are some frequently used commands and system variables related to object snap tracking.
| Command | Description |
|---|---|
| DSETTINGS | Sets grid and snap, polar and object snap tracking, object snap modes, Dynamic Input, and Quick Properties. |
| TRACKING (Command Modifier) | Locates a point from a series of temporary points. |
| System Variable | Description | Default Value | Saved in |
|---|---|---|---|
| AUTOSNAP | Controls the display of the AutoSnap marker, tooltip, and magnet. | 63 | Registry |
| POLARMODE | Controls settings for polar and object snap tracking. | 0 | Registry |
| TRACKPATH | Controls the display of polar and object snap tracking alignment paths. | 0 | Registry |
| POLARANG | Sets the polar angle increment. | 90 | Registry |
| ORTHOMODE | Constrains cursor movement to the perpendicular. | 0 | Drawing |
| OSMODE | Sets running object snaps. | 4133 | Registry |