Have you ever wanted to add a custom ribbon tab and panel with your favorite commands and controls on it? Maybe you saw a coworker’s customized AutoCAD ribbon in a screen share and found it useful to get to certain commands without frequent switching to different tabs. A customized ribbon can increase efficiency and help save time in completing your tasks.
Create a New Ribbon Panel
In this exercise, you’ll create a ribbon panel named My HYT Panel.
- Click
.
Find
Note: You can also open the CUI Editor from the Workspace Switching Find
 Customize on the status bar.
- In the Customize tab, Customizations In <file name> pane, click the plus sign (+) next to the Ribbon node to expand it.
- Right-click the Panels node and choose New Panel.
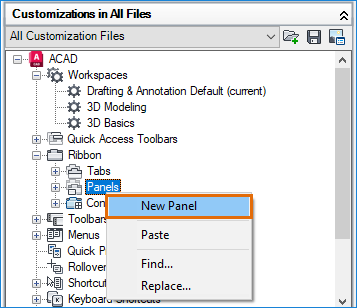
- Enter a new panel name,
My HYT Panel.
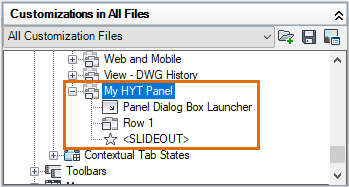
The My HYT Panel is added at the bottom of the list of Panels.
- Click Apply.
You'll add the My HYT Panel to a new ribbon tab in a later exercise.
Add Commands to a Ribbon Panel
In this exercise, you’ll add five block-related commands to the ribbon panel you just added, My HYT Panel.
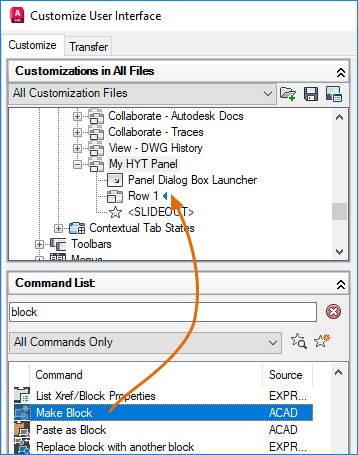
- In the CUI Editor, locate the newly created ribbon panel (My HYT Panel), if necessary.
- In the Command List pane, Search Command List text box, type
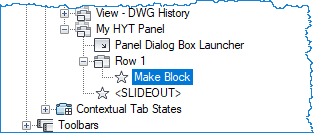
block. Select Make Block (BLOCK command) and drag it to Row 1 under the My HYT Panel.
- Select the Make Block command you’ve added to Row 1.
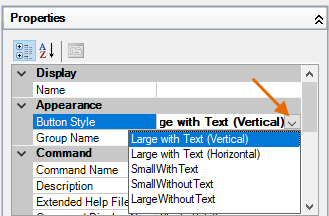
Next, let's set how the command button will look on the panel.
- In the Properties pane, on the right, under Appearance, click Button Style drop-down list and choose Large with Text (Vertical).
- Under Display, in the Name text box, type
Create Block and press Enter. You can observe the property changes in the Panel Preview pane.
Now, let's repeat this process to add more commands to your ribbon panel. We'll also try some of the other display properties.
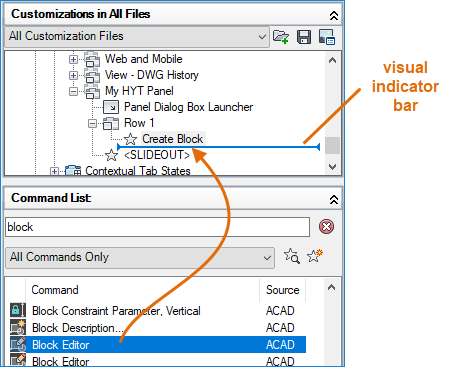
- Using the ‘block’ search result, select Block Editor (BEDIT command) and drag it to Row 1 under Create Block. Use the visual indicator bar to specify the position of the command.
- Select the Block Editor command you’ve added under Row 1 and choose Large with Text (Vertical) as the button style.
- Under Display, in the Name text box, type
Block\nEditor and press Enter.
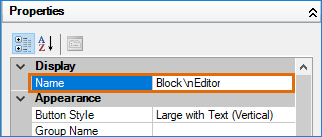 Note: The \n forces the label to be displayed on two lines. The \n disappears after pressing Enter or when text box loses the focus. If you don't see the changes in the Panel Preview, click Row 1 under My HYT Panel to refresh the preview.
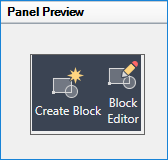
- In the Search Command List text box, search on the following text shown in bold, and add the matching control items to Row 1.
- blocks (BLOCKSPALETTE command)
- tool palettes (TOOLPALETTES command)
- designcenter (ADCENTER command)
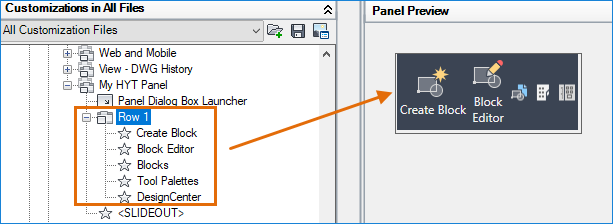
The Blocks palette, Tool Palettes, and DesignCenter command buttons are added to Row 1 using the default button style, Small Without Text.
- Click Apply to save the changes.
Move Commands to a New Sub-Panel
Let's say you want to keep the smaller command buttons but arrange them into multiple rows in the panel. The following steps explain how to create a sub-panel and define the placement of the Blocks palette, Tool Palettes, and DesignCenter command buttons into multiple smaller rows.
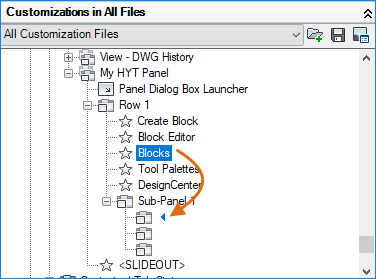
- Under My HYT Panel, right-click Row 1 and choose New Sub-Panel.
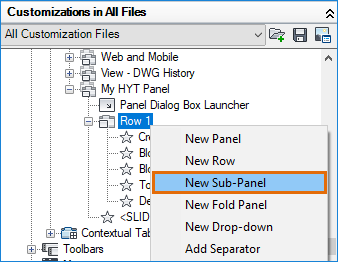
A new sub-panel (named Sub-Panel 1) is created under My HYT Panel. By default, the new sub-panel contains a row.
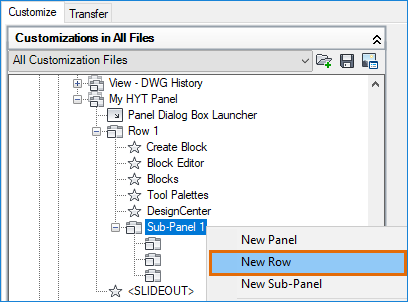
- Right-click Sub-Panel 1 and choose New Row. Repeat this step until you have three rows under Sub-Panel 1.
- Under Row 1, select Blocks and drag it to the first row in the sub-panel.
- Select the Blocks command you've added to Sub-Panel 1.
- In the Properties pane, specify the following:
- Under Appearance, Button Style drop-down list, choose Small With Text.
- Under Display, in the Name text box, enter Blocks Palette.
- Move the Tool Palettes and DesignCenter commands to the second and third row in the sub-panel, respectively.
- Choose the Small With Text button style for the Tool Palettes and DesignCenter commands.
- Check the Panel Preview and adjust the command button placement and names as desired.
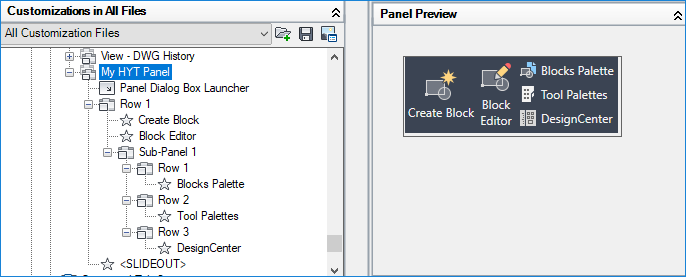
- Click Apply to save the changes.
Create a New Ribbon Tab
Now that you have your new ribbon panel, let's create a new ribbon tab and add My HYT Panel to it.
- In the CUI Editor, Customize tab, Customizations In <file name> pane, click the plus sign (+) next to the Ribbon node to expand it.
- Right-click the Tabs node and choose New Tab.
- Enter a new tab name,
My HYT Tab.
The My HYT Tab is added at the bottom of the list of Tabs. Now you can add your ribbon panel, My HYT Panel, to this new tab.
- Under the Ribbon node, click the plus sign (+) next to the Panels node to expand it.
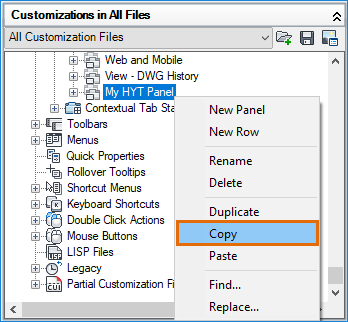
- Under the Panels node, right-click My HYT Panel and choose Copy.
- Under the Tabs node, right-click My HYT Tab and choose Paste.
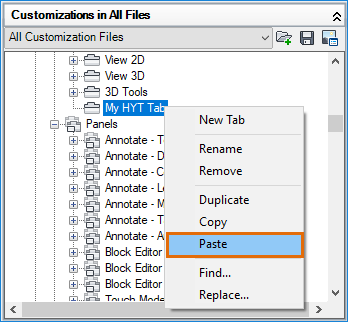 A reference of My HYT Panel is added to My HYT Tab.
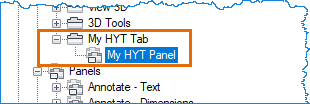
- Click Apply.
Add a Ribbon Tab to a Workspace
New ribbon tabs are not automatically added to a workspace. The following steps explain how to add the My HYT Tab to the current workspace.
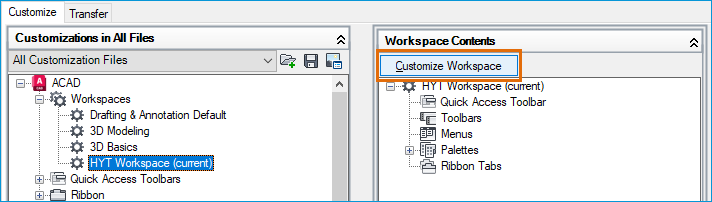
- In the CUI Editor, Customize tab, Customizations In <file name> pane, click the plus sign (+) next to the Workspaces node to expand it.
- Select the current workspace and click Customize Workspace in the Workspace Contents pane.
- In the Customizations In
<file name> pane, click the plus sign (+) next to the Ribbon and Tabs nodes to expand them.
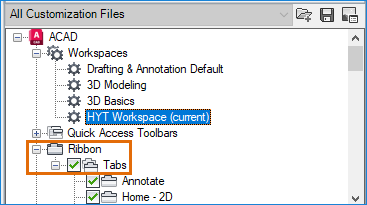
- Check My HYT Tab.
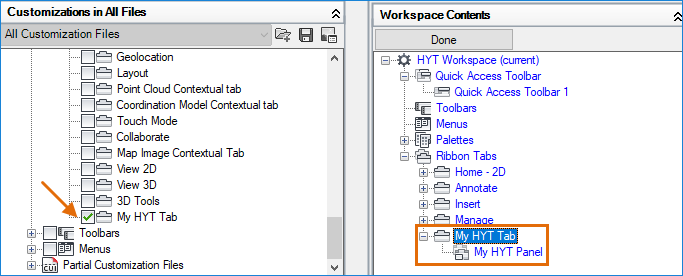
The My HYT Tab is added to the Ribbon Tabs node in the Workspace Contents pane.
- In the Workspace Contents pane, click Done.
- Click OK to save the changes and exit the CUI Editor.
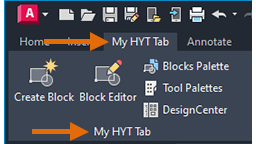
- On the ribbon, click My HYT Tab to view My HYT Panel and its commands.