The ability to extract attribute information from blocks into a table object or CSV file for use in another application can help save time and reduce costly errors that might occur from re-entering the data. The Data Extraction wizard is the most efficient way to extract attribute information from blocks inserted into a drawing. It can also be used to extract property values that are associated with the other types of geometry defined in a drawing along with general information about a drawing file.
If you aren't familiar with block attributes and how to create them, check out the Have You Tried: Work with Attributes in Blocks topic first.
- Open the drawing that was completed using the steps outlined in the Have You Tried: Work with Attributes in Blocks topic, or open another drawing that contains blocks with attributes that you want to extract.
- Enter DATAEXTRACTION at the command prompt.
- In the Data Extraction Wizard, choose Create a New Data Extraction and click Next to continue.
- Specify a name and location for the new DXE file, such as
Office Furniture.dxe and place it in your
My Documents folder.
A DXE file is a data extraction file which is used to store the extraction settings chosen in the Data Extraction wizard, and to then be able to use those same settings when extracting data from other drawing files.
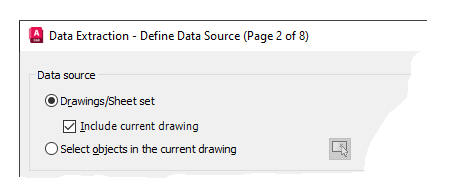
- Use the Drawings/Sheet Set and Include Current Drawing options, and click Next to continue.
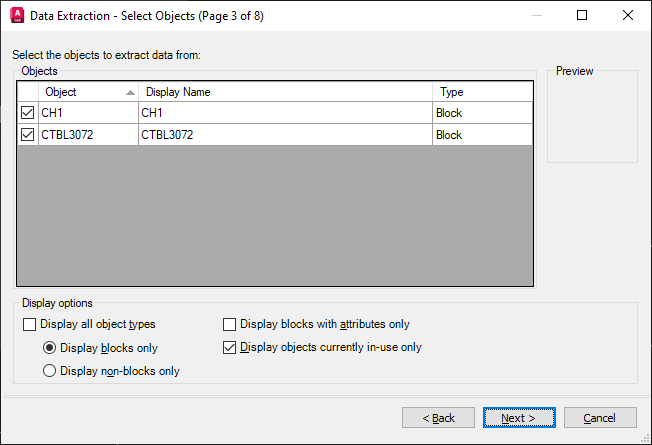
- Clear the Display All Object Types checkbox and choose Display Blocks Only, and click Next to continue.
- Under Category Filter, clear all options except Attribute and then make sure the properties checked match the attribute values to extract.
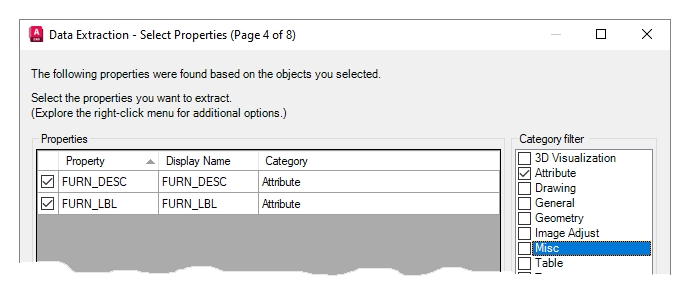
- Double-click the Display Name field for each attribute and change its value to match the previous image. Click Next to continue.
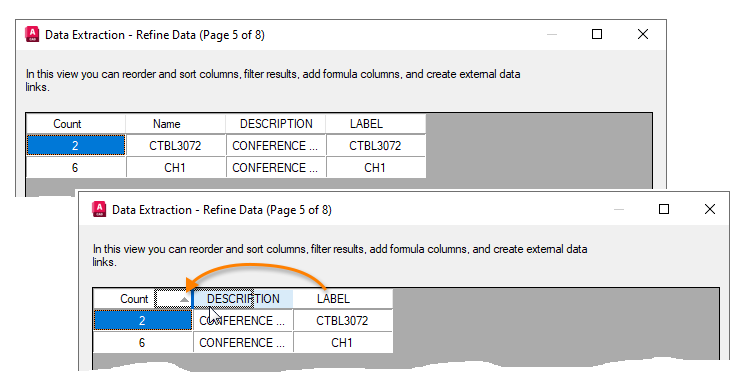
- On the Refine Data page, reorder, rename and hide columns to control the extracted output. Click Next to continue.
- On the Choose Output page, check Insert Data Extraction Table into the Drawing and click Next.
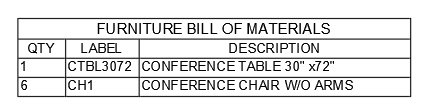
- On the Table Style page, select the table style to use and type an appropriate name for the title of the table. Click Next and then Finish to place the table in the drawing.
Update Extracted Data in Tables
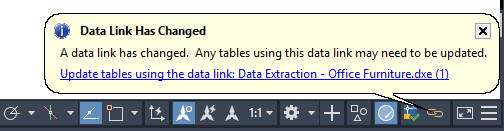
Data extracted and placed in a table can be updated using the original extracted data settings. For example, if you were to add additional blocks to a drawing and you could update the data link associated with a table to include the latest block counts instead of having to repeat the extraction process.
- Add some new instances of the blocks that were included in the original data extraction.
- Select the table that contains the extracted data, right-click and choose Update Table Data Links.
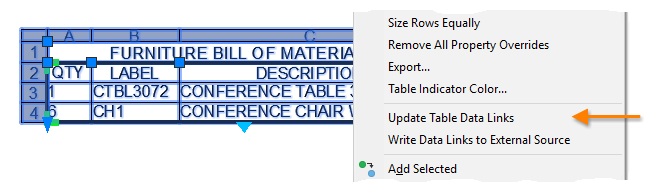
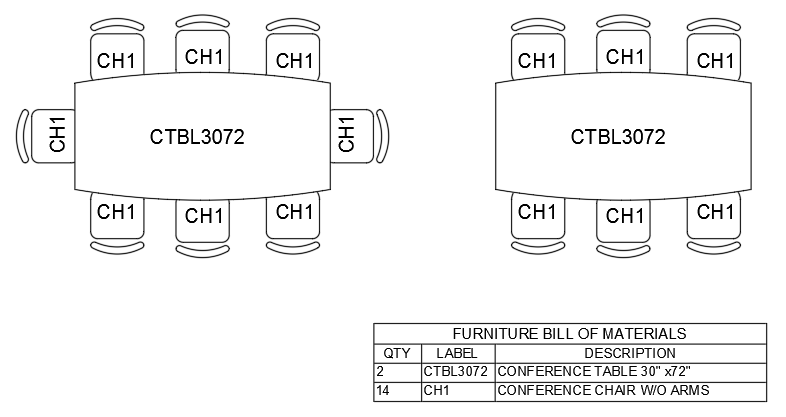
The following shows the results of updating the extracted data in a table after adding some additional blocks to a drawing.