Use the Associate Terminals command to assign terminals to specific levels of a multi-level terminal.
Associate terminals
- Click


 . Find
- Respond to the prompts as follows:
Select “Master” terminal: Select terminal 4 on line reference 211
Pick terminal: Select terminal 5
Pick terminal: Select terminal 6, right-click
Note: The command prompt area indicates that the terminal was added as level 02 or level 03 once you pick the terminal. - Right-click terminal 6 and select Edit Component.
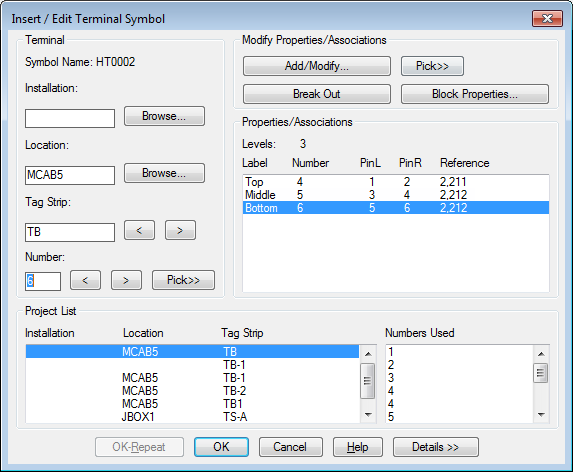
On the Insert/Edit Terminal Symbol dialog box, Properties/Associations section, all three levels have been assigned. You can now move a terminal to another level using the Add/Modify Association dialog box.

- On the Insert/Edit Terminal Symbol dialog box, Modify Properties/Associations section, click Add/Modify.
- On the Add/Modify Association dialog box, Active Association section, highlight level 3 in the grid and click Move Up.

The grid updates to reflect the move. Notice that terminal 6 is now assigned to level 2.
- Click OK.
- On the Insert/Edit Terminal Symbol dialog box, click OK.
- If asked to update related components, click Yes-Update.
Note: If the terminals are not all on the same drawing you can associate them using the Add/Modify Association dialog box.