In this exercise, you will create an alignment outside of a site and move existing alignments out of sites. These practices eliminate unwanted parcels being created by alignments interacting with a site.
When an alignment is in a site, it creates new parcels if it forms closed areas by crossing over itself or other alignments or parcels on the same site.
Examine alignments in a site
- Open Parcel-1E.dwg, which is located in the tutorials drawings folder.
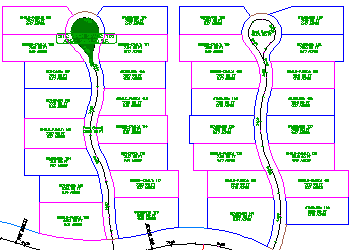
This drawing contains five roads off of a main West-East road. The two Northern side roads have centerline alignments, each of which created a parcel in the roadway and cul-de-sac center island. In the next few steps, you will convert the centerline of one of the Southern side roads to an alignment and prevent it from forming parcels.
- In Toolspace, on the Prospector tab, expand Sites
 Site 1AlignmentsCenterline Alignments.
 Notice that the four existing centerline alignments all reside in Site 1, while the top-level Alignments collection (above the Sites collection) is empty.
Create an alignment outside of a site
- Click tab panel drop-down Find.
- When prompted, select the red centerline for the road in the lower middle of the drawing.
- Press Enter twice.
The Create Alignment from Objects dialog box is displayed. Notice that, by default, the Site is set to <None>.
- Click OK.
- Expand the top-level AlignmentsCenterline Alignments collection in Prospector.
Notice that the new alignment was placed in the Alignments collection, and did not form a parcel in the cul-de-sac center island. This happened because you accepted the default <None>Site selection when you were prompted to select a site in step 3. In the next few steps, you will move one of the two existing cul-de-sac road alignments out of its existing site and into the top-level Alignments collection.
Move alignments out of a site
- In Toolspace, on the Prospector tab, right-click Alignment - (4), which is the cul-de-sac alignment to the Northeast of the alignment you created. Click Move To Site.
- In the Move To Site dialog box, make sure that the Destination Site is set to <None> .
- Click OK.
Notice that in Toolspace on the Prospector tab, Alignment - (4) has moved to the top-level Alignments collection. In the drawing window, the parcel label and hatching has been removed from the cul-de-sac center island.
Further Exploration: Repeat the preceding steps to move Alignment - (3) to the top-level Alignments collection.
- Close Parcel-1E.dwg.
To continue to the next tutorial, go to Editing Parcel Data.