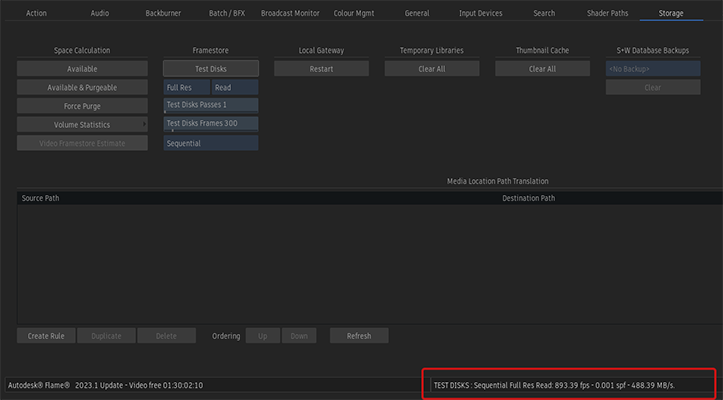
The Test Disks tool validates the throughput of the current framestore volume. It is available in .
The test results are displayed in the message bar.

The results are also displayed in the application shell.

The results show:
- The number of frames (read or written) per second (fps)
- The number of seconds it takes to read or write a frame (spf)
- The amount of data processed every second in megabyte per second (MB/s)
The test options are:
- Resolution: Use the project Full Resolution or Proxy resolution as the resolution for the tests.
- Operation: Select between a read or write test.
- Number of Test Disks Passes: How many times the media is read in a read test. For write tests, this number is multiplied by the Test Disks Frames setting to determine how many frames are written to the disk. Flame storage algorithm doesn't allow overwriting frames, hence the number of passes has a different meaning for writing tests.
- Test Disks Frames: Select the number of frames per pass to test with. This number is used as-is for reading tests, but it is multiplied by the Number of Test Disks Passes for writing tests.
- Test mode: Specify the order in which the frames are read or written.
- Sequential: Each pass reads or writes frames from first to last.
- Random: Each pass reads or writes frames in a different and randomized order.
- Butterfly: Alternates between frames from head and tail, getting closer to the median frame at each pass. For example, given a 10 frame read pass, frames are read in this order: 1, 10, 2, 9, 3, 8, 4, 7, 5, 6.
With Flame, most accesses are sequential. The occasional exception is when playback changes shot, or when the desktop refreshes and retrieves one image from each clip.
Testing with clips
The test disk tool in the Preferences uses colour noise frames to test the storage. You can also use your clips to test the storage.
Unlike its Preferences counterpart, testing with clips performs only a read test. The test uses the output of the main video track of the clip. By using clips, you measure the storage throughput, including any required decoding for frames from RED or BMD media.
To test your storage with a clip:
- In Media Panel, right-click a fully rendered clip and select
The tool tests the current Volume with the properties of the selected clip or sequence.
Tip: To test using a sequence, make sure that all Timeline FX are fully rendered. - The results are displayed in the Message Bar and in the application shell.
 Tip: Stop the test by clicking anywhere in the UI.
You can test using clips or sequences in Media Panel, Desktop Reels, and Freeform views. You cannot test with clips or sequences in MediaHub, Timeline, Batch, or Batch FX.