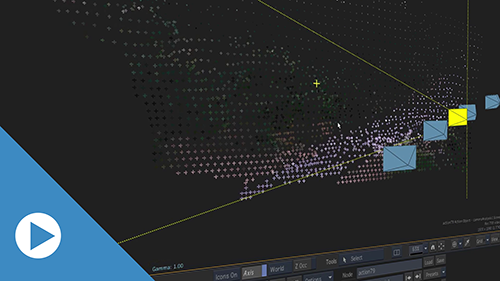
Use the new Camera Analysis node for 3D Tracking.
With the Camera Analysis node, you can generate camera data, a point cloud, and a Z-Depth map. You then use this data to position objects in a scene
You can use the Camera Analysis in Timeline, Batch, or Tools with the following nodes or FX:
- Action
- Image
- GMask Tracer
To create a 3D track to position an object in the scene, you:
- Prepare the 3D tracking.
- Perform a 3D Analysis of the Scene.
- Review the analysis to validate the results.
- Add an object to the scene.
Preparing the 3D Tracking
Using Camera Analysis with Action in Batch:
- Connect the shot to the Action Background socket.
- Display the Action Schematic.
- In the Schematic,
right-click the Camera node and select
Add Camera Analysis.
It creates a Camera Analysis parented to a motion vectors map of the background. It also creates a mimic link between the Camera Analysis node and the Camera node.
Using Camera Analysis with Image in Timeline:
- Select the segment in the timeline.
- Open Effects.
- In the FX ribbon, select Image.
If Image is not available, add it from the FX menu and then select it.
- Display the Image Schematic.
- From the Image Node Bin,
drag-and-drop the Camera Analysis node in the Image Schematic.
Adding the Camera Analysis node to the schematic reveals the Default Camera node. It also parents a motion vectors map of the segment to the Camera Analysis node.
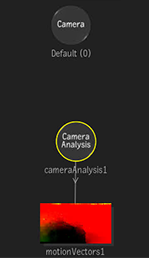
- Create a Mimic Link from the Camera Analysis node to the Camera node. Do one of the following:
- Select the Mimic Link tool, and link from the Camera Analysis node to the Camera node.
- In the Camera Analysis node, open the Analyse menu and click Link to Camera.
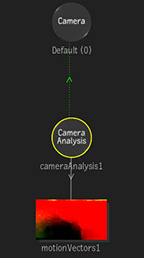
The mimic link is essential: as the Camera Analysis analyses a scene, it feeds 3D information back to the camera. This 3D information is computed from the attached motion vectors map.
Perform a 3D Analysis of the Scene
To perform the 3D analysis of the scene:
- Set the Field of View.
- Set the Resolution of the analysis.
- Set the Max number of trackers.
- Set the Reference frame.
- Click Analyse.
A Camera Analysis message box appears. It disappears once the analysis finishes.
Setting the Field of View
Knowing the field of view (FOV) of the camera used to shoot the media is useful information that helps with the 3D tracking analysis.

If you know the FOV:
- Set Compute FOV to Fixed.
- Enter the
FOV value.
Having an accurate FOV helps the analysis by providing a reliable data point for the Camera Analysis.
If you do not have the FOV, but know the focal length and the camera sensor format:
- Set Compute FOV to Fixed.
- Enter the focal length in the Length field.
- Select a format from the
Camera Sensor Format menu.
The node calculate the actual FOV from the focal length and the size of the sensor.
Tip: If you do not have the sensor format but have its dimensions, select User Defined and enter the height of the sensor in millimeters.
If you know neither the FOV nor the focal length and the camera format, you can let the Camera Analysis compute it for you. While more information is always nice, the analysis algorithm is robust enough to compute the FOV itself.
If you do not know the FOV:
- Set
Compute FOV to Static.
Camera Analysis computes the FOV for you during the analysis.
If you do not know the FOV information and the shot contains zooming in and out while the camera moves:
- Set
Compute FOV to Dynamic.
Camera Analysis computes the FOV for you during the analysis.
Setting the Resolution of the Analysis
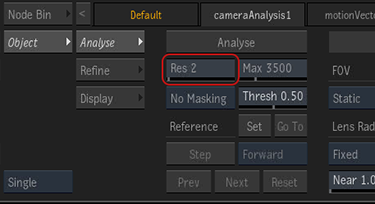
The Resolution of the track refers to the granularity of the track. 1 tracks every frame, 2 tracks every other frame, 3 every 3 frame and so on.
So a higher value skips frames for a less accurate track: the movement of tracking points are interpolated between analysed frames. While skipping frames can create a less reliable track, it's great for quickly testing the camera analysis on a shot.
To set the resolution of the analysis:
- Enter the resolution in
Resolution.
Setting the Number of Trackers
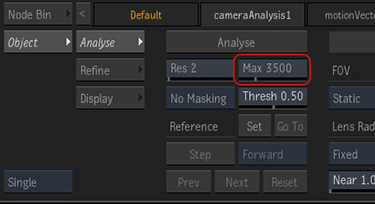
The number of trackers should be proportional to the detail in the image, with more trackers making the analysis longer to complete. The default is 3500 trackers per frame.
This value sets the maximum number of trackers: the Camera Analysis might compute a lower number of trackers.
To set the number of trackers:
- Enter the maximum number of trackers in
Max. Number of Trackers.
Setting the Reference Frame
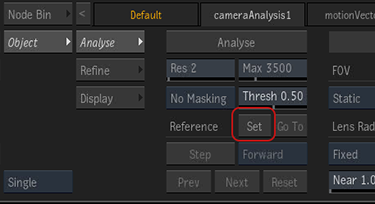
The Reference Frame is ideally the frame showing the most detail, without any motion blur or occlusions. Frame 1 is typically good in most cases.
To set the Reference Frame:
- With the timebar, scrub to the frame that presents the most details, without motion blur or occlusions.
- Click
Set.
Review the Analysis
Once the analysis is complete, the Camera Analysis node tells you how confident it is about the quality of its analysis.
To the display the analysis quality information box:
- Set the Viewports to the 2-Up view (Alt+2).
- In the Schematic view, select the Camera Analysis node.
- With the cursor in the other viewport, press F8.
- The Analysis Information box appears in the top-left of the viewport.
The Information box appears in all three Camera Analysis F8 views (Camera, Media, and Scene).
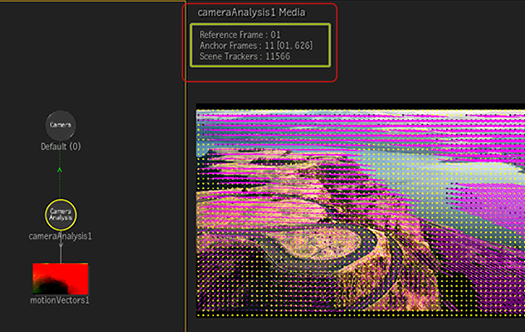
2-Up View: Schematic view and Camera Analysis Media view displaying the Information Box—Credit: www.pexels.com | Ruvim Miksanskiy
| Feature | Description |
|---|---|
| Colour | From bright green (best) to red (worst), the colour of the box indicates the quality of the analysis. A higher quality analysis means better interpolation between frames, and fewer slipping tracking points. |
| Reference Frame: | The ID of the frame you set as the reference point. |
| Anchor Frames: | The number of anchor frames in the shot, with the first and last frames used as anchor frames in brackets. |
| Scene Trackers: | The total number of points used across the entire shot for the analysis. |
You can also determine the quality of the track by looking at the tracking points.
To see the tracking points:
- Set the Viewports to the 2-Up view (Alt+2).
- In the Schematic view, select the Camera Analysis node.
- With the cursor in the other viewport, press F8.
- Press
F8 until you see the Media view.
You can now see in the viewport the frame with its tracking points (yellow dots) and their motion in the frame (magenta and cyan tails).
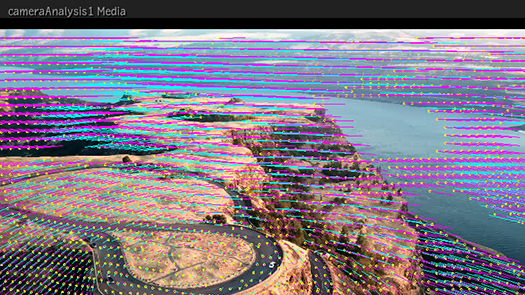
- Scrub the timebar to view how the points track the image. A good track is one where tracking points do not slip as you scrub the shot.
Anchor Frames?
An anchor frame is a frame automatically selected by the algorithm to estimate the camera motion and the point cloud. Each anchor frame is selected so there is minimal coverage between each one (each share a minimal number of points with the previous and next anchor frame) and there is a minimal expected parallax changes from one frame to another. This means that while you can ask for an analysis of every 5 frame, if there is very little parallax change and that point coverage is sufficient, you can end up with only a few anchor frames for your shot. But this does not mean that the analysis is bad. It only means that the algorithm required just a few frames to anchor its analysis.
In the Camera Analysis Scene view, you will have as many camera icons as there are anchor frames.
Adding Objects to the Scene
Because of the mimic link between the Camera Analysis node and the Camera node, the camera is already being fed the camera movement from the shot. Integrating an object simply requires adding in an axis that carries the same information.
To add an object to the scene:
- Create an Axis specific to the Camera Analysis node, the trackersAxis.
- Add the object to the trackersAxis.
To create the trackersAxis:
- Set the Viewports to the 2-Up view (Alt+2).
- In the Schematic view, select the Camera Analysis node.
- With the cursor in the other viewport, press F8.
- Press
F8 until you see the Camera view.
This displays the point cloud generated by the analysis.
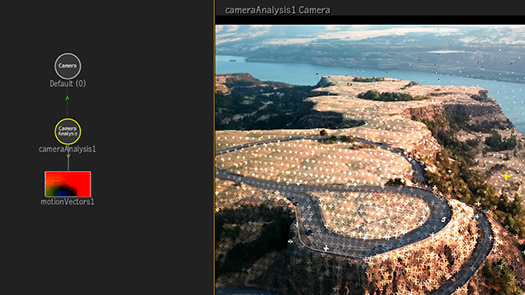
- In the Camera Analysis Camera view, select the trackers located where you want to position the object.
You can select only one tracker, but selecting multiple trackers it that spot gives you an average position that will better match the perspective of the shot. Try selecting points lying in the same plane.
Tip: Ctrl-drag to draw a selection box.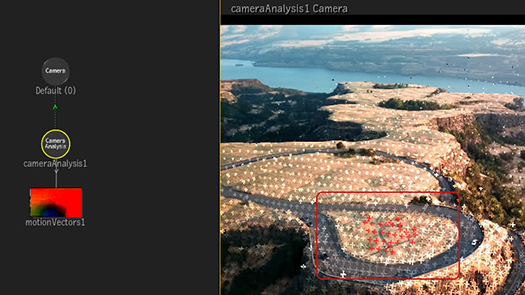
- In the Camera Analysis object menu, click
Scene Trackers.

In the Schematic, a new axis, trackersAxis, is created under the Camera Analysis node .
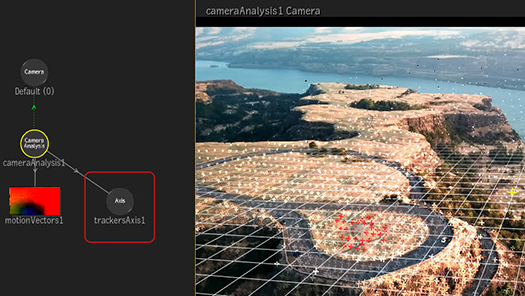
To add the object to the scene:
- Display the Result view (F4).
- Connect the trackersAxis to the Axis of the object.
The object snaps to the trackersAxis position. You can now adjust that object position by editing its Axis. And scrubbing the timebar, you can see the object tracks with the rest if the shot.
The trackersAxis plane aligns initially according to the Grid Plane button, with XY (vertical alignment) being the default. To change this default to the horizontal, set Grid Plane to XZ.
To tweak the alignment of the trackersAxis:
- Select the trackersAxis.
- If in Set Space Selector to Object mode.
This makes it easier to rotate an axis.
- Select the Rotation (R) tool.
- Rotate the axis until you are satisfied with the plane alignment.
Tip: To hide the plane of the axis, disable .
