When you implement a turntable effect as a function of a camera, the camera rotates around a stationary model.
When you implement a model turntable, the model rotates in front of a stationary camera.
Create camera turntable
- On the ribbon, click Environments tab
 Begin panel Inventor Studio .
 - On the ribbon, click Render tab Animate panel Camera
 .
. - In the Camera dialog box, Turntable tab, select the Turntable box to enable the controls.
- In Axis, choose from one of the five available axes:
- X, Y, or Z origins
- Camera-H for horizontal rotation around the vertical axis of the target
- Camera-V for vertical rotation around the horizontal axis of the target
- In Direction, specify the direction of rotation about the axis, either clockwise or counter-clockwise. The default direction is clockwise.
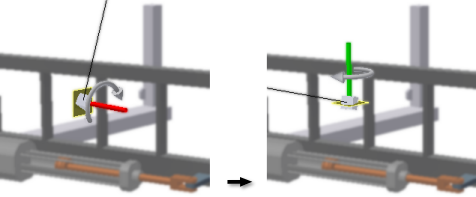
In the graphics area, a turntable axis and direction graphic is displayed so you can verify your selections.
- In Revolutions, specify the number of revolutions per second the turntable makes in the animation. The minimum value is .01.
- Click either / min or / sec to specify calculations in minutes or seconds.
or
Click +/- to use acceleration. In this case, specify the duration of the action and number of revolutions, and the acceleration input dictates the speed they are accomplished. The default is Constant Speed.
- In Time, specify a setting. The default is Loop. The action begins at time position 0.0 if no other camera actions exist. Otherwise it begins after the nearest camera action.
When a loop is the first or only action, the action bar spans the full animation. You can adjust the time span to make space for a new action.
When you place a turntable action between two existing actions in the timeline, the loop spans the entire time between them.
Note: With Loop selected, if you change the animation length, the loop adjusts automatically to include the entire animation. After you edit the End time to a value less than the end of the animation, the loop no longer adjusts automatically. - If necessary, change the start and end timeframe.
- In the Animation browser, an action bar representing the turntable action is displayed, indicating that the turntable is in use.
To delete the turntable action, delete the action bar in the browser, or clear the selection of the Turntable check box.
Create model turntable
- Create an assembly. In effect, it is a wrapper assembly.
- Place the assembly you want as the turntable target in the wrapper assembly.
- Right-click the target assembly, and click Animate Component.
- Create a rotation action for the component.
- Specify the number of rotations to occur over the duration of the action.
- Render the animation, specifying the light style, scene style, and camera to use.