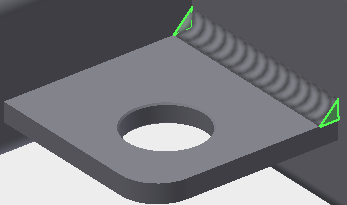
An end fill represents the filled region at the end of a weld bead. End fills are automatically added to fillet welds.
Use the End Fill command to add end fills to other types of weld beads.
- In a weldment assembly, double-click the Weld folder to enter the weldment environment.
- On the ribbon, click
Weld tab
 Weld panel
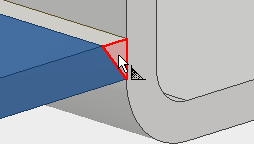
End Fill. Existing end fill faces are highlighted.
Weld panel
End Fill. Existing end fill faces are highlighted.
- Click any face of a solid weld bead to add an end fill.
- Continue to add end fills. Right-click and select OK to finish.
To remove an end fill, click End Fill and then click the face again to turn off the face highlight.
Tip: To change the appearance of an end fill, right-click the Welds folder in the browser and select Properties. In the Properties dialog box, click the Weld Bead tab. In the End Fill Appearance box, click the arrow to list available appearances and select. Click OK to close the dialog box.
End fills in drawings
To display the end fills in a drawing view, click in the view and then select Get Model Annotations > Get Weld Annotations in the context menu.
