- On the ribbon, click Annotate tab
 Dimension panel
  Dimension .
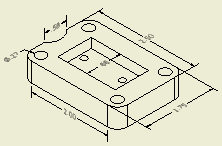
- In the graphics window, select the geometry and drag to display the dimension. Click Spacebar to toggle between inferred annotation planes.
- Optionally, use the context menu to select the annotation plane:
- Select Dimension Type
 Horizontal or Vertical dimension type to align the dimension with the coordinate planes of the model.
 - Select Dimension Type
 Aligned to align the dimension geometry with the selected objects in the drawing view.
 - To place the dimension on a model work plane, select Annotation Plane
 Show All Part Work Planes (or Show Visible Part Work Planes). Then select a work plane in the graphic window. (Available only if the selected model geometry belongs to one part)
 - Select Annotation Plane
 Use Sheet Plane to place the dimension on the drawing sheet plane.
- Select Dimension Type
- Click to place the dimension in the appropriate location.