Use bent tubing and flexible hosing styles to create curved routes conforming to the minimum bend radius. In rigid piping routes, you can use the following commands to manually create bends in the route environment:
- Custom Bend on the context menu when the 3D Orthogonal Route tool is active.
- Bend on the Route tab.
Use Custom Bend to create bends upon route creation. It cannot be used to edit a finished route.
The Bend command is particularly used for post edits. For instance, when you delete parallel or perpendicular constraints on a route segment that were previously placed using the Parallel With Edge or Perpendicular To Face commands, use Bend to add an odd angle in between. In addition, applying the Parallel With Edge command to a certain linear geometry may also requiresa bend if directional fittings in the Content Center such as 45-degree or 90-degree elbow are not appropriate.
The Bend command only applies to adjacent sketched route segments. If you do not apply the Bend command, the default bend radius of two times the pipe nominal diameter is used.
Use Custom Bend for forward creation
- Activate the rigid piping route.
- Ensure the 3D Orthogonal Route tool is active. If not active, for instance, right-click the free terminal route point and select Route.
- Right-click in the graphics window and select Custom Bend.
- Double-click the angle handler and enter a bend radius.
- Change the orientation of the direction axis of the 3D Orthogonal Route tool using rotation handlers or geometric constraint commands, such as Parallel With Edge or Perpendicular To Face.
- On the reoriented direction axis, define a route point.
The specified bend radius is created at the previous route point at which you have set the custom bend.
- Optionally, edit the bend radius.
- Continue with forward route creation.
- Right-click in the graphics window and select Done.
- Right-click again and select Finish Edit.
Use Bend for post edits
- Activate the route.
-
 On the ribbon, click Route tab
  Create panel Bends .
 - In the Bend dialog box, enter a bend radius. By default, it is the last used value or initially two times the nominal diameter of the pipe segment involved.
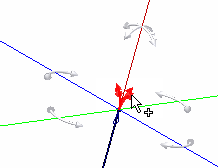
The cursor is attached with a white plus symbol.
Note:The Equal command is automatically selected and constrains bends to each other. If appropriate, cancel the selection to prevent automatically constrained bends.
- Select either a
shared route point
between two sketched route segments or two adjacent sketched route segments.
The specified bend radius is created.
- Optionally, edit the bend radius.
- Continue with forward route creation.
- Right-click in the graphics window and select Done.
- Right-click and select Finish Edit.