Migrating customized Content Center libraries in Desktop Content
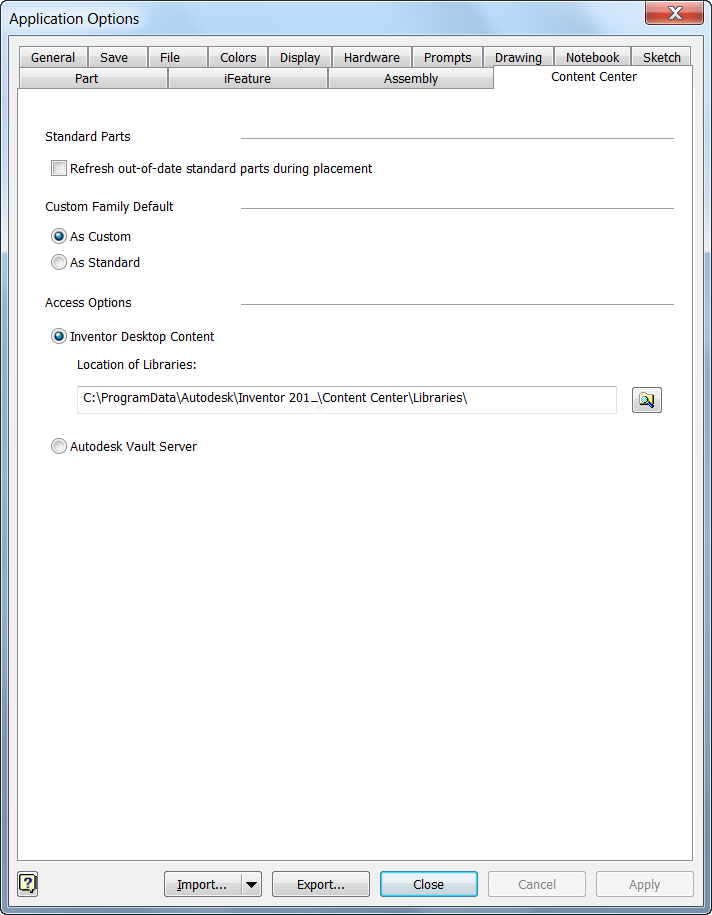
Inventor Desktop Content default location is C:\ProgramData\Autodesk\Inventor <version>\Content Center\Libraries or C:\Documents and Settings\All Users\Application Data\Autodesk\Inventor <version>\Content Center\Libraries folder. You can change this default location in the Application Options, Content Center tab. See the previous image.
To migrate customized Content Center library in Desktop Content:
Step 1: Copy your legacy customized Content Center library into Desktop Content location. See the Location of Libraries option in the previous image.
Step 2: Update the legacy customized Content Center libraries by using the Update Tool in the Configure Content Center libraries dialog box.
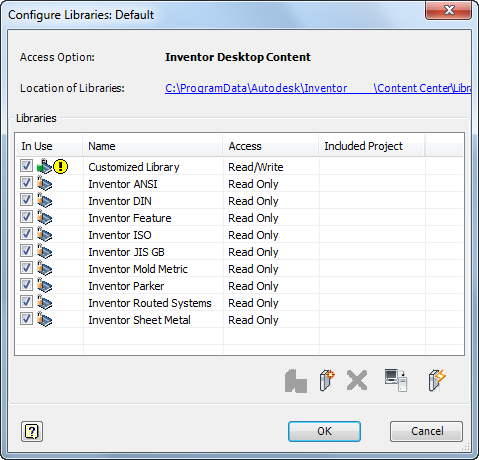
In the project dialog box, click Configure Content Center Libraries. The legacy customized Content Center libraries are listed in the Configure Libraries dialog box. The In Use column is selected. Click Update Tool to migrate. See the following image.
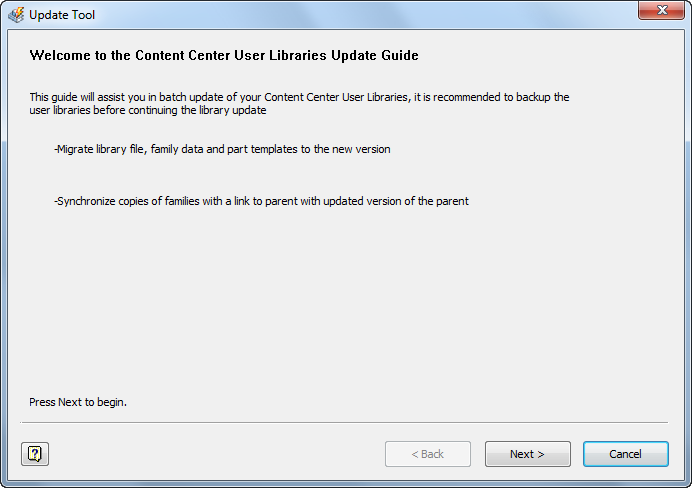
Step 3: In the Update Tool dialog box, click Next to step through the process to finish the custom libraries migration.
The legacy customized Content Center libraries to be updated are listed, as shown in the following image.
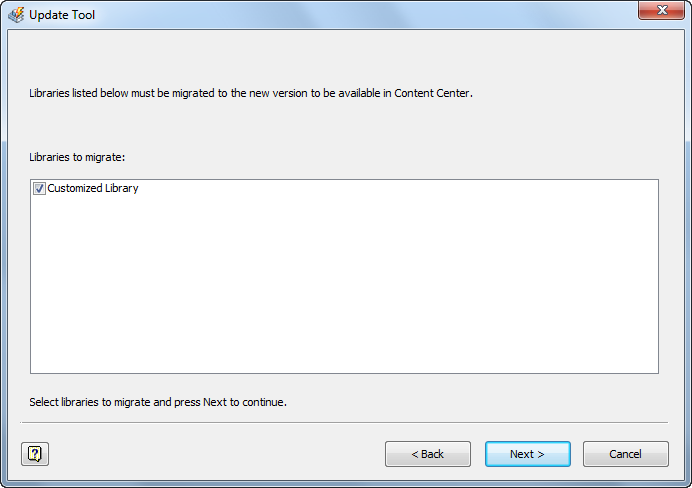
Select the library to update. If more than one user library is out of date, you can select several libraries to update in the same process. Then click Next.
A library analysis is performed and results of the analysis display. If any problems are found, you must solve them to continue. If no problems are found, the Backup options display. Specify a folder to create a backup and click Next.
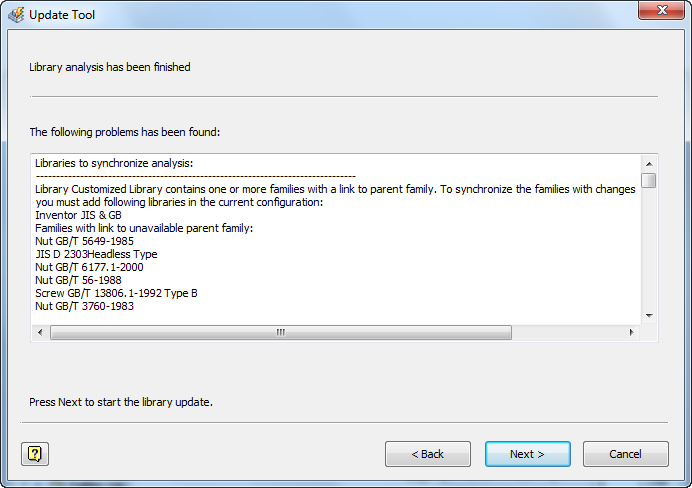
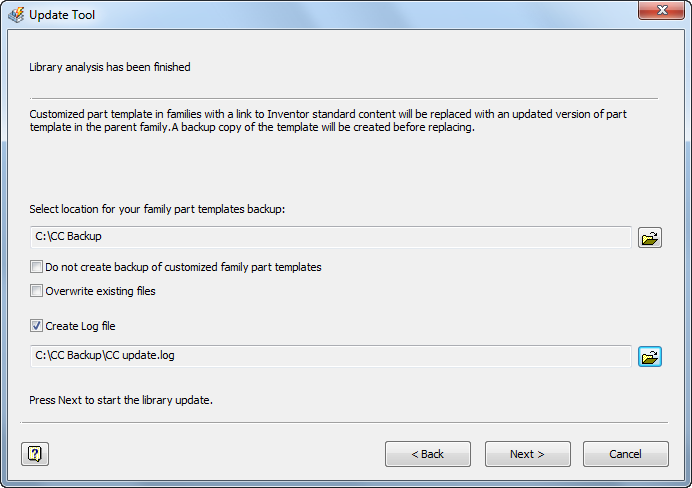
After the process ends, review the Update report, as shown in the following image.
Tip (Cross References between Libraries): If there is a cross reference, and you have a user library (UL1) that includes source families for families in user library UL2, and UL2 includes source families for families in user library UL1, attach both libraries and run the update tool step by step for UL1 and UL2.
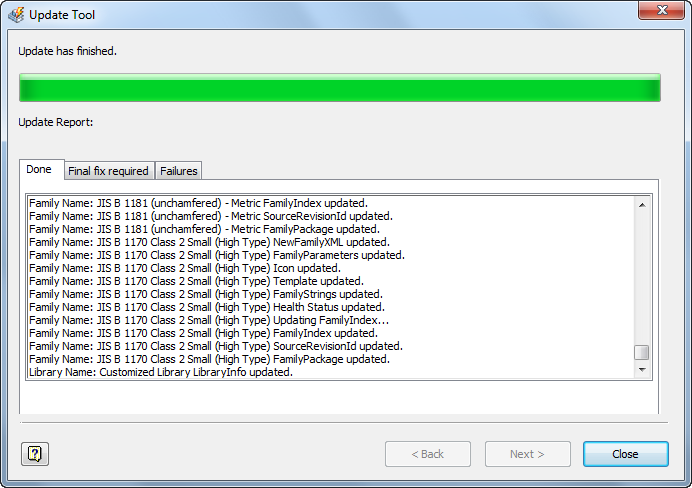
Fix all sick families in the updated library (libraries). Sick families are marked with an icon in the Place from Content Center and Content Center Editor dialog boxes. They can be used in Content Center, but sick family members often cause unexpected problems.
Migrating customized CC library in Vault Server
The migration of the customized CC library is done in two steps. The first step is to migrate the Autodesk Data Management Server (ADMS). The second step is to update the customized CC library to the new version of Inventor and refresh the legacy assemblies.
Perform the following steps to migrate customized CC library in Vault Server
- Use ADMS Console to create a backup.
- Uninstall the existing ADMS, and then install the new version of ADMS and Inventor.
- Migrate legacy customized CC libraries to the new version of ADMS.
- Copy legacy customized CC libraries to new Inventor partition the ADMS Console.
- In the Inventor project, click Configure Content Center libraries.
- Update legacy customized CC libraries by using the Update Tool in the Configure Content Center libraries dialog box.
- Refresh Content Center parts in legacy assemblies.
Step 1: Use the ADMS Console to create a backup
Back up all ADMS data before you upgrade ADMS. Run ADMS Console, and select Tools > Backup from the ADMS Console menu. The Backup tool creates a backup of all libraries and vaults.
Step 2: Uninstall existing ADMS, and then install the new version of ADMS and Inventor.
Please refer to ADMS and Inventor installation documents for detailed information.
Step 3: Migrate legacy Content Center libraries to the new version of ADMS.
Usually it automatically migrates legacy customized CC libraries to the new version of ADMS when you import it or restore a backup of an old ADMS version.
- Run ADMS Console.
- In the ADMS Console window, expand Libraries, and right-click a library to copy.
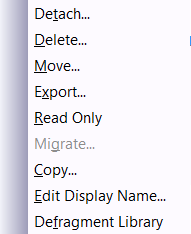
- In the Copy Library dialog box, enter the library name, select Autodesk Inventor 2013 partition, and click OK. The library is copied into Autodesk Inventor 2013 partition.
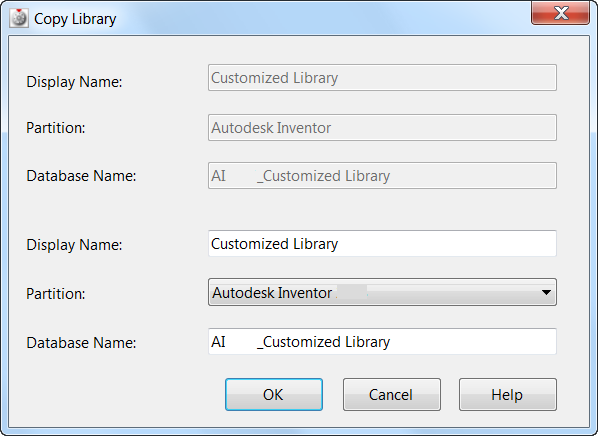
Step 5: Update legacy customized CC libraries by using Update Tool in the Configure Content Center libraries dialog box.
This step is the same with update legacy customized CC libraries in Desktop Content.