Performing a Confidence Check
A confidence check is a process in which you manually check the contents of your timeline (which you created by assembling shots from the scanned film frames) against a digital reference cut captured directly from an offline edit video tape or other medium. This is an important step in ensuring that the assembled timeline contains the frames specified by the offline editor. If, for any reason, there is an offset between your current timeline and the digital cut, your picture could end up out of sync with the sound.
To perform a confidence check:
Load or create the timeline by doing one of the following:
- Loading a current timeline. See Importing Timelines as Source Clips.
- Creating a newly assembled timeline from an EDL. See Working with EDL, ALE, and Cutlist Files.
Save the current cut, create a new cut, and load it.
Capture the footage you want to use as a point of comparison (this is the offline digital cut). See Capturing Material.
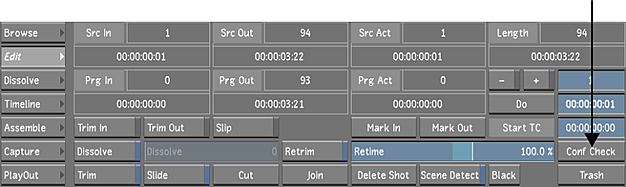
Click Editing, and then click Edit to display the Edit menu.
Drag the digital reference cut from the Library to the Confidence Check button.
A split screen display appears. The current first frame is loaded in the left viewer and the digital cut is loaded in the right viewer with the first frame displayed.
Navigate between shots to make sure each timeline shot starts on the exact same frame as in the reference cut. You must check the two versions by eye in search of discrepancies. If, for any shot, you determine the two start frames (timeline and reference) do not start on the same frame, synchronize the start frames.
Synchronize the reference cut to the timeline by offsetting the reference cut in the right viewer:
- Left-click the reference image (right-side image) and drag left to scrub in reverse.
- Left-click the reference image and drag right to scrub forward.
- Middle-click the reference image to go one frame forward.
- Right-click the reference image to go one frame backward.
Navigate within each shot by stepping through the cut points frame-by-frame to make sure there are no shots that are offset.
If you determine there are shots that are offset, you can use the Editing tools (trim, slip, and slide) to adjust the shots to the correct frames. This is usually performed in the timeline cut and not the reference cut.
To trim from the Edit menu, see Trimming from the Edit Menu.
To trim from the Timeline menu, see Trimming Elements.
It is important to note that when matching your timeline to a reference clip, several editing changes are automatically updated in the Player without the need to release the mouse button:
- trimming
- slipping
- sliding
Save the current cut.
The confidence check reference is saved with the cut. When using a clip from the Library for a Confidence Check, the reference clip, its timing offset and the viewing mode (Single or Dual and Wipe position) are saved with the cut information. When reloading a cut, you do not need to manually reload the Confidence Check clip and set the proper offset value. Simply clicking the Conf Check button (located in the Editing/Edit menu) displays the confidence check view with the reference clip and the defined offset value.
Note:Only source clips can be used as a Confidence Check reference. Sequences are not supported.