Create a map file and assign a coordinate system. Color the map background white so you can better distinguish features when you use color to style them. All maps you create from now on use the new background color.
Create a Map File
- If you have not already done so, copy the sample files for the tutorials to a directory on your hard drive.
- Start AutoCAD Map 3D toolset and create a map using the map2d.dwt template.
- Assign a coordinate system to the new map.
- Switch to Map Explorer in the Task Pane.
- Right-click the current drawing and click Coordinate System.
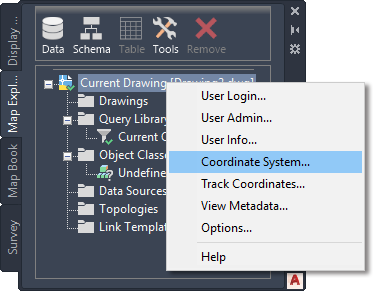
- For Code, enter ca-i and press Enter.
- Click OK.
- Click

 Save . In your tutorials folder, name the file
AnalyzeMap1.dwg and click OK.
Save . In your tutorials folder, name the file
AnalyzeMap1.dwg and click OK.
Change the Map Background Color
- Click
Options.
- In the Options dialog box, click the Display tab.
- On the Display tab, in the Window Elements area, click Colors.
- Under Context, select 2D Model Space.
- Under Interface Element, select Uniform Background.
- Under Color, select White.
- Click Apply & Close, and then click OK.
To continue this tutorial, go to Exercise 2: Add a surface to view elevation data.